


 Unboxed")
")


Make Your Own Google Cardboard with These Simple Steps

At a time when Virtual Reality has taken centre stage in the tech industry, there is a lot to be done to make this revolutionary innovation reach to every corner of the world. The advanced technology that can recreate sensory experiences, designs an environment and sends users to the virtual world making them feel as if they are physically present there.
Many smartphone companies are pushing the unexplored division, by offering Virtual Reality (VR) headsets at special prices along with the smartphone. Some of these handsets include Samsung Galaxy Note, Galaxy S6 and Galaxy S6 Edge. More choices in VR headsets include Galaxy Gear VR, HTC Vive, Oculus Rift, Microsoft HoloLens and few more, but their market is limited to developed nations. This is where Google Cardboard comes into action. The low-cost, hand-made Google Cardboard requires only a bunch of things for its construction, and your smartphone is then ready to mount on the fold-out cardboard.
Follow the below-given steps and make one now:
List of Things Required
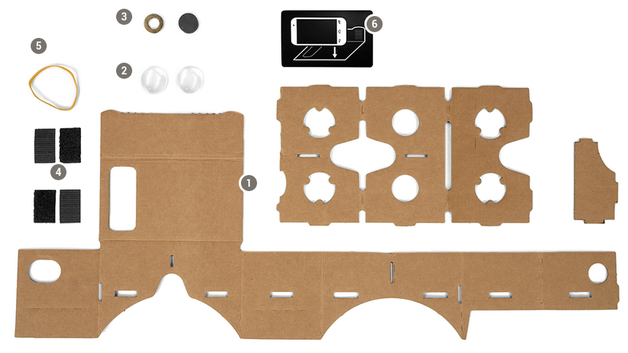
First of all, collect all the articles necessary for its preparation. You will need:
- Cardboard: You will need a corrugated cardboard that is 9-inches by 22-inches. A pizza box, shoe box or any thin, rigid sheet would do.
- Lens: The second thing is the lens. The lenses to affix the cardboard need to be 25mm in diameter with 40mm focal length. In case you don’t find lenses of these measures, 50mm focal length will do, but then you have to increase the length of your cardboard. You can also go for a plano-convex lens or biconvex lens, Google recommends the latter. So, first find out the lens available and accordingly start the project. [tw-button size=”medium” background=”#07ABE2″ color=”” target=”_blank” link=”http://www.amazon.in/Alian-Biconvex-Lens-Google-Cardboard/dp/B00UYG3G5G/ref=sr_1_10?ie=UTF8&qid=1434185814&sr=8-10&keywords=google+cardboard&tag=igyaan-21″]Buy Now[/tw-button]
- Magnet: Two small ring-shaped magnets.
- Velcro strips: Two velcro strips with adhesive on the plane surface. [tw-button size=”medium” background=”#07ABE2″ color=”” target=”_self” link=”http://www.ebay.in/itm/10-METRE-Sew-on-type-Polyster-Velcro-Hook-Loop-Tape-1000-CM-BLACK-COLOR-/111678681852?pt=LH_DefaultDomain_203&hash=item1a009172fc”]Buy Now[/tw-button]
- Other things are a rubber band, glue, a pair of scissors, and a cutter.

Steps to Make Google Cardboard
1. Print out the cardboard template by clicking on “Download the Kit” on the provided link. Apply some glue on the back of the template and paste it onto the cardboard with light numbers on top of the darker ones.
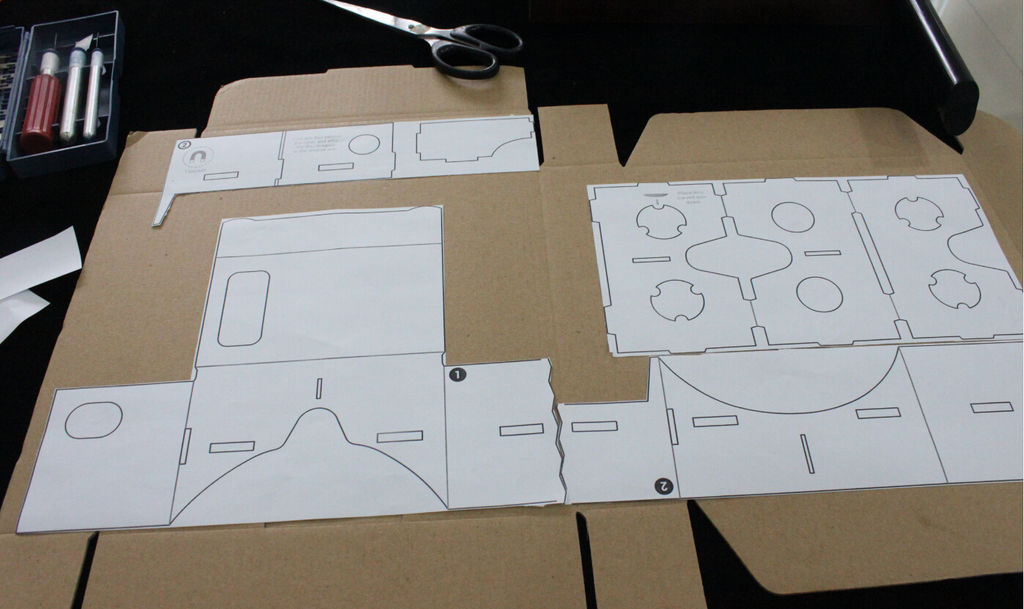
2. Now start cutting along the edges and fold the area marked by the red line.
 3. Once you are through with cutting the cardboard, place the lens in the curved area and magnet at the other side of the cardboard mentioned on the template. Glue the area that’s done and affix the Velcro strips where you’ll be slipping your phone.
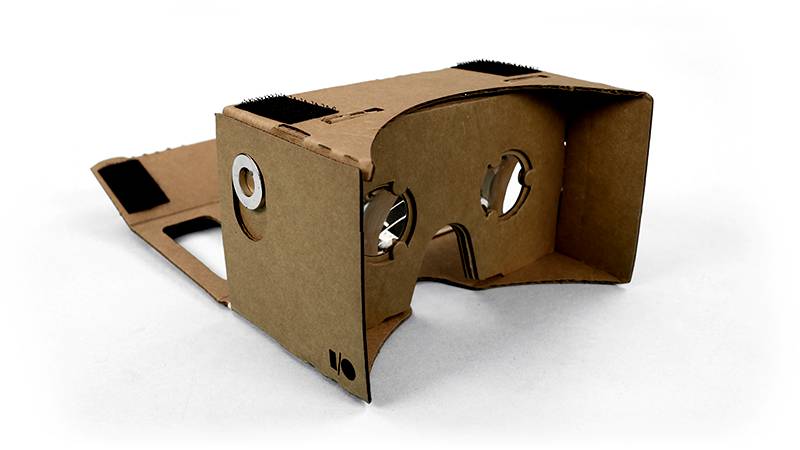
4. If you have followed the steps mentioned above, your cardboard is almost ready.
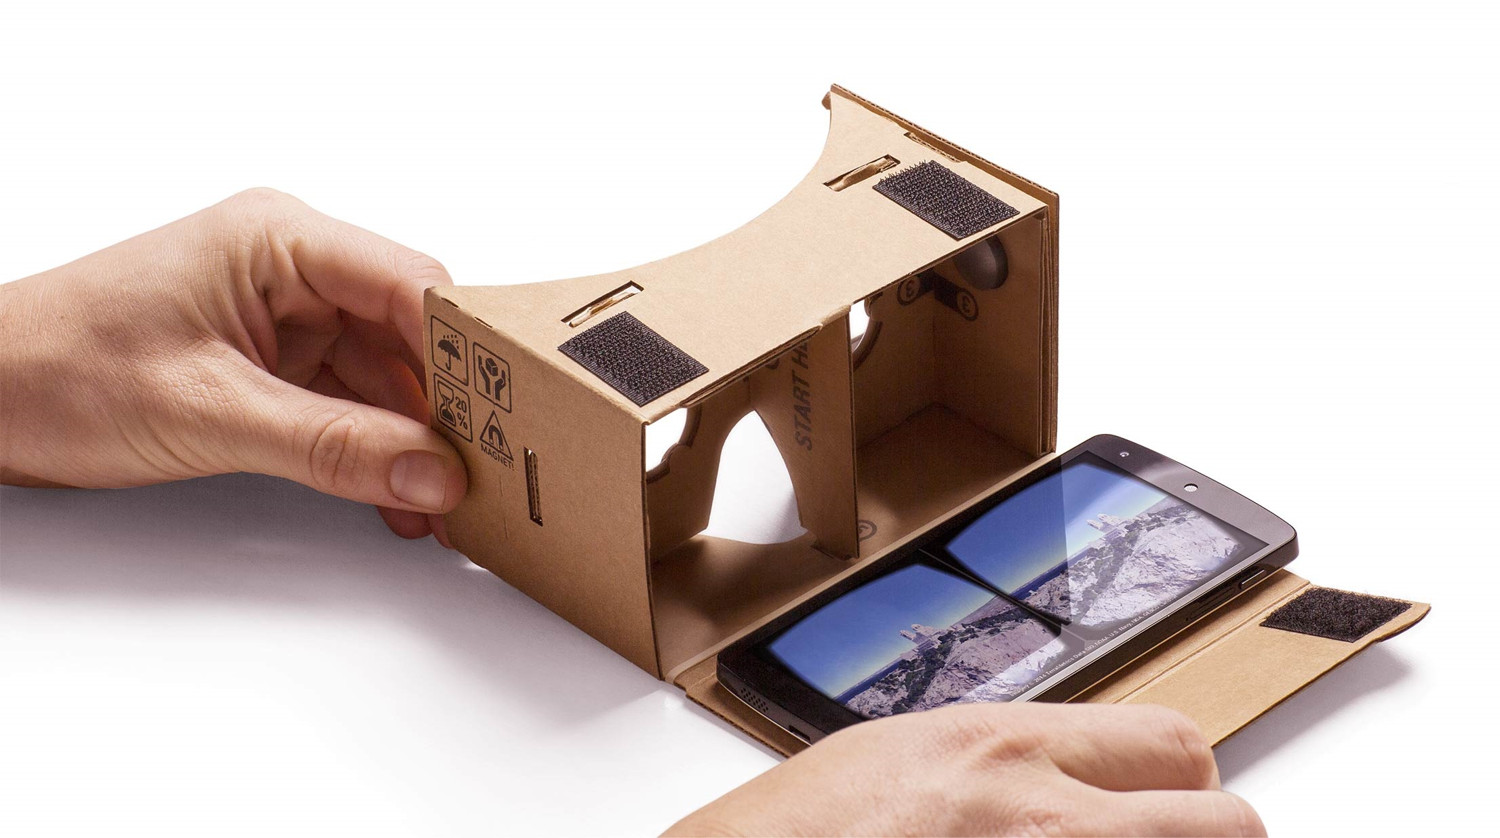
5. Put your smartphone in the cardboard and tie a rubber band so that your phone doesn’t slip through.
6. One more thing left is the installation of Cardboard app from Google Play Store that provides you content to see through the hand-made Google Cardboard. Launch the app and click the desired category by sliding down the magnet, placed on the side. You can get back to the main menu just by holding your VR headset upright.
In case everything fails, you could order one online:


