Category: Tips and Tricks

  • Switching from iOS to Android? Then This Guide is For You

    Switching from iOS to Android? Then This Guide is For You

    Apple has garnered a reputation for being the most genuine and reliable brand for many years. Its iOS smartphones, Macbooks and the upcoming Apple smartwatch have seized the attention of the audience. In spite of this, the fact also stands true that there are also some dissatisfactory customers who wish to switch from iOS to Android.

    For those who have been using the iOS platform from the beginning may find it hard to switch to Android. The operating system may intimidate first-time users as it works quite differently. Use this guide and transfer music, contacts, messages, videos and other relevant documents to your new Android smartphone.
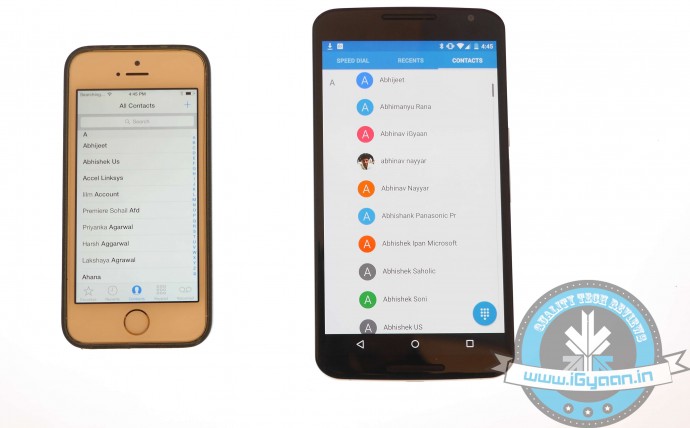
    Transfer Contacts

    Before you land on to the Android platform, the first thing you need to do is back up your iOS device. Contacts are important need to be saved in top priority. Transferring data through iCloud is extremely easy. Just keep in mind these simple steps:

    1. Sign into iCloud and click Contacts.
    2. Select all contacts by pressing Command+A.
    3. Go to the cog wheel icon and tap Export vCard; a VCF file with all the contacts will download.
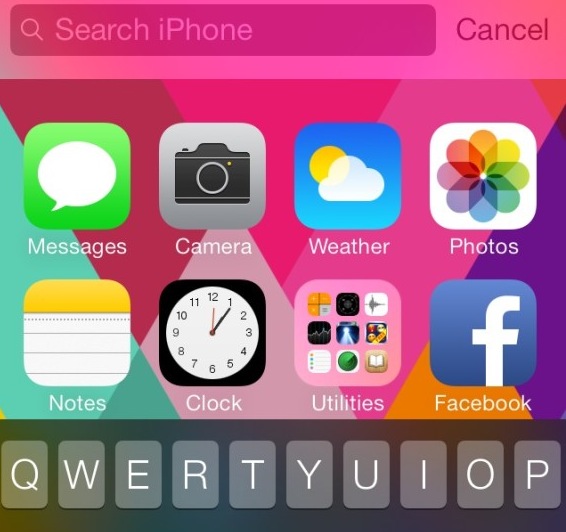
    4. Plug in the Android device and copy the VCF file onto your Android.
    5. Import the copied contacts from the Contacts or People app.iOS vs Android 11

    Another way to copy contacts is through iTunes:

    1. Plug your iPhone via USB and open iTunes.
    2. On the Info tab on the Menu bar, tick Sync Contacts with.
    3. Choose Google Contacts.
    4. Type in your Gmail Username and Password in the new window and click Apply.
    5. All your contacts information along with numbers and email addresses will store on Gmail and Apple alike.

    As the contacts are now on your Gmail account. Your new Android smartphone will ask you for an option to sync on the first boot. Just add the Gmail account and your contacts will automatically appear in a list on the device.

    Sync Calendar

    iOS vs Android 1

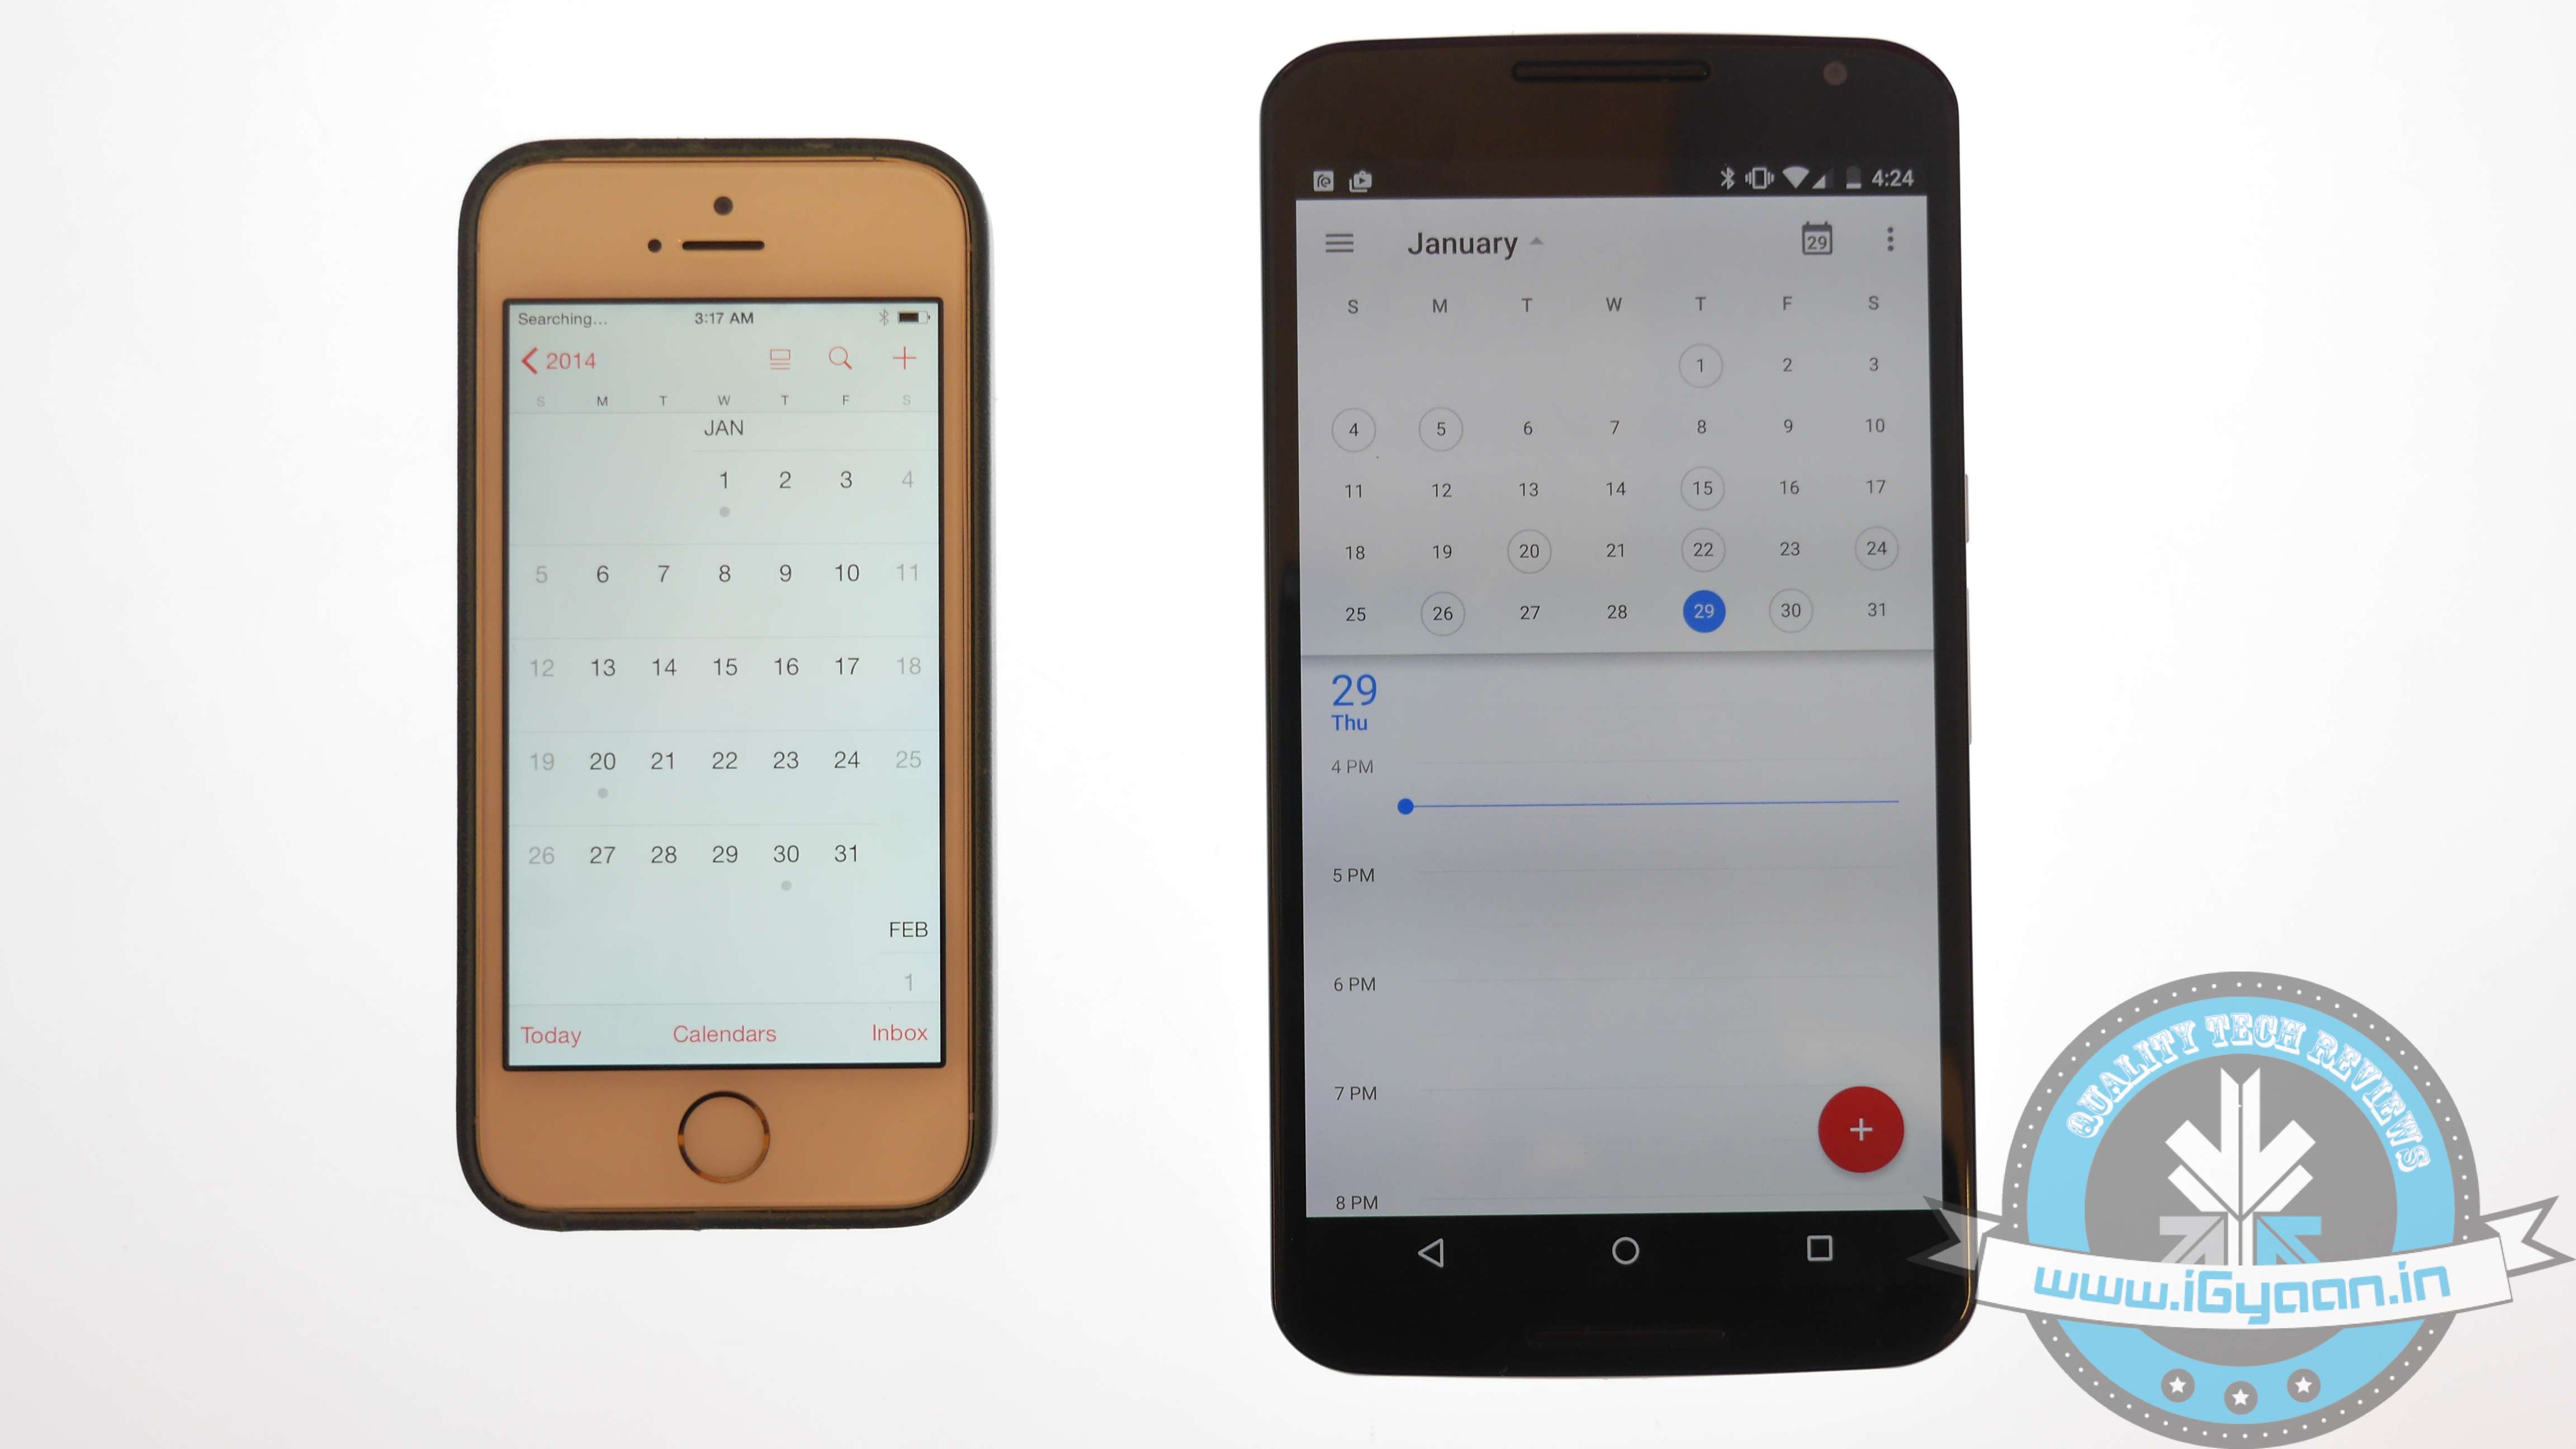
    Syncing Calendar is not an easy job, but SmoothSync for Cloud Calendar will make it convenient for you. Get started with these few easy steps on your iOS device:

    1. Open SmoothSync for Cloud Calendar and login to your iCloud account.
    2. On the next window, select calendars you wish to sync.

    Now, it will take care of the rest. All the important events and notifications will now come on your Android device.

    Transport Music

    iOS vs Android 8

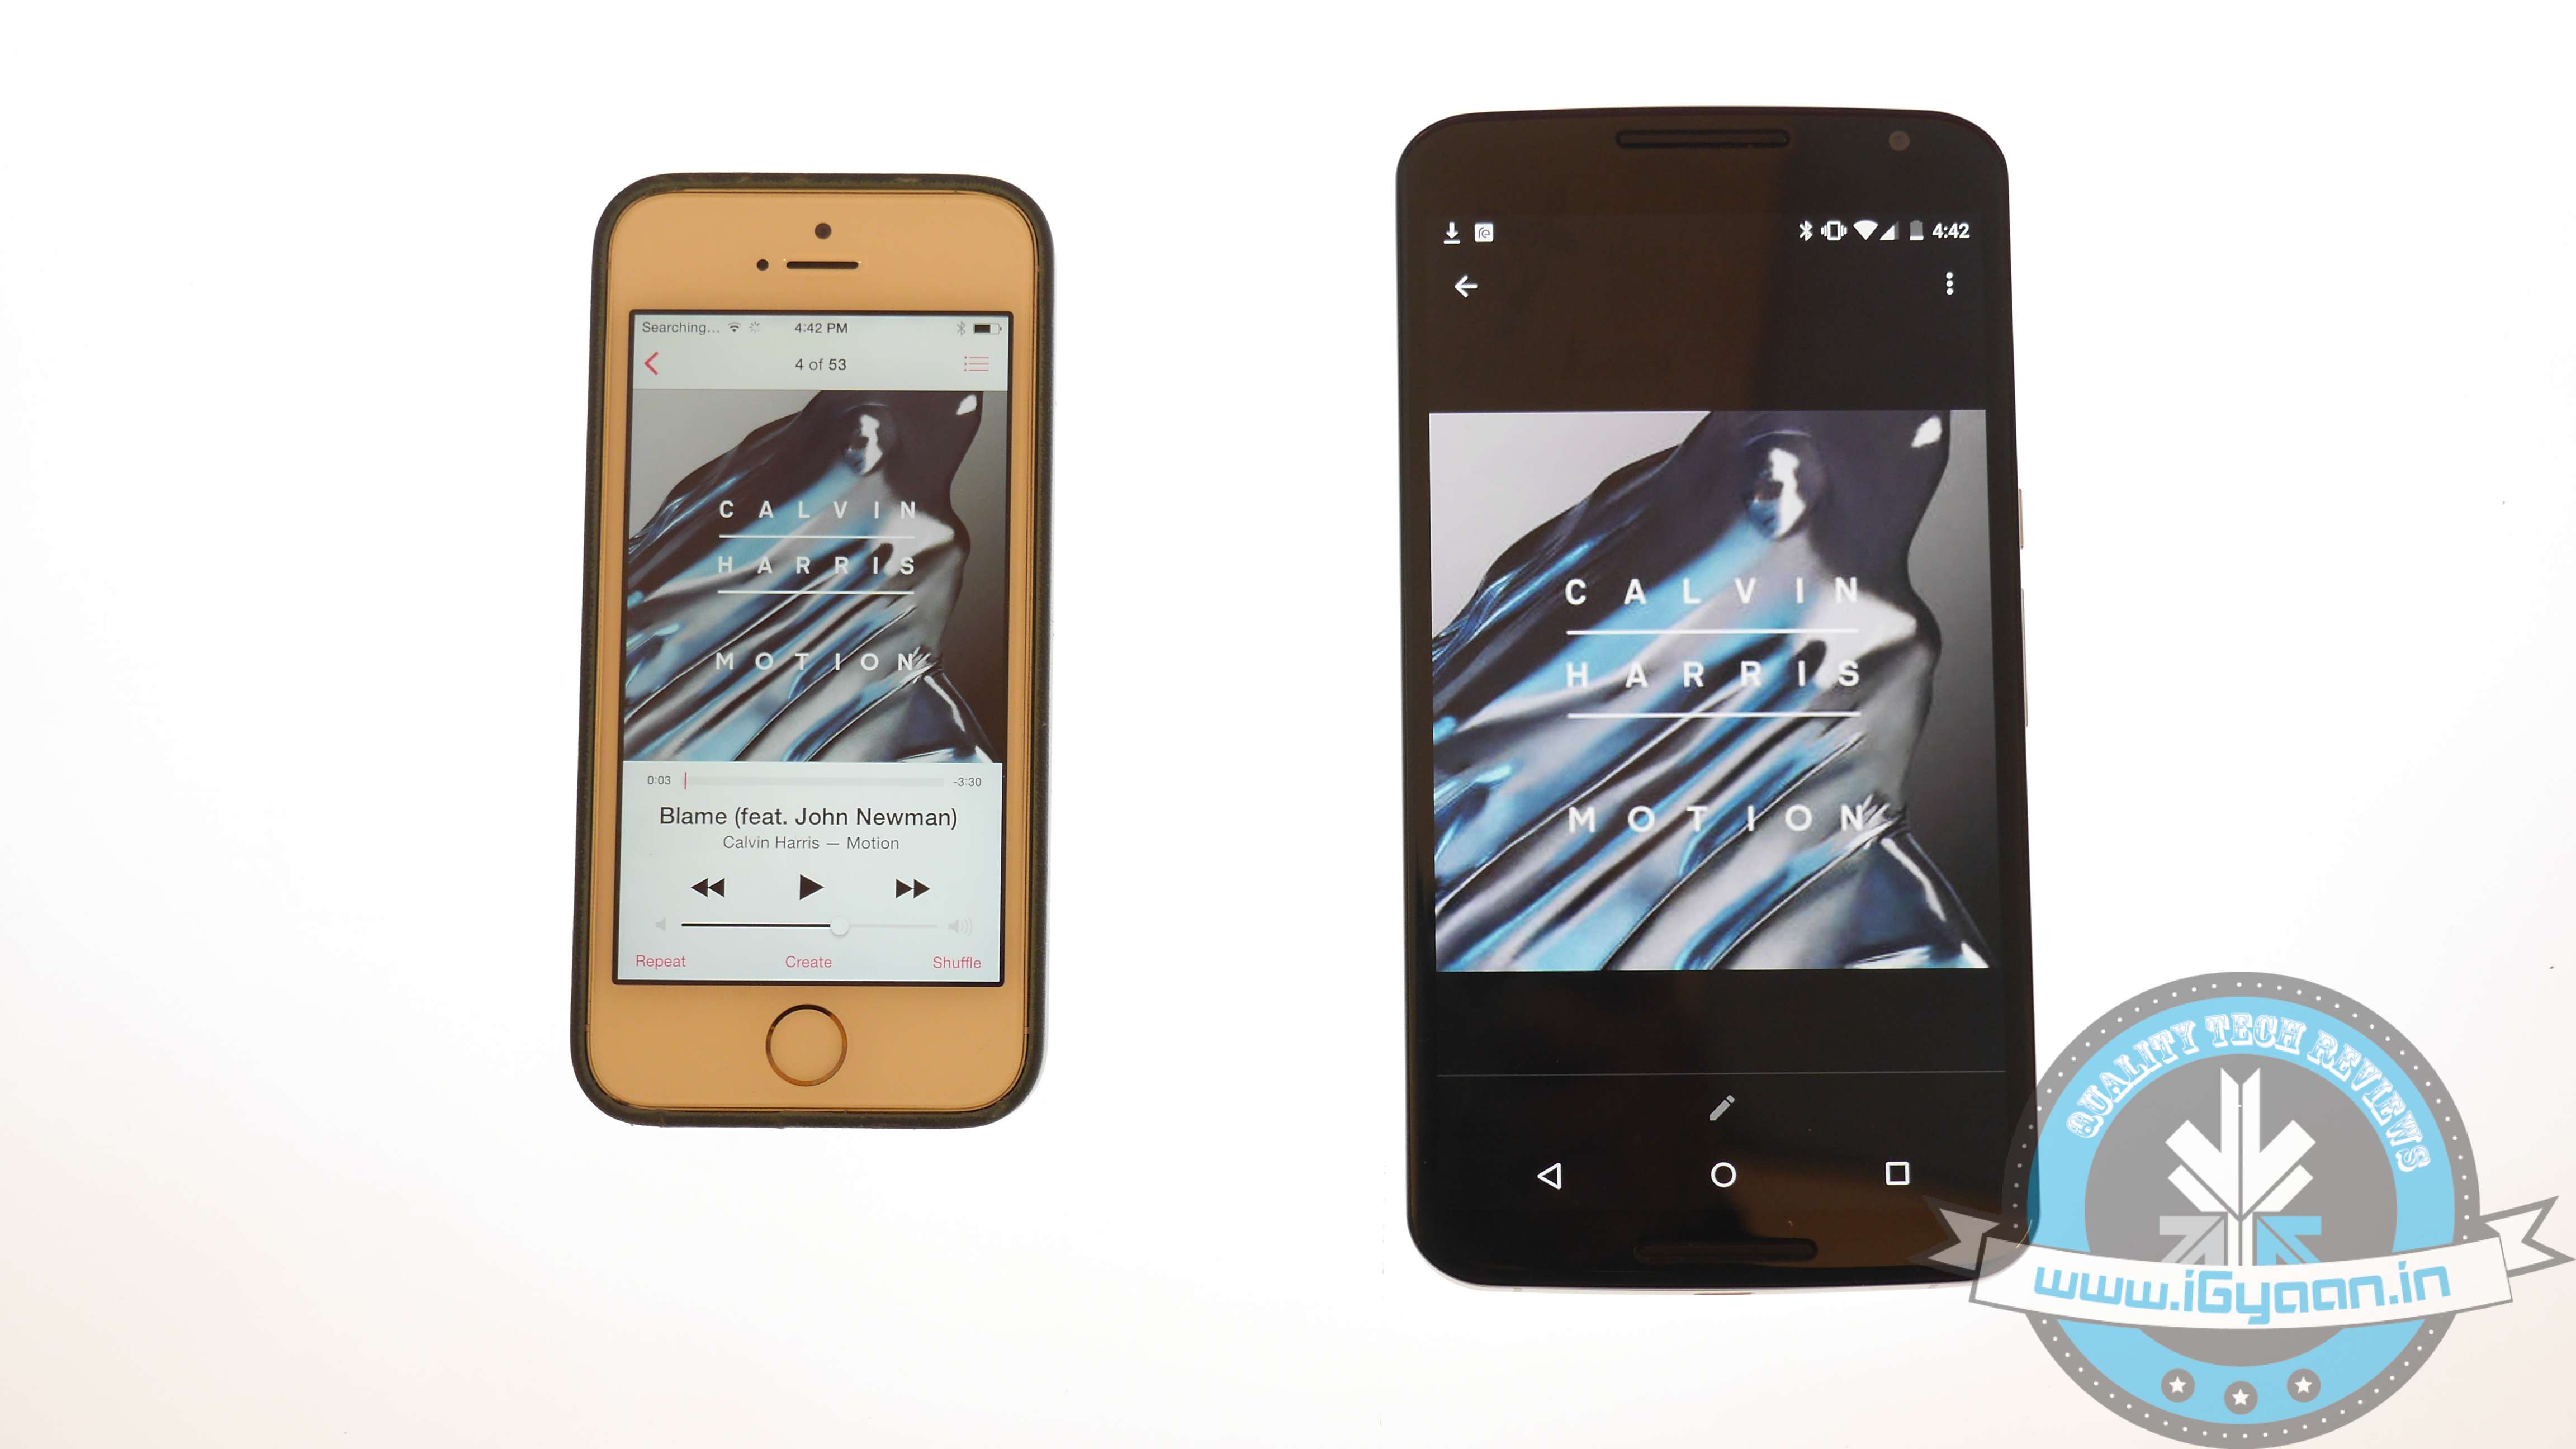
    Building a music library of your choice is a hard done effort of many years. You cannot afford to lose it. The easiest possible way to transfer music files from iOS to Android is to download Music Manager on a system that has both Google Music and iTunes.

    1. Sign in to Google Music.
    2. Once the Music Manger is downloaded and installed, select iTunes option as the present music storage option.
    3. Choose Upload all songs and playlist. The songs will then be uploaded on the app apart from your iOS handset.
    4. You can now transfer your music library to your Android device.

    Shift videos and photos

    iOS vs Android 3

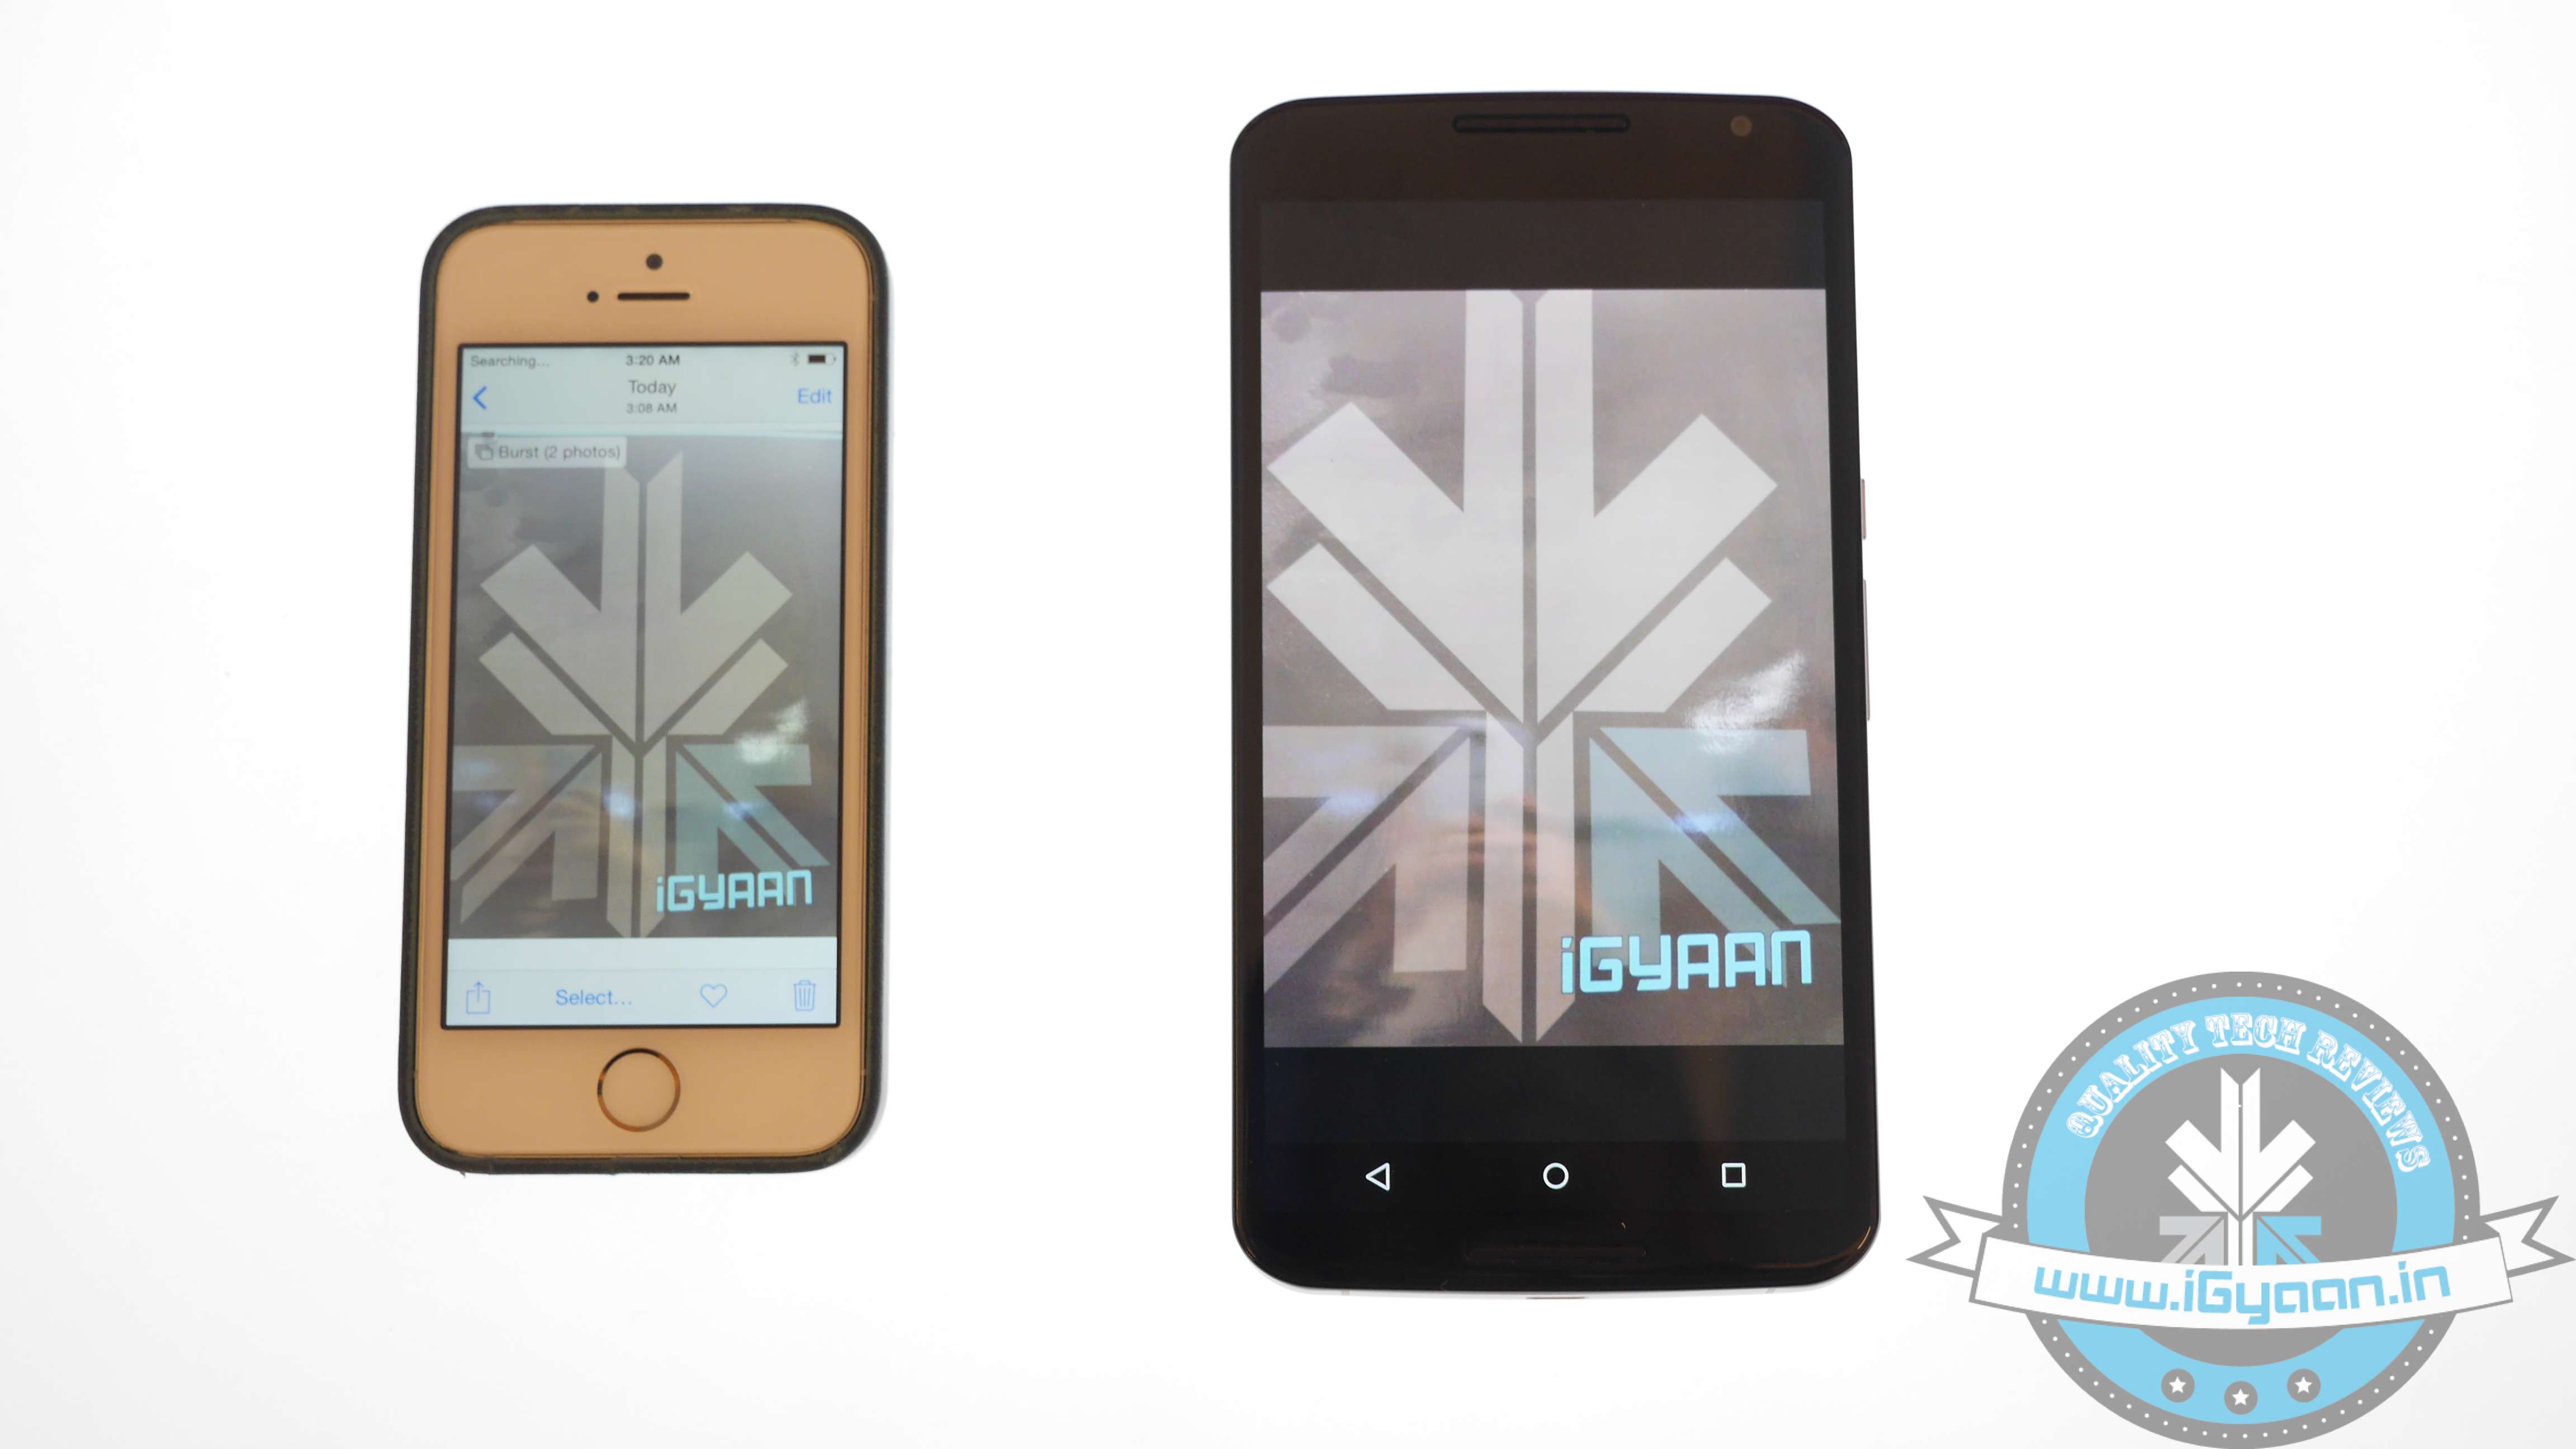
    Out of many ways of transferring pictures and videos from iOS handset to Android, the easiest one is to connect your iOS handset and Android device to a computer via USB cable.

    1. Locate both the devices in My Computer folder.
    2. Open the storage of both the devices.
    3. Locate DCIM on the iOS device.
    4. Select the images and drop them into the Android storage folder.
    5. Images of the iOS phone will now appear on your Android device.

    This drag-and-drop method is the simplest and least time consuming than the wireless transfer option.

    Relocate text messages

    iOS vs Android 0

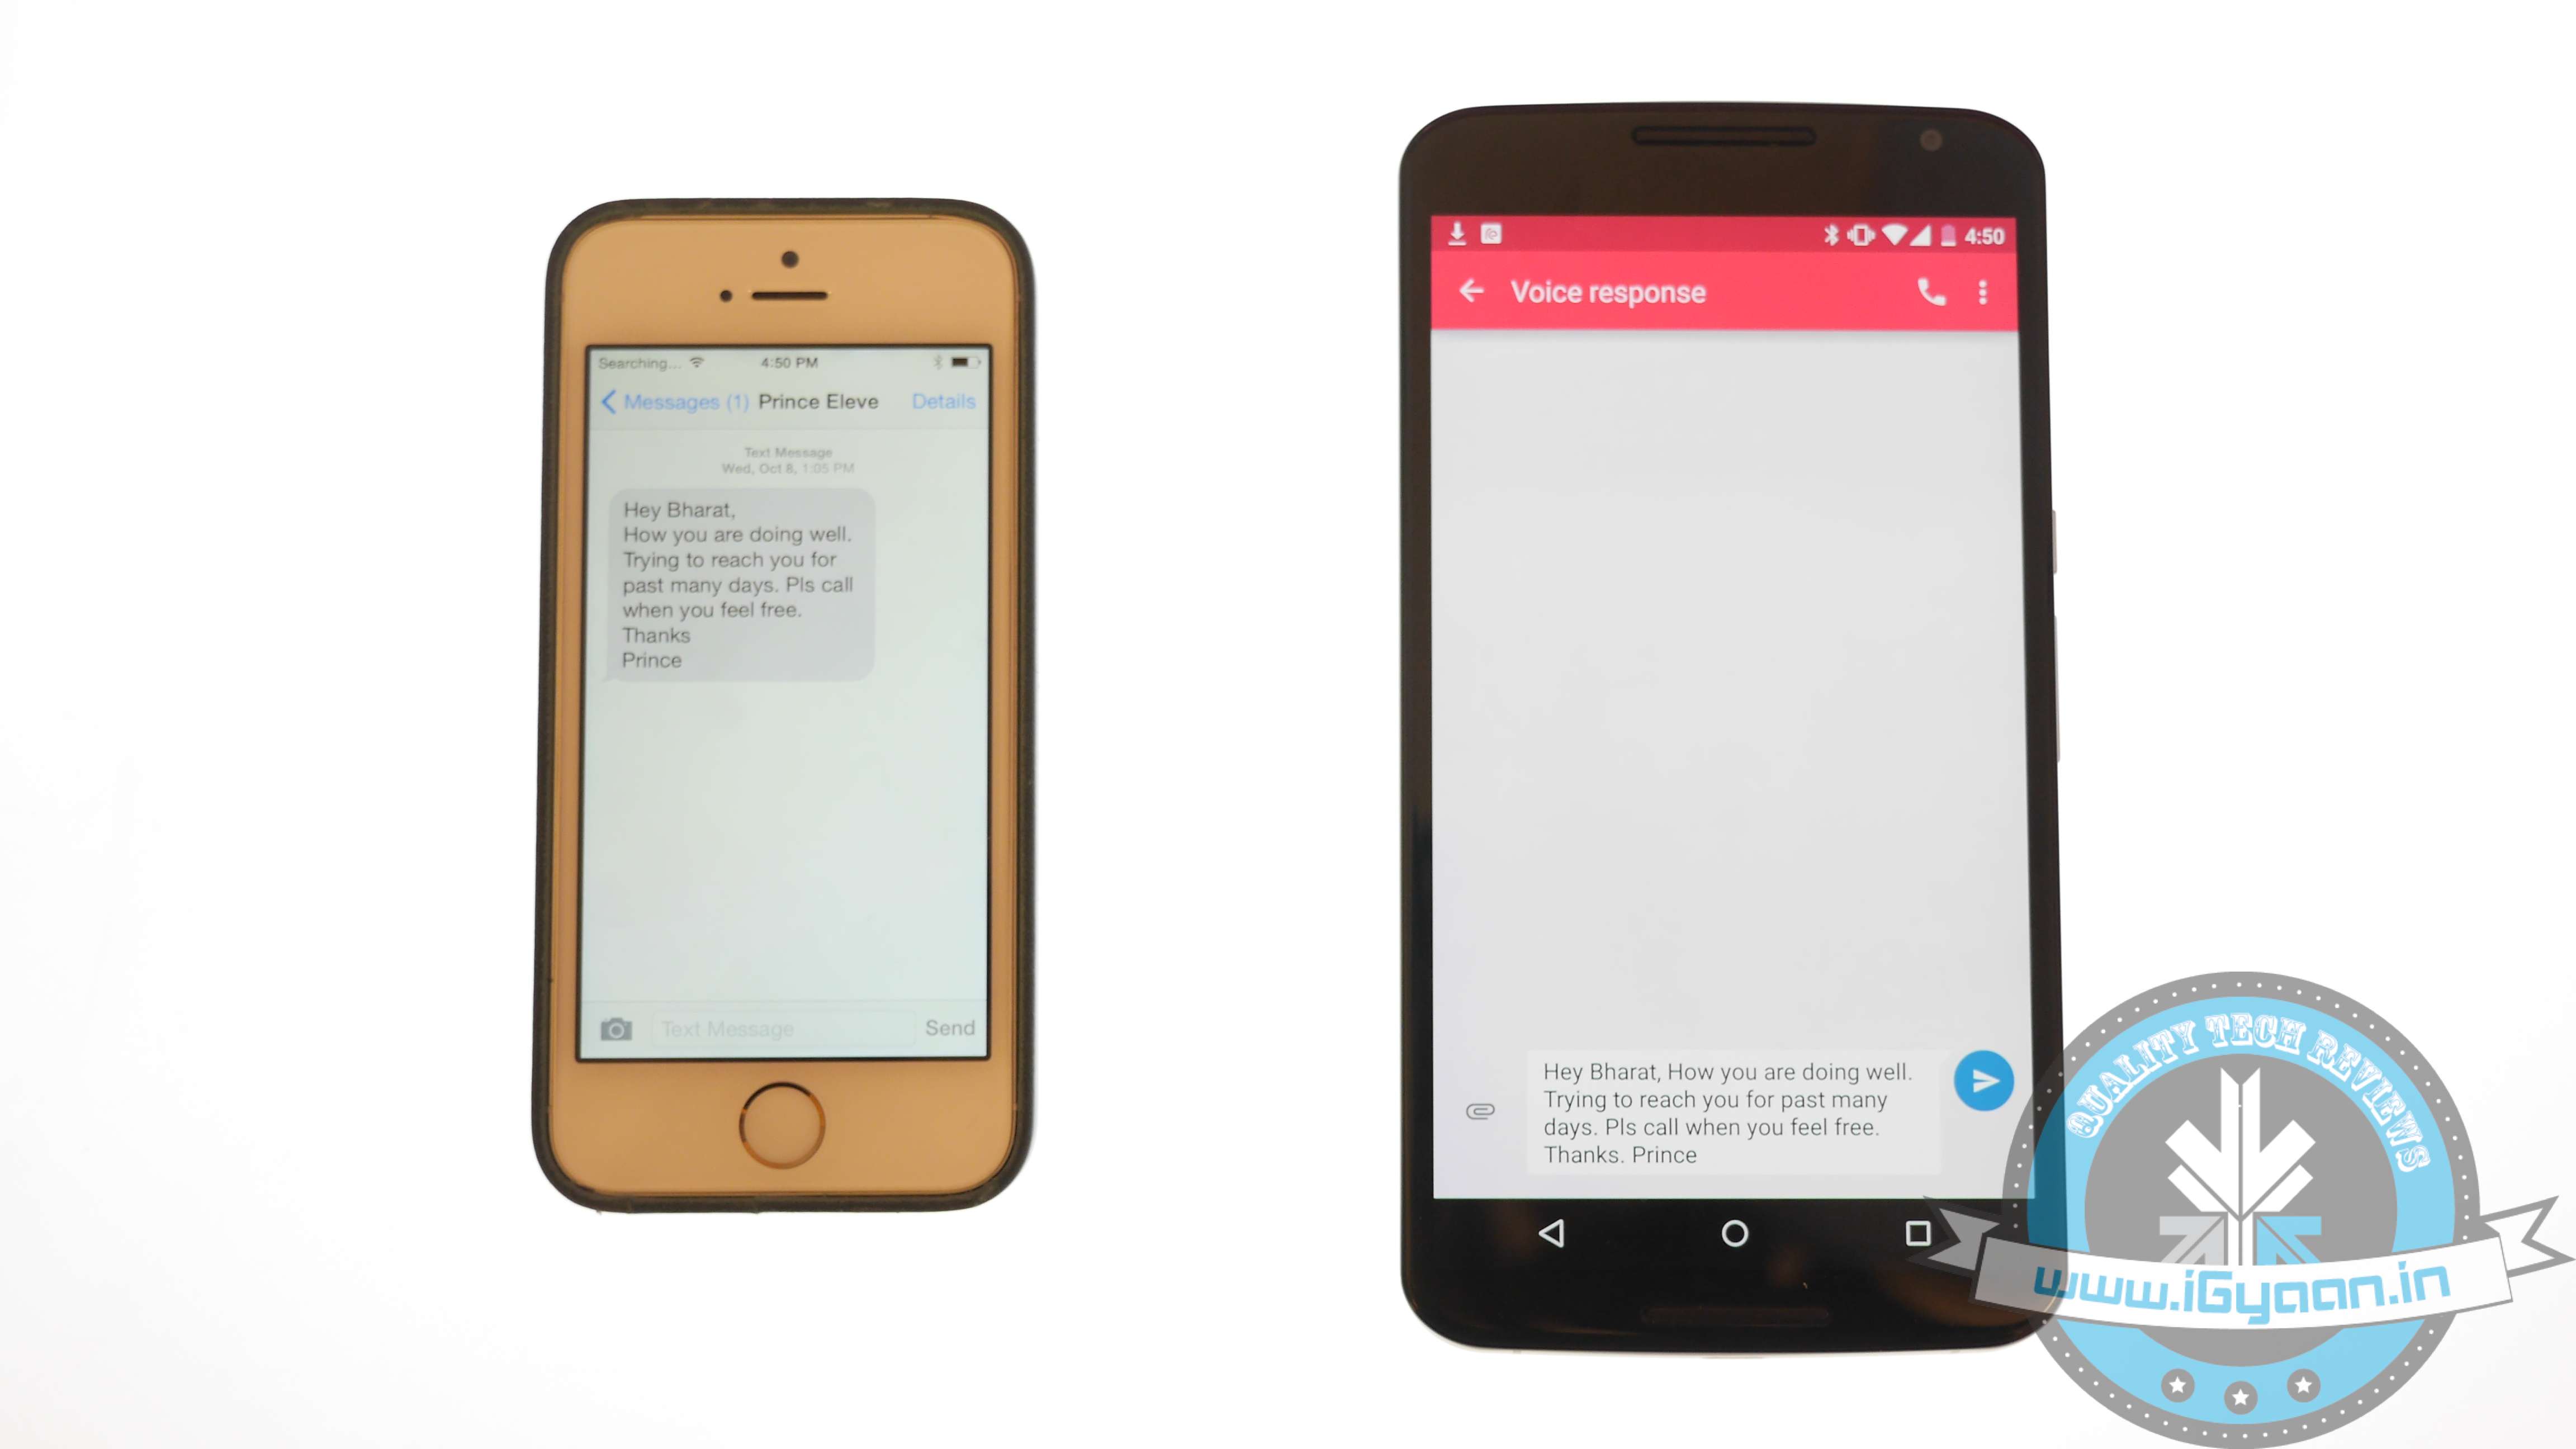
    Some of you might find it useless, but for some others messages are as important as contacts, music and photos. The transferring of iMessages to Android is not an easy job; it’s a three-step process, which is simplified below:

    1. Connect iPhone to your computer and open iTunes.
    2. On the bar at left, right click on your phone name and choose Backup.
    3. A file with random name will save on your system.
    4. Transfer this file to your Android device storage.

    The messages are in your Android device but are not yet readable. Convert them to a readable format through iSMS2droid.

    1. Download iSMS2droid and install it.
    2. Open the application and choose Select iPhone SMS Database.
    3. Locate the backup file just transferred to your phone.
    4. A pop-up will ask you for your permission to load SMS.
    5. Tap All and the conversion will start.

    Post the conversion, another app needs to be installed – SMS Backup & Restore.

    1. Open the app and choose Restore.
    2. Select the converted file from the directory and click Restore All Messages; the restoration will commence.
    3. A pop-up will show the restored message number along with those that cannot be restored.

    Once you are done with relocating your stuff, visit Google Play Store. A whole new world of apps is waiting for you!

  • Get an Organised Facebook Page With These 7 Tips And Tricks

    Get an Organised Facebook Page With These 7 Tips And Tricks

    Social platform Facebook is widely used by people of all groups. Though, it’s an amazing means to share updates, pictures and more with your friends and family, it sometimes pesters users through advertisements, invitations popping up to play games, posts sharing on your behalf and many more.

    Have you ever been in such circumstances where your mum scolded you on Facebook and likes of that post multiplied in minutes with people having a good laugh at it? Well, we all must have come across one or the other issues in the gigantic service, but fret not as the below-listed tips and tricks will keep awkward situations at bay.

    1. Remove Facebook Advertisements

    Advertisements are the most annoying part of any web page and same is the case with Facebook. Whenever we login to our account, a plethora of ads force us to leave the page. However, you would no longer be frustrated opening up your Facebook account as ‘Cleaner’ will keep your page tidy. Download Facebook Cleaner and avoid ads and updates on your account.

    2. Keep parents off Facebook

    facebook album link share

    Many a times it is seen that mums are interested in the activities of their grown-up kids. In spite of your mums’ continuous threats to join Facebook, you can sit back and relax as she would no longer complain. Now show her the pictures of your choice and be at the best of your behaviour. All you need to do is open the desired album, tap settings and copy the link. You can send this album as an email or via ‘Send in Message’ option, as per your liking.

    3. Discontinue auto-playing Facebook videos

    facebook video autoplay

    ‘This video is completely ridiculous. Why the hell people update such stuff.’ You must have said similar lines for disgusting videos auto-playing on your Facebook page as you scroll down the recent activities of your friends. Many a times we don’t bother and pause the videos individually, but seldom when we’re in a hurry to sneak onto our account for a few minutes, the videos automatically start playing. Well, this can be avoided by making some slight changes. Click on Settings -> App settings and choose Off on the Video AutoPlay option on the Android phone. iOS users can turn it off by choosing Settings on the phone and then clicking Facebook>Settings>Off under Video Auto-play option.

    4. Restrict apps’ requests and notifications

    facebook block apps

    With advancements in technology, games are no more the same as they used to be. You can now connect to Facebook and can ask your friends for help in case you’re stuck in the middle of some game and a lot more. Usually, these games send notifications to your friends or ask you to join it, which is quite pestering. However, you can easily get rid of the irritating updates by clicking the downward triangle icon. Then in your Setting options; click to customise your blocking options. Then enter the name of the apps you no longer want to get notifications of.

    5. Stop apps posting on your behalf

    facebook

    Some of us involve ourselves in Candy Crush or Subway Surfer to beat the boredom, but at the same time we don’t want our boss or teachers get record of  our gaming achievements. Many apps insist on posting the recent record break or achievements on the wall, but preventing them is much easier than one would have thought. Go to downward triangle and choose Settings and then Apps. Edit the list of offending apps and set ‘Visibility of app field to ‘Only me’. Your achievements will be updated on the wall but only you will be able to see them.

    6. Unfollow People

    facebook unfollow

    You may be friends with some people, but you no longer desire to receive or share News Feeds with them. It can be your ex-boyfriend or an irritating friend. Removing them from your friends’ list may hurt them but there’s a way to ignore them without even letting them know.

    The easiest way to hide the activities is by going to the status of the unwanted person and choose ‘Unfollow [friend’s name]’. You can also remove a particular uninteresting post from appearing on your page. Also, confine status updates to your close friends by choosing a list in the Friends drop-down option before hitting post.

    7. Select Display Pictures Only on Facebook Profile Page

    Facebook Friends box

    On the left-hand corner of the page, there is a Friends box with tiny pictures of your friends. However, you don’t get in touch with them often and they still appear shamelessly on your page (not your friends, but Facebook is to be blamed for this). But there’s a way you can decide what all friends you want to see on your page. Go to the Edit option on your Friends box and list the names of your friends. The chosen friends will now appear in your Friends box.

  • Tips and Tricks to Make Your Smartphone Theft-Proof

    Tips and Tricks to Make Your Smartphone Theft-Proof

    Smartphones have become an integral part of our lives. They save us the hassle of carrying around cards and other vital data as it has become an all-in-one device that contains and protects all our important information.

    Smartphone theft has become a usual affair and we hear of it every now and then. But have you ever considered the thought that you might become a victim or misplace your precious device one day? Luckily for us, several smart apps have released and by installing them, you can easily locate and retrieve your device if misplaced or lost. We strongly recommend you to download one before you find yourself in a similar situation.

    Given listed are some anti-theft apps and steps to install them:

    Save your IMEI Number

    Before anything else, save your IMEI number. The IMEI is the first thing you need once you lose your phone. Note it down anywhere else other than your device.

    Download Find My iPhone

    Find_My_iPhone_APP

    It’s a free application that supports all iOS devices. It helps you locate your lost phone, and remotely lock and swipe your iOS device, if needed. Find My iPhone requires an iCloud account. It’s easy to install and use. Just follow these simple steps:

    • Go to Settings on the home screen
    • Tap iCloud option
    • Click Accounts and then sign in
    • Scroll down and turn on the Find My iPhone slider; it will turn green

    Once you turn it on, you will receive a message notifying that this will turn on GPS on your device.

    • Tap Allow to turn Find My iPhone on

    Get Prey Anti-Theft

    prey

    This is another free app for iOS to track down your device. Along with showing the current location of the lost iPhone, this app also keeps a track of the locations where your device was used. Besides informing you about the location of the thief, the app clicks a picture of the thief, making it easy to recognise. Steps involved in installing this app:

    • Download the Prey Anti-Theft application
    • Create an account within the app; you will get a verification e-mail
    • Open the email and Verify your account
    • Login to your account on Prey’s web interface
    • Download the iPhone app and install it
    • Click Already a Prey User and fill in the required details
    • Configure your device by using setting on the web browser
    • Turn it to MISSING when your device gets lost

    Prey allows you to register three devices on a single account.

    Get Lookout

    Lookout

    Lookout is an all-around anti-theft app for Android devices, which locks your phone and displays a custom message once your phone gets lost. Also it lets you swipe the data if your device falls into the wrong hands. Just like the anti-theft apps for iPhone, this Lookout too clicks a picture of the culprit. Install the app with below mentioned steps:

    • Go to http://lookout.com/ and download Lookout
    • Sign up with all the necessary information and get started
    • Tab Missing Device option
    • Tap Locate to locate your device
    • Tap Scream to sound the alarm on your phone
    • Click Wipe to delete all the data

    Download Cerberus

    cerberus

    Just like Lookout, Cerberus takes the photo of the suspect when someone makes an attempt to unlock your phone.

    • Download Cerberus
    • Sign in and fill all the details like Username, email address and password
    • Configure Cerberus by ticking Wrong unlock code, Alarm stopped, Message dismissed and other options

    With this, you are set. Now, whenever you lose your cellphone, it will make a loud sound even if on silent and will track down the location along with taking a picture of the culprit.

  • Top 4 Ways to Make Sure You Score a OnePlus One Invite in India

    Top 4 Ways to Make Sure You Score a OnePlus One Invite in India

    Well, the ‘Flagship Killer’ has landed in India. The 2nd December event created much excitement among the smartphone lovers. However, the fact that you need to get your hands on an invite to get the OnePlus One has left many confused about how to get the same.

    Although, Amazon and OnePlus have integrated their account services to make it simple for those with invites to purchase their smartphones. There is still some confusion about the invite system. Well, the company has been known for its mismanaged marketing strategy, however, this time around it seems everything is going smooth.

    If you are still wondering how to get hold of an invite, there are quite a few ways to get it. Read on for more:

    1. Amazon Contests

    amazon

    Amazon and OnePlus are currently running a couple of contests to help you grab the One. Amazon users can earn invites by spotting and clicking on the ‘One in a 1000’ contest across the internet, including select social media websites. A total of 1,000 users that spot and click these contest ads will win an invite. Another method to win one of the 4,000 invites runs involves simply connecting your Facebook account to Amazon India.

    2. OnePlus Accounts

    facebook

    The company will be running marketing or engagement events on its social media, same as it did in other countries, through which it will give out invites. So make sure you like or follow the official accounts on Facebook, Google+ and Twitter.

    3. Get a Friend To Buy One

    Same as in other countries, anyone who has managed to get a OnePlus One smartphone will also receive an invite that can be shared with friends, family or anyone. These invites are valid typically up to 3 and 6 weeks of purchase.

    4. OnePlus Forum

    forum

    The website forum is the most famous and efficient way to get an invite. Users who join the OnePlus One forum can either win an invite via an engagement event or contest, or through other forum members distributing the invites. However, there is no way to check the authenticity of the forum members giving out the invites.

    Need to know more about the OnePlus One before you start hunting for invites? Watch our full review here:

  • Tips and Tricks to Make Sure You’re Never Left Stranded With a Drained Battery

    Tips and Tricks to Make Sure You’re Never Left Stranded With a Drained Battery

    It’s no mystery that smartphones are big time battery hoggers. Given the diverse range of multi-function capabilities, battery life has always been a concern for developers, manufacturers and users. Surely, the smart move would always be to have your charger handy. But life doesn’t always go according to the plan. Fortunately, there are plenty of options you can opt to stem the flow of juice from your device.

    Here are some essential tips to make sure your phone battery never dies when it is actually needed.

    1. Let the battery drain once in a while

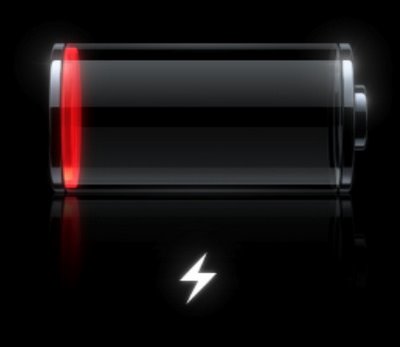
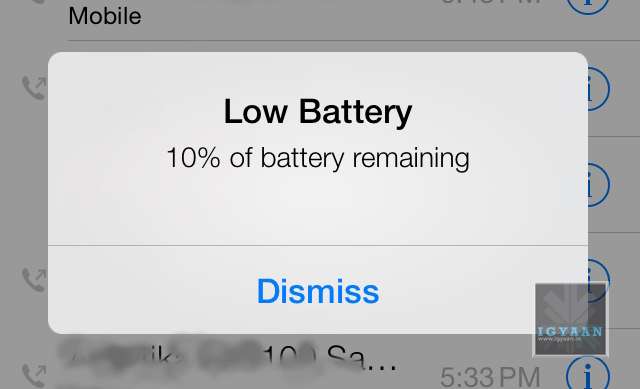
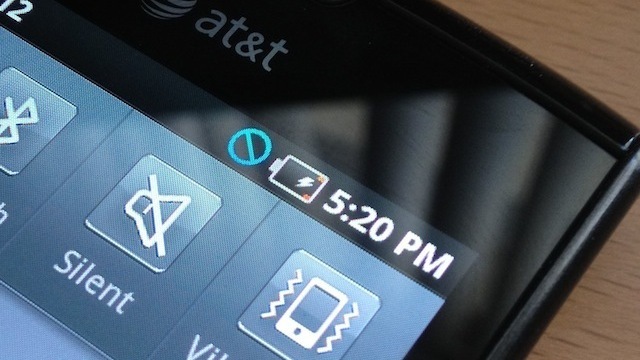
    For optimum performance, ‘reboot’ your battery whenever you can by waiting to charge until the battery is down to about 10 percent. Then, charge it up to 100 percent—and remember not to overcharge it. Overcharging actually reduces a battery’s capacity, and every rechargeable battery can only go through the cycle a limited number of times.

    2. Minimise notifications

    icloud

    With constant connectivity to the Internet, we tend to get notifications on our smartphones all the time – be it updates on the latest news, emails, high scores from games, add-ons for apps etc. But I’m sure that you would only want to be notified about the more essential events like new text messages or messages from WhatsApp.  Set ‘Sleep time’ or ‘Blocking mode’ to switch off Wi-Fi and mobile data when you don’t need them. If your phone is basically off limits at work, set your device to not ring, vibrate or connect to the internet while you’re at work. Likewise, you can set your phone to Airplane mode when you’re asleep, or use sleep or blocking modes to set up limits for what your phone does during certain times of the day, whether that’s while you’re asleep, at work or in a meeting.

    3. Update your Apps regularly

    your-apps-appupdates

    Keep your apps up to date. Developers often release updates for apps and games that offer improved optimisation and this can have a big impact on the battery life. If you discover a battery hog, then consider removing it. Don’t use task killer apps. Also, keep your smartphone as cool as possible. Sitting in direct sunlight on the dashboard of your car will actually drain the battery faster.

    4. Turn off ‘in-active Apps’

    Windows Phone Wifi

    It is amazing that today’s phones have LTE, Wi-Fi, NFC, GPS and Bluetooth, but do you really need them all round the clock? Your phone lets location-based apps reside in the background, and the constant drain of your battery will become noticeable, fast. Wi-Fi hogs a lot of juice on all devices because it’s always searching for a signal. You can also turn off 4G LTE if you happen to be somewhere without a strong signal. Keep the screen as dim as you can stand it, and close apps when you are done with them. This way, they don’t run in the background. Extend the refresh time: Set your email to get new messages every 15 minutes (or even longer) rather than as soon as they arrive on the server. And whenever possible, put your device to sleep. Also, unless you really need that added awareness, turn off vibration. It actually takes more power to vibrate your phone than it does to ring it.

    5. Invest in a Mi Power Bank

    Its massive capacity can handle all your charging needs for the weekend
    Its massive capacity can handle all your charging needs for the weekend

     Power Banks are the most popular and convenient way of charging your phone on the go. Xiaomi has two offerings at present in the power bank category.With massive capacity and modest pricing, the devices are perfect for the juice thirsty smartphone batteries. The Chinese electronics giant had launched 5200 mAh and 10400 mAh power bank variants. Read our full review of them here.

    6. Battery Cases

    i-Blason-Apple-iPhone-6-4.7-Inch-External-Protective-Battery-Case-74.99Battery cases combine a hardware enclosure, which protects your phone with an extended battery life that can double your phone’s endurance. You can find models compatible with popular phones from a variety of manufacturers. Also, carrying a power bank might be a tedious option when you are traveling and are during fieldwork for long hours. So, we’re listing some of the best ones for you:

    1. i-Blason cases for iPhones: i-Blason power cases come with amazing advantages which can help you charge your iPhone to 100% battery capacity while working, shopping, or travelling. They are fabricated with impact-absorbing materials and comes with rechargeable battery up to a 4700 mAh capacity battery.
    2. Mugen Power Battery Case for Moto G : Specifically for Moto G, this battery case provides you with 2800 mAh of extra battery. The case has a robust design which, according to makers, can withstand handfull of slips and falls.
    3. ZeroLemon for LG G3 : Rugged Zero Shock Hybrid Protection Case, ZeroLemon case includes Free High Quality Screen Protector and yes a whooping 9000 mAh extended battery (probably the world’s highest).
    4. Samsung Extra Battery Kit for Note 4 : This isn’t exactly a battery case, however it is as useful. The Spare Battery Charger is great for when your battery is low, but you need to continue using your device and are not able to attach it to a wall outlet. Samsung extra battery kit charges your battery without needing to connect the handset. Simply slip the battery into the storage compartment and connect your charging cable. The size of this charger makes it easy to charge at home or on the go.
  • Top 10 Tips and Tricks for Samsung Galaxy Note 4

    Top 10 Tips and Tricks for Samsung Galaxy Note 4

    Samsung’s Note franchise is known for its vast amount of features, which are equally useful for business and consumer purposes. The latest addition to this series, Galaxy Note 4, comes with a functionality that is overwhelming and a thoroughly cleaned-up TouchWiz interface that makes getting around the device straightforward and easy. However, there are fairly ample amount of things you’ll never come to know about your new Note 4 until you take a good look inside its menu.

    We are listing top 10 essential tips and tricks for Samsung Galaxy Note 4.

    1. Use of Motion Gestures

    Samsung Note 4 Features 2

    Samsung has added some very convenient hand gesture controls in the new Note 4. The Note 4’s Motions and Gestures setting lets you customise a number of gesture controls. Switch on ‘Direct Call’ and it will let you pick up and hold the phablet to your ear to make a call to a predefined default number. The option of ‘Smart Alert’ will make your device vibrate to indicate new notifications and events when you pick it up. The ‘Mute/Pause’ option lets you mute incoming calls or alarms by turning the device over or placing your palm over it. Finally, ‘Palm Swipe to Capture’ lets you place the side of your hand on the screen and swipe it across to capture a screenshot.

    2. Customise your Notification Bar

    Samsung Note 4 Features 0

    You can customise the Quick Settings directly from the Settings panel. Also, you can drag the panel down from the top, tap the Quick Settings icon, and then tap the pencil icon to start editing.

    3. Use One-handed Operations

    Samsung Note 4 Features 12

    Samsung has added loads of features to make one-handed operations more manageable. Under Settings > One-handed operation, you can choose from three different one-handed utilities. First one is the option of reducing the screen size that lets you adjust the screen size and layout by swiping out from the midpoint or either edge of the app. One-handed input compacts the apps down like the Dialer, in-call buttons, and Samsung keyboard. As soon as the on-going app compacts, the Side key panel will pop up Android’s navigation buttons on the screen so that you can access them quickly.

    4. Wider Selfies

    Samsung Note 4 Features 10

    Catering to the worldwide selfie trend, Samsung has added a Panorama-like selfie feature which lets you take wider selfies. Open your Note 4’s camera, switch to front camera, tap ‘Mode’ and hit the ‘Wide selfie’ option. Put your finger on the heart rate sensor and lift it to take a photo, and say ‘Cheese’. You’ll get a panorama-like outline which you have to fill by tilting the device left and right. When the blue frame has reached each end of the white frame, your spacious selfie is done.

    5. Use Alternative Commands to Snap Pictures

    Screenshot 2014-11-08 13.01.16

    Tap anywhere on the screen inside the camera app—just not on the shutter button—and then tap the Settings icon. Tap again for more settings. Tap on the volume key towards the bottom of the screen. From here, you can set the volume, whether it’s to snap a photo or record a video. Also, it acts as a zoom controller. In that same settings menu, you can turn on the voice control to take photos or record videos.

    6. S-Pen’s Improved Functionalities

    Samsung Note 4 Features 1

    One of the primary distinguishing features of Galaxy Note 4 is the integrated S Pen functionality. The S Pen has been around since the original Samsung Galaxy Note and has got better with every new release. The Air Command pop-up menu launched with the Note 3 and it has refined largely for the S Pen and large display of the Note line. One improvement that is tough to demonstrate is the increased pressure sensitivity from 1,000+ to over 2,000+ level. The most convenient feature is the ability of the S Pen to select multiple images by dragging it around the screen, more like you do it with your mouse on your desktop.

    7. Use your Note 4 with Gloves

    Samsung Note 4 Features 8

    Because, why not? It’s going to be winter soon and you’re probably going to be sporting gloves until next April. It’s hard to use a phone with gloves on. Fortunately, you can increase the Note 4 display’s touch sensitivity from the settings menu, so you don’t have to take those gloves off just to send a text message. And also, you won’t have to look forward to frost-bitten fingers anytime soon.

    8.  Play with Depth of Field

    Samsung Note 4 Features 4

    Samsung followed suite of HTC by bringing in the Selective Focus feature. To enable it, open Camera, tap Mode, Selective Focus, and take a photo as usual. There are ‘Near focus’, ‘Far focus’, and ‘Pan focus’. The first makes the object of your photo stand out against a blurred background, the second does the opposite, and the last one makes both the subject and the background noticable.

    9. Get Notified when a Doorbell Rings or your Baby Cries:

    Samsung Note 4 Features 11
    There is built-in doorbell detector and baby crying detector in the new Note 4. When your phone detects these respective sounds, it makes the smartphone vibrate. You can find both these options in the Settings, Accessibility, Hearing, Sound detectors menu.

    10. The Music Square

    Samsung Note 4 Features 9

    Samsung has added an interesting feature in Note 4’s built-in Media player, called Music Square. You can find it inside the app’s three-square menu. The square has an algorithm which analyses your songs and matches them to four-mood categories. You can also create a mood-based playlist.

    Check out our video below and subscribe to our YouTube channel for the newest updates here:

  • Buy a Redmi 1S Today Using These Tips to Better Your Chances

    Buy a Redmi 1S Today Using These Tips to Better Your Chances

    After the overwhelming success of the Mi3, Xiaomi is now ready to unleash the Xiaomi Redmi 1S in the Indian market. Today, the smartphone, priced at Rs. 5,999, will go on sale at 2pm. Lack of stock, unreliability of Flipkart and the overall disappointing sales of the Xiaomi Mi3 have taught us that we need to be armed and prepared to handle these strategic flash sales better.

    Here are our tips and tricks to make sure you get your hands on a Xiaomi Redmi 1S today:

    1. Pre Register

    Possibly the most obvious tip, you need to have already pre registered to buy the phone. Pre registrations are now closed, so hopefully, you’ve checked this box. Otherwise, remember to set a reminder to be better prepared for next Tuesday.

    2. Know the Time

    The Xiaomi Redmi 1S will go on sale at precisely 2:00 pm IST on 2nd September, so try and reach the buying page at least an hour earlier, even though it seems like an overkill.


    Screen Shot 2014-09-02 at 11.28.02 am

    3. Multiple Device logins

    Try being online from multiple devices, preferably on different internet connections; in order to have different I.P. addresses accessing the site, this will improve your chances and bring you one step closer to buying a Xiaomi Redmi 1S.

    4. Flipkart App

    The Flipkart app uses a separate server and has a higher chance of “not failing” at the time of sale. If you want to buy a Xiaomi Redmi, the app might prove to be easier, “might” being the key word.

    5. Super Refresh Times 40,000

    When the sale starts, most people are struggling to open the webpage, ctrl+R / f5 (refresh)/ Cmd+R (mac), is your best friend. Hit it till you get a page to buy a Xiaomi Redmi 1S. Other people have reported opening several tabs being helpful.

    pressing-f5-key-690x470

    6. Cart it!

    If you do get a page loaded, add that phone to the cart like there is no tomorrow, once you have the handset in your cart, your chances have just gone up from 1 in a million to 50:50 in order to buy a Xiaomi Redmi 1S.

     Screen Shot 2014-09-02 at 11.31.25 am

    7. Patience

    Once you have it in your cart, attempt payment by refreshing several times, in most cases you won’t be able to make payments due to overloads on the server so keep trying. Here the app helps too.

    Also, if the website fails completely, there is a very high chance that the phone is in your cart when Flipkart comes back online, that’s the perfect moment for you to buy a Xiaomi Redmi 1S.

    Once you do get through to the payment section and make your payments in whatever the mode you select, pat yourself on the back sir, you my friend are a lucky owner of the coveted Xiaomi Redmi 1S!

    Now, check out our unboxing of the Xiaomi Redmi 1S below.

  • Microsoft Launches Interactive Website For Windows 8.1 Newbies

    Microsoft Launches Interactive Website For Windows 8.1 Newbies

    Windows Phone a bit too confusing for you? Well, in hopes to encourage and increase users, Microsoft has created a new ‘How To’ website for newbies that will teach them tricks to master each and every aspect of its newly released Windows Phone 8.1 software.

    Screen Shot

    This step-by-step guide by Microsoft shows and explains the basic things that Windows Phone is capable of doing. Microsoft has compiled a well thought out and extensive list of all the things a regular user might want to do on his/her Windows Phone and provides the shortest way to complete that task.

    It bears a simple design with a list of actions organized neatly into different categories, and a large Windows Phone device (funnily, a Nokia) performing the selected action on the side. The list includes a vast array of operations that users can perform on their phone, like personalizing your home screen, making calls, playing games, working on Microsoft Office, taking pictures, searching for places, protecting personal information, and even using the latest and most awaited feature of Windows Phone 8.1, Cortana. Yes, the site also includes demonstrations of Windows Phone’s own little personal assistant that is soon going to make it’s first appearance worldwide.

    Screen Shot 2 copy

    This is a pretty good move, as Nokia has just pushed out the Lumia Cyan update for it’s Lumia devices, and Microsoft is almost ready to release Windows Phone 8.1 to a majority of Windows Phone devices. It will also help build up some hype for the release.

    Now some of you may feel that they are a bit late to release a ‘How To’ website for an OS that is nearly four years of age, but better late than never right? So for all those users out there who need help completing a normal task on their phone, or those who are just curious as to what all Windows Phone is capable of doing, we encourage you to check out the website.

    By: Pranav Aroma

  • Top 5 Tech Blunders You Should Avoid

    Top 5 Tech Blunders You Should Avoid

    You have money? Spend it! But make sure ensure you invest wisely. We have complied a list of 5 tech blunders you should never make:

    5. Buying Pirated Windows

    windows_not_genuine

    One of the most common tech blunder that most people make is to Install the pirated version of Windows. But you have to ask yourself whether it’s worth losing and rebooting your system a year down the line, or paying a few extra thousand for the original windows now?

    4. Leaving the house with less than 62% battery life

    Low-battery

    Smartphones today either run on Android or iOS which are known for their User Interface. One thing, however, these phones are not reputed for is their battery life. Make sure you leave home with a fully charged phone or suffer the wrath of the missed calls.

    3. Buying a device with an old software

    android donut

    There are two kinds of old software buyers. One who don’t care about the latest version and the other who expect an upgrade to launch for their device. The latter are easy to spot since they are always seen complaining about their device.

    2. Investing in a 3D Tv

    3dtv

    Investing in a 3D TV is one of the biggest mistakes one could make. With only few movies and games available and scarcity of time; 3d TV’s are not the best bet yet.

    1. Buying Samsung Galaxy S5 at full price

    Galaxy S5 review 5

    It was initially launched at a whooping Rs 53,500 after which the prices dropped drastically. For people who value their wealth and want their money’s worth, this is not the device for you.

    two kin

  • Quick Tip: Sync Your iPod to a New Desktop Without Losing Music

    Quick Tip: Sync Your iPod to a New Desktop Without Losing Music

    Picture this: You’ve recently bought a new computer (the last one died out on you.) Once you sync your iPod to it, all your old songs vanish. Still aching from pains of your laptop dying, losing out on all the music you’ve collected through the years – might just be too much to handle.

    There is an alternative, it’s quite a simple task to change the sync settings on your iPod. Here’s what you need to do:

     Things You’ll Need
    [icon name=”square-o”] iTunes
    [icon name=”square-o”] iPod

     Instructions

    [icon type=”rectangle” size=”small” name=”e-check”]Download and install iTunes on the new computer.

    [icon type=”rectangle” size=”small” name=”e-check”]Connect the iPod you’re syncing to the new computer using the player’s USB cable.

    [icon type=”rectangle” size=”small” name=”e-check”]Open the iTunes software. Wait a few seconds and the name of the player will appear in the left iTunes column (under “Devices”). Click the iPod name.

    [icon type=”rectangle” size=”small” name=”e-check”]Various tabs will appear listed near the top of the iTunes program

    [icon type=”rectangle” size=”small” name=”e-check”]Click the “Summary” tab. Options will be visible in the middle of iTunes.

    [icon type=”rectangle” size=”small” name=”e-check”]Click on the box that is positioned directly next to the “Manually manage music and videos” option.

    [icon type=”rectangle” size=”small” name=”e-check”]Click the “Apply” button, found under the previous mentioned options. The iPod will sync to the new computer without any damage.

  • How To Take Good Images From Your Phone’s Camera

    How To Take Good Images From Your Phone’s Camera

    These days digital cameras are found in a variety of other gadgets – including cell phones. In fact Camera Phones are one of the fastest growing segments of the digital camera market and with the improvements in the quality of what is being offered in some phones (higher megapixels, better lenses, high capacity storage) some believe that they are beginning to win market share away from the low end offerings of many digital camera manufacturers. 

    So keeping that in mind, we present to you some basic tips to improve the quality of images that you click from your cell phone.

    1. Stand Still

    It is really difficult to keep still while clicking images with your phone. Even the slightest of movements can leave the image blurred. The shutter delay is what causes these blurs. 

    smartphone_camera

    Holding the camera really steady and even after the shutter is released, keep it steady for a few seconds more just to be sure. You could also try supporting the phone on a few books, table, against the table vase and get sharper images.

    2. The Better The Lighting, The Clearer The Image

    The better lit your subject is the clearer your image is likely to be. If possible shoot outside or turn on lights when shooting inside. Your phone’s biggest weakness is its inability to take good pictures in low light (unless you have a Lumia 920 or a HTC One), which means you generally will want to get as much light as you possibly can on your subject.

    If your phone camera has the basic white balance features then experiment with them to get the near possible match.

    3. Focus!

    When you’re taking a close-up, your phone generally focuses on the element closest to the lens. Switching the focus can allow objects in the background to stand out instead, thus making a run-of-the-mill shot more interesting. To focus on an element, gently tap your screen’s viewfinder.

    Motorola-Moto-X-camera

    Wait for the subject to be in focus. Then take the shot. There are apps you can use to selectively focus areas in your image. More on apps later. 

    4. Avoid Zoom

    The built-in zoom in most phone cameras are not optical but digital. Hence, it is advisable to not zoom in to compose a picture because you are not really zooming. 

    Instead, move closer to the object and crop the image later if you have to. You will notice a considerable difference in the quality of the image.

    Most smartphones have 8+ megapixels of resolution and sometimes more. That means you can crop substantially and still have plenty of resolution left for display on the web.

    5. Keep The Lens Clean

    While most of us spend loads of money on buying screen protectors for the front of your devices, we must realise that there is a lens on the back of your device that needs maintenance too. 

    keep your lens clean

    Phones spend a lot of time in pockets, in bags and being used in all manner of weather and conditions and over time the camera lens can collect lint/dust and create a blurred image. Just give it a good wipe with a clean cloth. 

    6. Keep The Background In Mind

    We all have images in our phones that were ruined by poor background surroundings. From photobombing friends or garbage on the road, keep in mind that the background is as important as the subject.

    Backgrounds should vary from shot to shot. You can either go for a subtle, clean background or one with motion and movement. 

    7. The Default Camera App Isn’t The Only One You Can/Should Use!

    Depending on your particular phone and the camera app that comes with it, you may have a few settings you can adjust before taking a picture. In almost every case, though, you can do better by grabbing a more advanced camera app.

    10_camera_apps

    Apps like Camera Awesome allow you to shoot in bursts and separates the AF lock from the exposure lock. Other apps like Camera+ have similar options for more controlled shooting.

    There are a ton out there, so look around! 

    8. Use Accessories! 

    If you intend to use your mobile phone as a digital camera, then you would do well to add on some accessories to maximise the camera experience. 

    Given the success of cameras on smartphones, more and more manufacturers are selling accessories specially designed for use with camera phones. These include camera phone tripods, Bluetooth adapters to transfer photos to a PC, and an attachable wide-angle lens.

    1

    When professional photographers want to up the quality of their shots, they often upgrade their lenses. If you have a good smartphone, there are plenty of lens add-ons that allow you to do the same.

    An example is the Olloclip. Easy to slip on and off, the Olloclip is actually three lenses in one: macro, fish-eye, and wide angle. The HitCase for the iPhone 5 also comes with a wide-angle lens, which helps you in taking macro-shots.

    9. Edit Later, Avoid Using Filters

    While you’re better off tweaking some settings before you take the photo, you can always make a picture look better by editing it after you’ve downloaded the pictures to your computer.

    Take your shots in color at high resolution to keep your options open on how to treat it later. You can always make it black and white on your computer, but you can’t make it colour if you take it in Black and White mode. 

    twitter-filters

    Apps like Snapseed (free) can be used to edit photos easily. Snapseed is very easy to use, and less onerous or labour-intensive than Photoshop Touch. It can auto-fix photos, definitely, but it can be used to make subtle and even minute edits to photos that affect exposure, saturation, sharpness and contrast. In other words, it’s a fully-fledged photo editor that competes with iPhoto.

    10. Experiment!

    The beauty of all forms of digital photography (including that of camera phones) is the ability to shoot off many shots quickly and without cost. This means you can experiment with different modes and composition and discard those that you don’t want to keep.

    Don’t be afraid to try interesting angles. Sometimes playing around with angles can make an image look contrived, and other times, it just works.

    Most importantly, just like any other camera, practice. Practice practice practice.Take lots of pictures. Learn what you like and what you need to improve on. It takes a while to get into a groove where you really start to excel, so shoot often and keep only your best work.

    Armed with these tips and techniques, you’ll be surprised what you can do with a simple camera phone.


    Let us know your tips in the comments section below!

  • iOS 7 Battery Drain Fixes for iPods, iPhone 4, 4s, iPhone 5, 5c and iPhone 5s

    iOS 7 Battery Drain Fixes for iPods, iPhone 4, 4s, iPhone 5, 5c and iPhone 5s

    If you recently upgraded your iPhone 4, 4s and or 5 to iOS 7 then you are probably suffering from massive battery loss on your iOS device also known as post-upgrade-drain-syndrome. However we have been able to locate a few causes that could be the culprits behind the whole iOS 7 battery life drain issue. 

    Check out the ten quick fixes below and the ultimate fix at the bottom. 

    o-IOS-7-BATTERY-LIFE-570

    Quick Fixes

    1. Brightness and Display Timeout : It’s an age old problem, and probably the easiest to fix quickly : ensure that the brightness is not turned up too high and the timeout of the display is at 1 minute. This will save the battery considerably as the biggest consumer of iOS 7 battery is the Display.


    2. Location Services : In iOS 7 a lot of apps ask for location use consent and users mostly agree without realizing that the use of GPS causes sufferable battery drain, quickly fix theis by going to Settings > Privacy > Location Services and turning off apps you don’t want using this service. For example Google Chrome may use location to find localized results but you may not need that, so turn it off. Also at the bottom of the Location services menu,you will find a System Services panel, which can be further tweaked to turn off options like Location Based iAds etc. that you don’t need.


    o-IOS-7-BATTERY-LIFE-570


    3. iPhone 5/ 5s Parallax : The fun new animation which causes the wallpaper in the background to move, making the whole plane of the iPhone look 3 dimensional also affects the battery life drastically. Head over to Settings > General > Accessibility  and set “Reduce Motion” to On. This will disable parallax and increase iOS 7 battery life.


    4. Background App Refresh: If your apps are getting updated and refreshed while your phone is resting, its not really resting. While your phone is on standby , its actually getting drained pinging the servers for data refreshes. turning this off will improve battery life considerably. Find it in Settings > General “Background  App Refresh” you can turn it off completely or turn off apps you can refresh manually.


    5. Push Mail / Fetch Mail : Push Mail and Fetch mail also check the servers for new email frequently, using up data and battery life, setting this to manual will help the battery life of your iPhone / iPod. However some would rather have this feature on. Find the settings in Settings > Mail,Contacts, Calendars > Fetch New Data.


    6. Incompatible Apps : Some apps that have not been optimized for iOS 7 may cause battery drain issues, one such daily use app is “Whatsapp”. In our testing we saw that battery drained 200 times faster if Whatsapp is actively running on the iOS 7 device. If not using this app is not an option, then double tapping the home button and sliding the app away to fully quit the app may be a good option to save battery life.


    7. iPhone 5/ 5s Airdrop: On the iPhone 5, 5c and 5s a new feature called Airdrop allows you to share files between other iOS devices that support this feature including Mac OS devices. However if you don’t use this feature frequently turning this off from the control center will save additional battery. Swipe the control center up and tap on AirDrop , then tap “Off” and you are all set.

    o-IOS-7-BATTERY-LIFE-570


    8. Spotlight Settings : With iOS 7, you can now search for anything on your iPhone using Spotlight. All you have to do is pull down on your Home screen and you can search pretty much every part of your phone, from notes to music, to mail. This also takes a mjor hit on the Battery, simply reduce the search options to the ones you do use : go to Settings > General > Spotlight search and set it to use only things you use.


    9. Siri: Unless you use Siri frequently, turn her/him off. If you do use Siri, then turning off “Raise to Speak” in Settings > General > Siri will keep the proximity sensor from being used all the time. 


    10. Bluetooth and Wifi: Although the essence of any Smartphone, if you are not a frequent user of Bluetooth and Wifi, then turning them off will help improve iOS 7 battery life.


    Although the above fixes will help a lot with the battery life drain, turning off only those features you can live without is recommended. If all else fails try the major Fix below.

    Major Fix:

    Set Up as a new device: 

    In most cases when we update any hardware from one generation of OS to the next, it is recommended that a fresh install be done. Similarly when you upgraded your iOS 6 device to iOS7, a lot of profiles and cached files, tmp file and even some preferences get carried over to iOS 7 which may not essentially be compatible with the new OS and may cause the processor on the iPhone/ iPod to get overworked. 

    Take a backup of all your images, sync up your contact to iCloud or any similar service, and bid adieu to the old messages. Put your iPhone / iPod in DFU mode , and restore the device via iTunes, once the new iOS is downloaded and flashed on your iPhone / iPod, set it up as a new device and do not restore from backup.

    Simply sync back your images, contacts, music and apps and you are good to go. You will see a drastic change in the battery life of your iDevices, as this method will make your device fresh and delete all the garbage that was not required. 

  • DIY : Clean Your Laptop Inside Out

    DIY : Clean Your Laptop Inside Out

    Most of us recognise the noise – the incessant whirring of an overworked laptop fan, struggling to keep a computer cool. You might put it down to old age, assuming that notebooks always get noisier and hotter until, eventually, they just stop working.

    That doesn’t have to be the case though. When your laptop is starting to get on a bit, overheating and shutting down on its own, it might not be worn out – it might just be dirty.

    However clean you keep the outside of your notebook, dust inevitably gets sucked into fans, crumbs fall into keyboards and fluff gets into vents.

    Follow these tips to keep the inside and outside of your laptop clean and running faster and smoother. 

    Note : Before cleaning any laptop, we suggest the laptop first be turned off and unplugged.

    To give your laptop a thorough cleaning, you will need:

    – Compressed Air Can
    – Rubbing alcohol
    – Cotton swabs (Q-Tips)
    – Dish soap (without bleach) or some other mild detergent
    – Paper towels
    – Flathead screwdriver
    – Towel

    1. To clean the keyboard.

    So your laptop keys stick for one reason or another. Perhaps you spilled a drink on it, or you just like to eat and surf the web at the same time. Your keys were basically snapped onto your keyboard at the factory and therefore can be unsnapped.

    Grab onto a corner of a key and firmly lift up.  You may be required to pry on more than one corner at a time to unsnap each key.  If a key (especially larger ones) prove difficult, wiggle a flathead screwdriver underneath the key and rotate the blade in several places to “persuade” it to let go.

    This process will take some time, be patient and don’t rush this part… that’s a sure way to break something important. Clean the keys one by one with the soap and cotton swabs.

    laptop

    Some of your larger keys may have one or several metal guide bars on their underside.  These bars slide into slots on your keyboard, so make sure not to bend the bars or their slots on your computer.

    Dip your cotton swab into the rubbing alcohol and begin to clean around each key post.  Remember if any liquid made its way under your keys to remove the key carriers as well and soak them with the keys.

    Once your keys are cleaned, wait for them to dry out and start popping them back in and you’re done!

    2. Cleaning the insides of the laptop

    When you can see dust and hair in or on the vents on the bottom and sides of the case, you can bet there is more inside the laptop. The only way to get it all out is to open the case. Don’t attempt to blow it out from the outside. This will only clog it up inside the case. All laptop cases will come apart fairly easily. There are several small screws that hold the case together.

    laptop

    There will probably be little rubber or plastic caps covering screws that hold the display on. Most all cases will be disassembled from the bottom. Make sure that the power cord and battery are removed before starting. Remove the hard drive and place in a secure place out of the way.

    Note : DO NOT USE MAGNETIC SCREWDRIVERS OR CORDLESS TOOLS.

    When the case is completely apart, you will see the ‘dust bunnies’ hiding near the case cooling fan and cpu cooling heat sink. Remove large pieces with a pair of tweezers. Compressed air in a can will work well to blow out the dust on and around the motherboard and keys.

    Be sure to hold the case upright when using air in a can. If the can of air is tilted downward when spraying, the gas inside will become a liquid. This will damage the components inside the laptop. When reassembling the laptop, be sure to use the right screws in the right places. Some screws are longer than others, and need to be used where they were originally. Pay particular attention to any ribbon cables and their connectors.

    The keyboard and mouse pad will use this. Make sure that the compression or wedge connectors are tight before proceeding to the next step. You don’t want to have to open the case again until it is time to clean it again. When you are finished, your laptop will be as good as new.

    3. Fans And Vents

    As for case fans, these can be removed and the blades wiped clean with cotton buds. It’s never a good idea to blow compressed air into them, because they may be forced to spin in the wrong direction, damaging them.

    laptop

    Before you close your machine up, take a good look down the sides of the case to locate the vents and passive heat sinks. Use your can of compressed air to carefully blow dust out of the case.

    4. Cleaning the outsides of the laptop

    Cleaning the exterior portion of the laptop case can help keep the laptop looking new. The exterior case of a laptop can be cleaned by using a damp cotton cloth that has been dampened with water.

    It is not recommended that the exterior case of the laptop be cleaned with household cleaning solutions. However, if there is a substance on the laptop that cannot be cleaned with water, we suggest using rubbing alcohol.

    5. Cleaning the LCD Screen

    It’s very easy to get streaks on your screens from just a couple of finger swipes. LCD wipes or a soft dust-free cloth sprayed with your home-made solution of distilled water and white vinegar can clean that up in a jiffy.

    laptop


    First, use the canned air to get rid of the bigger bits of dust. Then rub the moistened cloth or wipe the screen in circular motions.

    Disclaimer : Although these methods have been used to measurable success by various people, you should do so at your own risk. Make sure that the ports and other sensitive parts of your device are not exposed to the ingredients you use!

  • Samsung Galaxy Note 2 and S Pen Tips and Tricks

    Samsung Galaxy Note 2 and S Pen Tips and Tricks

    The Galaxy Note 2 is a wonderful device and even so is also the most prominent smartphone in the Android Market, but what really sets this phone apart is its ability to interact with the S Pen ( or should be call it the S Pen 2? ) Completely redesigned from the bottom up the new S Pen is more ergonomical and precise.  Lets look as some of the new things you can do with the new S Pen on your Shiny new Galaxy Note 2.

    Pop Up Note.

    This feature allows you to enable a Pop Up Note to show up every time you pull the S Pen from the new Galaxy Note 2. This feature Can Be anablet from Settings > S Pen Settings > Enable Pop Up Note


    Color Selector in S Note 

    A new Color Selector dropper tool in the S Note application allows you to choose a custom color that you may pick up from the image you are editing or anywhere on screen. This will allow artists more flexibility with their designing. 

    Air View

    One of the most versatile features of the new S Pen on the new Galaxy Note 2, the Air View feature adds a context menu to the Galaxy Note 2 and performs better than Samsung claims. 

    Air view adds a lot of new features :

    • Scrolling: Just by hovering the Pen over the Top or bottom of Email and Message lists, you can scroll up or down. This feature will work in any app including browsers and music players. Mostly anywhere where scrolling can be enabled.
    • Tooltip : Don’t know what a button is for? The Air view tooltip feature gives you a quick introduction to any button or menu item you will hover your S Pen over.
    • Quick Preview : The Most useful AirView feature is the new quick preview, hovering the S-Pen over any EMail or SMS received on the new Galaxy Note II will give users a quick preview of what the content of the message is. This feature will also give you a preview of the pictures in a Gallery.

    Quick Command 

    The new interface that lets you perform tasks and open applications with a quick swipe of your S Pen. Holding the button on the S Pen and dragging it an an upward direction opens up a quick command dialogue box.  You can now use one of the pre set gestures or create your own, allowing you to open applications, turn on/off services like WiFi, Data, Bluetooth, etc. 

    Handwriting to Text

    The Galaxy Note 2 mixed with the new S Pen has the best Handwriting to Text algorithms available today. It instantly converts the poorest of handwriting styles into crisp text. Although not a lot of people will use this features, but in some cases it may turn out to be much faster than typing.

    Pressure Sensitivity

    The new S Pen is really pressure sensitive allowing you to create thin or thick lines without actually changing the settings form the the pen menu. while creating strokes, a light touch will create a thin line whereas a thick stroke will create a thick line. 

    Missing Pen Alert

    Once this feature is enabled from the Galaxy Note IIs Pen Settings Menu, the phone will vibrate every time you move 10 ft away from your phones S Pen, reminding you that you have left your S Pen somewhere. This is a feature that will really help those people who lost a lot of S Pens with the original Note. 

    OLD FEATURES

    The Note 2 also retains most features from the original Note, including the slide left to close app gesture and slide right for menu function, among others.

    Screenshot and Edit

    Hold down on the Pen Button and long tap the screen with the S Pen to click a screenshot. The screenshot will immediately open up in the image editor and allow for editing, annotations and cropping. You can then share the image to various apps and services.

    Video Link

  • DIY : How to set-up tethering on your phone!

    DIY : How to set-up tethering on your phone!

    First and foremost : What is tethering?  Tethering refers to using a cell phone as a modem for your laptop or any other device. Creating a connection either with cables or wirelessly “tethers” your cell phone to your other mobile device. 

    Basically it’s using the internet on your phone for other devices. 

    Now, how is it done? Do you need to jailbreak/root your phone? Read-on!

    [tabgroup][tab title=”iOS”]

    Tethering on iDevices was more of a hassle in the past, but come iOS 5, that changed! It can be done in 3 ways. Each requiring a data package from your carrier for your iDevice.  We tethered our iPhone 4s on AirTel. 

    Whoops! Something went wrong!
    Click on Personal Hotspot
    Whoops! Something went wrong!
    Set your password and turn it on

    Through WiFi 

    Probably the most convenient of the 3.  Go to Settings->Personal Hotspot->On. Set your password and it’ll prompt you to turn on your WiFi and Bluetooth. Once this is done, your device becomes a Wifi Hotspot for other devices to connect to. 

    As shown in the screenshot, the name of your device, in this case “Shivaank”, shows up as a WiFi network on your other device. Just click on connect and you’re connected to the internet via your iDevice’s network. 

    Whoops! Something went wrong!
    Your device name comes up as a WiFi connection

    Through USB 

    The basic steps for tethering through USB are the same as above. Go to Settings->Personal Hotspot->On. To save battery, turn off your WiFi and Bluetooth as you won’t be needing them. 

    Whoops! Something went wrong!
    Your device serves as an Ethernet connection

    Connect your device to your laptop and turn on your Hotspot toggle. Then go to your network settings of your laptop and you’ll see  your devices name as an Ethernet connection. Just click on connect and you’re good to go!

    Through Bluetooth

    Now, we were only able to tether our device to a MacBook using Bluetooth. The name of your device simply shows up on Bluetooth devices list. Click on pair to get going!!
     
     
    Apps like MiWi and Tether Me are viable options for those running an older version of iOS but these are paid apps.


    [/tab][tab title=”Android”]

    On Android, the tethering process is a breeze! Tethering feature is inbuilt into Android and to activate follow these steps.


    Through WiFi

    Go to Setting->Wireless and Network->Tethering and Portable Hotspot->Portable Wi-Fi hotspot and turn it on. The name of your connection (which you can configure) shows up on other device’s to connect and voila! You’re connected!

    Whoops! Something went wrong!
    You can change the name of your WiFi by configuring it.
    Whoops! Something went wrong!
    Windows Phone connected to Android Hoptspot

    Through USB

    Go to Setting->Wireless and Network->Tethering and Portable Hotspot->USB Tethering. Click on it to turn it on and the computer you’re connected to shows your devices network as an ethernet connection. Click on connect to start using it.

    Whoops! Something went wrong!
    Tethered through USB
    Whoops! Something went wrong!
    Device comes up as Ethernet connection

    [/tab]

    [tab title=”Windows Phone”]

    Possibly the easiest of the three! Just go to Settings->Internet Sharing and turn it on! That’s it! You’re device shows up as an internet hotspot, click on connect and you’re done.

    Whoops! Something went wrong!
    Click on Internet sharing
    Whoops! Something went wrong!
    Turn it on and you're done!

    [/tab][/tabgroup]


iGyaan Network
Privacy Overview

This website uses cookies so that we can provide you with the best user experience possible. Cookie information is stored in your browser and performs functions such as recognising you when you return to our website and helping our team to understand which sections of the website you find most interesting and useful.