Category: Do It Yourself

  • How To Keep Your Facebook Account Safe

    How To Keep Your Facebook Account Safe

    Facebook is part of our daily routine, it is very important for us to take care of its security so that it does not harms us in some or the other way. Here are some steps you may want to follow to make sure that you have your Facebook account secured:

    Privacy settings: 

    Set your privacy setting to ‘Friends only’, by doing this, you will be able to have control who has access to your information and pictures. For certain pictures, you can also select certain friends that you do or do not want them to see. this is known as “Custom” sharing.

    Always monitor pictures:

    Always monitor pictures that other people put of you and tag you on. You can see the tagged pictures of you by going to your profile, click on “Photos”- you should see “Photos of You” and the number of tagged pictures. Click on that, and look through the pictures. You can un-tag any photo of you, but people still have the ability to see it. Click “Report/Remove Tag” under the “Options” on the bottom of the picture. Also if you think that the particular picture could put you in a compromising situation, consult whoever put it up and ask him or her to remove it immediately. If they are your so called friends they should acknowledge your request.

    Personal Information:

    Avoid putting your phone number, mailing address, or your home address in your profile. People often use words such as pet’s names or numbers as passwords, so it is not recommended to publish them on-line.

    Change your password:

    Don’t make your password something obvious such as your birthday or mother’s maiden name. Try to have at least one capital letter, one lowercase letter, two numbers, and a symbol. The longer and more complicated the password, the safer you are from getting your account hacked. Always remember to log out after you’re finished with Facebook, especially on a shared computer.

    Connecting Facebook with untrusted websites:

    The purpose of Facebook is to connect you with people you know and not adding everyone randomly. Making your profile public means you’re sharing your information with everyone, even though you don’t know them, a risk that you would not want to take. Never link Facebook with any untrusted websites.

    Add someone you know:

    Don’t friend anyone out of your state/country unless you know them pretty well. Only friend people you know. Make sure they are the correct person by looking through their pictures. If they are not familiar, then remove them as a friend by getting to your friend list. Report/Block anyone that seems to threaten or harass you.


    These are some steps that will help you to update and secure your much loved Facebook account. If we missed any please let us know below!


  • 5 Essential Tips To Get A Happy Motor Bike

    5 Essential Tips To Get A Happy Motor Bike

    Maintaining a bike is an easy routine. But for most it can be kind of troublesome and tiring. Taking care of your bike is the key to a bike that will serve you well for years.

    First of all change your engine oil or gear oil frequently as it lubricates your gears and engines, and also keeps your engine cool. Not changing the engine oil will cause further damage to the engine Which can’t be noticed early. The owner’s manual will specify how frequently the oil should be changed and this schedule should be followed.

    Next is the spark plugs; it is the item which causes a spark which in turn will ignite the petrol. This should be changed as specified in the owner’s manual (or if a problem is suspected). It is critically important to use the correct spark plug grade and type. If the manual suggests an iridium plug then these can be worth the extra cost, lasting 16,000 kms or more. Considering that it can take several hours to access the spark plugs on many modern bikes this is money well spent.

    Spark Plug
    Spark Plug

    The chain which rotates the rear tire should be kept lubricated. If it’s kept lubricated, it should last for a very long time (50,000 kms is not unusual). If it’s not lubricated, it would be damaged due to excess heat and will wear. This cumulative wear on all the separate links makes the chain loose, and more likely to fall off the sprockets. This can be very dangerous indeed. The chain tightening procedure should be detailed in the owner’s manual, but bear in mind that too tight is a lot worse than too loose.

    Also washing the bike is part of maintaining. Keeping it clean of dirt will not only make it look nice, it has its benefits and it’s the key to a bike which lasts long. It also makes it easier to notice missing or loose bolts and nuts.

    Washing the bike.
    Washing the bike.

    Checking the tire treads every once a week is a good habit. You should change the tyres when you notice a change in the way the bike handles, or at the very latest when the tread is worn down to the wear bars. Under-inflated tyres will overheat and may fail. Over-inflated tyres will give less than optimal grip specially on Indian roads.

  • Take Care Of Your Smartphone, Only You Can Do It!

    Take Care Of Your Smartphone, Only You Can Do It!

    It is difficult to find someone these days who does not uses a smartphone, no matter if its a low or high end device they come up with hard earned money. Even while you take care of your phone have you ever faced any problems or do you have anything you would want to change with your smartphones ? We are sure 90% answers would be yes!

     A smartphone makes your life easier and helps you in daily tasks and activities, imagine your life without whatapp? facebook on mobile? a good camera ? emailing on the go? these are just few that are done with the smartphones. We really do not count on the tasks that we do on our phone,  a lot of multitasking and using the phones every now and then. The only thing we forget is that even though the phone gives us so many benefits to make life easy, at the end of the day it is a machine which needs to be cared for.

    We get our car/bike serviced because when you use them for a while or so they would need to be thoroughly cleaned and tuned up as they are machines. We are not saying to get your smartphone serviced, but what you can do is to take care of it on daily basis. Here are some basic steps that you can follow:

    • The Screen- This is one of the first part prone to scratches, can be because of anything like: nails, keys in the pocket, some change, the irregular surface its kept on or a bad quality screen guard. It is very important that we use good quality screen guards on our much loved smartphone and also taking care of small things like where we keep our phone. 


    Scratches
    Screen scratches
    • The Phone Itself- Not only the screen but the phone’s body is easily prone to scratches too, no matter how much you care for the phone there are some scratches that shows up now and then. In order to protect your phone’s body you can use a good back cover, that might not only give safety but add up to looks.   

    Back cover scratches


    •  The Battery- The most talked about problems is the quick draining battery, does your phone lasts for just a day ? or not even that ? well, here are few steps that might just help you. Make sure that the brightness of the screen is as per your need because the more brighter it is the more battery it consumes. You should enable the power saving mode. Close all unnecessary apps and most importantly NEVER overcharge your phone, this can result to low life of battery or harm the phone charging port in the long run.  


    These are few steps that can help you to take better care of your phone. We spend upto 45,000 Rupees for the best of smartphones available, so its good if we take care of them which would further ensure these phones to be with us for long times.

  • DIY : How to Root Micromax Canvas 4 A210

    DIY : How to Root Micromax Canvas 4 A210

    If you recently bought the new Micromax Canvas 4 A210 and need root access to download games or modify the OS?

    Here is a quick method by iGyaan to Root Micromax Canvas 4 A210!

    Simply follow the instructions below.

    (Note : the following method will also work for the Micromax Canvas HD A116)


    Here is what you need

      1. Micromax Canvas 4 A210 (For Sure)
      2. Windows PC/Laptop
      3. USB – MicroUSB Cable
      4. iGyaan Micromax Canvas Root File (based on Motochopper) (Right click and save)
      5. Patience and Perseverance 


    Root Micromax Canvas 4 A210


    Step 1:

    Make sure you phone is fully charged.


     Micromax Canvas 4 A210 Root 0

    Step 2:

    Enable USB debugging on your device.

    Go to Settings > Development > USB debugging.

    Disable Verify Apps over USB like shown above.

    Not: If you don’t see the  Development Panel, enable it by tapping several times on the Build Number in the Setting > About screen .

    Once enabled connect your Canvas 4 to your PC via the USB cable. (make sure all the drivers for the phone are installed, this will happen automatically)


    Step 3:

    Download the iGyaan Root Tools zip file above and unzip them into a folder called “root” on the Desktop.


    Step 4:

    Open this new “root” folder and launch Run.bat and press Enter.

    Micromax Canvas 4 A210 Root 3

    The Process will begin and your device may reboot several times, DO NOT REMOVE THE CABLE until the process is compete.

    Micromax Canvas 4 A210 Root 2

    Once completed you will find “SuperSu” in the application list. You now know how to root the Micromax Canvas 4 A210.


    Micromax Canvas 4 A210 Root 1

    UN Root Micromax Canvas 4

    Simply Open SuperSU > Settings > Full Unroot

    Your Micromax Canvas 4 A210 will reboot and Unroot.


    Video

    [youtube id=”R8VFEcmzCdw” width=”100%” height=”300px”] 


    Related Products

  • DIY : Clean Your Laptop Inside Out

    DIY : Clean Your Laptop Inside Out

    Most of us recognise the noise – the incessant whirring of an overworked laptop fan, struggling to keep a computer cool. You might put it down to old age, assuming that notebooks always get noisier and hotter until, eventually, they just stop working.

    That doesn’t have to be the case though. When your laptop is starting to get on a bit, overheating and shutting down on its own, it might not be worn out – it might just be dirty.

    However clean you keep the outside of your notebook, dust inevitably gets sucked into fans, crumbs fall into keyboards and fluff gets into vents.

    Follow these tips to keep the inside and outside of your laptop clean and running faster and smoother. 

    Note : Before cleaning any laptop, we suggest the laptop first be turned off and unplugged.

    To give your laptop a thorough cleaning, you will need:

    – Compressed Air Can
    – Rubbing alcohol
    – Cotton swabs (Q-Tips)
    – Dish soap (without bleach) or some other mild detergent
    – Paper towels
    – Flathead screwdriver
    – Towel

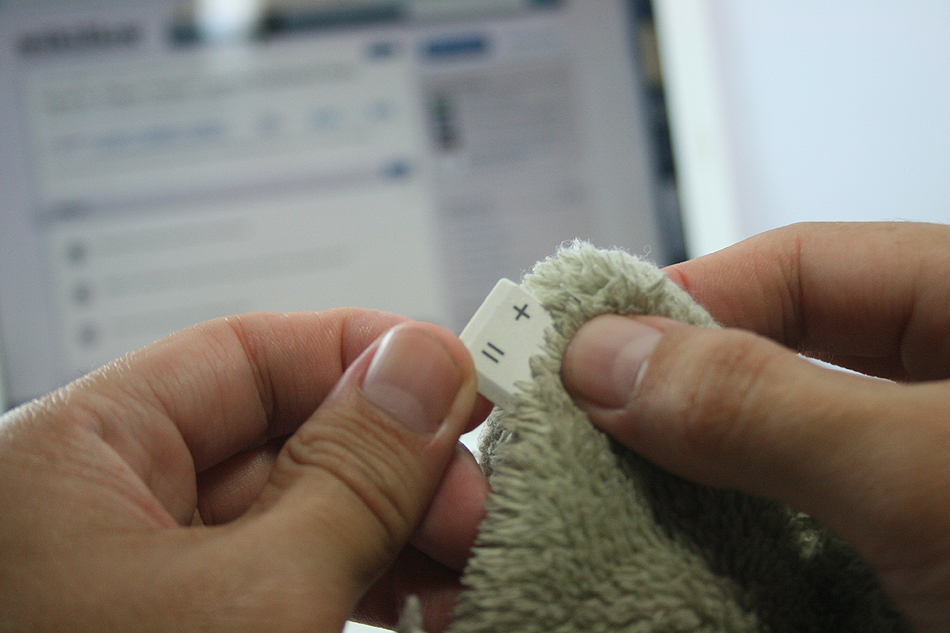
    1. To clean the keyboard.

    So your laptop keys stick for one reason or another. Perhaps you spilled a drink on it, or you just like to eat and surf the web at the same time. Your keys were basically snapped onto your keyboard at the factory and therefore can be unsnapped.

    Grab onto a corner of a key and firmly lift up.  You may be required to pry on more than one corner at a time to unsnap each key.  If a key (especially larger ones) prove difficult, wiggle a flathead screwdriver underneath the key and rotate the blade in several places to “persuade” it to let go.

    This process will take some time, be patient and don’t rush this part… that’s a sure way to break something important. Clean the keys one by one with the soap and cotton swabs.

    laptop

    Some of your larger keys may have one or several metal guide bars on their underside.  These bars slide into slots on your keyboard, so make sure not to bend the bars or their slots on your computer.

    Dip your cotton swab into the rubbing alcohol and begin to clean around each key post.  Remember if any liquid made its way under your keys to remove the key carriers as well and soak them with the keys.

    Once your keys are cleaned, wait for them to dry out and start popping them back in and you’re done!

    2. Cleaning the insides of the laptop

    When you can see dust and hair in or on the vents on the bottom and sides of the case, you can bet there is more inside the laptop. The only way to get it all out is to open the case. Don’t attempt to blow it out from the outside. This will only clog it up inside the case. All laptop cases will come apart fairly easily. There are several small screws that hold the case together.

    laptop

    There will probably be little rubber or plastic caps covering screws that hold the display on. Most all cases will be disassembled from the bottom. Make sure that the power cord and battery are removed before starting. Remove the hard drive and place in a secure place out of the way.

    Note : DO NOT USE MAGNETIC SCREWDRIVERS OR CORDLESS TOOLS.

    When the case is completely apart, you will see the ‘dust bunnies’ hiding near the case cooling fan and cpu cooling heat sink. Remove large pieces with a pair of tweezers. Compressed air in a can will work well to blow out the dust on and around the motherboard and keys.

    Be sure to hold the case upright when using air in a can. If the can of air is tilted downward when spraying, the gas inside will become a liquid. This will damage the components inside the laptop. When reassembling the laptop, be sure to use the right screws in the right places. Some screws are longer than others, and need to be used where they were originally. Pay particular attention to any ribbon cables and their connectors.

    The keyboard and mouse pad will use this. Make sure that the compression or wedge connectors are tight before proceeding to the next step. You don’t want to have to open the case again until it is time to clean it again. When you are finished, your laptop will be as good as new.

    3. Fans And Vents

    As for case fans, these can be removed and the blades wiped clean with cotton buds. It’s never a good idea to blow compressed air into them, because they may be forced to spin in the wrong direction, damaging them.

    laptop

    Before you close your machine up, take a good look down the sides of the case to locate the vents and passive heat sinks. Use your can of compressed air to carefully blow dust out of the case.

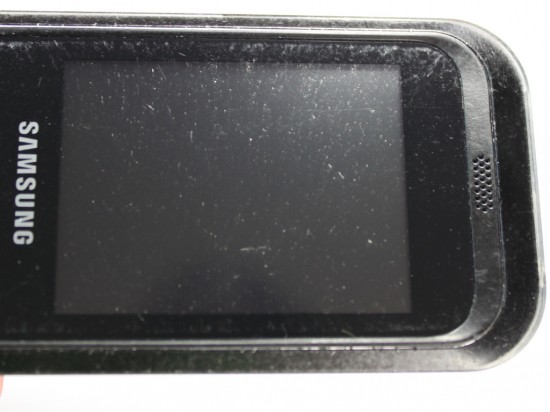
    4. Cleaning the outsides of the laptop

    Cleaning the exterior portion of the laptop case can help keep the laptop looking new. The exterior case of a laptop can be cleaned by using a damp cotton cloth that has been dampened with water.

    It is not recommended that the exterior case of the laptop be cleaned with household cleaning solutions. However, if there is a substance on the laptop that cannot be cleaned with water, we suggest using rubbing alcohol.

    5. Cleaning the LCD Screen

    It’s very easy to get streaks on your screens from just a couple of finger swipes. LCD wipes or a soft dust-free cloth sprayed with your home-made solution of distilled water and white vinegar can clean that up in a jiffy.

    laptop


    First, use the canned air to get rid of the bigger bits of dust. Then rub the moistened cloth or wipe the screen in circular motions.

    Disclaimer : Although these methods have been used to measurable success by various people, you should do so at your own risk. Make sure that the ports and other sensitive parts of your device are not exposed to the ingredients you use!

  • DIY : How to set-up tethering on your phone!

    DIY : How to set-up tethering on your phone!

    First and foremost : What is tethering?  Tethering refers to using a cell phone as a modem for your laptop or any other device. Creating a connection either with cables or wirelessly “tethers” your cell phone to your other mobile device. 

    Basically it’s using the internet on your phone for other devices. 

    Now, how is it done? Do you need to jailbreak/root your phone? Read-on!

    [tabgroup][tab title=”iOS”]

    Tethering on iDevices was more of a hassle in the past, but come iOS 5, that changed! It can be done in 3 ways. Each requiring a data package from your carrier for your iDevice.  We tethered our iPhone 4s on AirTel. 

    Whoops! Something went wrong!
    Click on Personal Hotspot
    Whoops! Something went wrong!
    Set your password and turn it on

    Through WiFi 

    Probably the most convenient of the 3.  Go to Settings->Personal Hotspot->On. Set your password and it’ll prompt you to turn on your WiFi and Bluetooth. Once this is done, your device becomes a Wifi Hotspot for other devices to connect to. 

    As shown in the screenshot, the name of your device, in this case “Shivaank”, shows up as a WiFi network on your other device. Just click on connect and you’re connected to the internet via your iDevice’s network. 

    Whoops! Something went wrong!
    Your device name comes up as a WiFi connection

    Through USB 

    The basic steps for tethering through USB are the same as above. Go to Settings->Personal Hotspot->On. To save battery, turn off your WiFi and Bluetooth as you won’t be needing them. 

    Whoops! Something went wrong!
    Your device serves as an Ethernet connection

    Connect your device to your laptop and turn on your Hotspot toggle. Then go to your network settings of your laptop and you’ll see  your devices name as an Ethernet connection. Just click on connect and you’re good to go!

    Through Bluetooth

    Now, we were only able to tether our device to a MacBook using Bluetooth. The name of your device simply shows up on Bluetooth devices list. Click on pair to get going!!
     
     
    Apps like MiWi and Tether Me are viable options for those running an older version of iOS but these are paid apps.


    [/tab][tab title=”Android”]

    On Android, the tethering process is a breeze! Tethering feature is inbuilt into Android and to activate follow these steps.


    Through WiFi

    Go to Setting->Wireless and Network->Tethering and Portable Hotspot->Portable Wi-Fi hotspot and turn it on. The name of your connection (which you can configure) shows up on other device’s to connect and voila! You’re connected!

    Whoops! Something went wrong!
    You can change the name of your WiFi by configuring it.
    Whoops! Something went wrong!
    Windows Phone connected to Android Hoptspot

    Through USB

    Go to Setting->Wireless and Network->Tethering and Portable Hotspot->USB Tethering. Click on it to turn it on and the computer you’re connected to shows your devices network as an ethernet connection. Click on connect to start using it.

    Whoops! Something went wrong!
    Tethered through USB
    Whoops! Something went wrong!
    Device comes up as Ethernet connection

    [/tab]

    [tab title=”Windows Phone”]

    Possibly the easiest of the three! Just go to Settings->Internet Sharing and turn it on! That’s it! You’re device shows up as an internet hotspot, click on connect and you’re done.

    Whoops! Something went wrong!
    Click on Internet sharing
    Whoops! Something went wrong!
    Turn it on and you're done!

    [/tab][/tabgroup]


  • How To : Upgrade Micromax A85 to Android 2.3.4 Gingerbread, Step by Step ( iGyaan Version)

    How To : Upgrade Micromax A85 to Android 2.3.4 Gingerbread, Step by Step ( iGyaan Version)

    Happy March 2012 people, since we promised a stable workable rom for the A85/ cherry Magnum / K Touch k700 with Android 2.3 , we are here to deliver in time. 

    Before we begin with the update process there are a few things we would like to clear out few important things with you people.

    Important Notes 

    1. We do not take guarantee that this rom will work perfectly and could crash / damage / brick your device. So proceed with your own caution.


    2. This ROM has been cooked by iGyaan but is majorly based on the official Cherry Magnum 2x update (you will see once you flash your phone)
    3. We have added bug fixes and tweaks from the Micromax Android 2.2 rom and K-touch K700 Rom to this upgrade.


    4. Unfortunately during the update you will loose all data/ apps and most importantly gesture features from the Micromax 2.2 stock rom. So Please Backup Accordingly.


    Here are our finding with this rom.

    (Based on 3 test units)

    1. Its very stable = Little or no crashes.
    2. Audio quality is excellent and networks are solid.
    3. Battery performance seemed better / depends on usage.
    4. Very fast and snappy.


    Okay now that you are aware of the above lets begin with the process.

    Tutorial

    What you need

    • Micromax A85/ Cherry Magnum 2x / KTouch K700 (either will do).
    • Windows PC.
    • RAR expander ( winRAR etc.).
    • USB-MicroUSb Data Cable.
    • iGyaan Update Bundle : [button link=”https://rapidshare.com/files/1042248031/igyaan_a85_bundle.rar”]Download Here[/button]
    • Finally , A strong heart and lots of patience.


    Step One 

    • Make sure you downloaded the iGyaan Update Bundle : if not then [button link=”https://rapidshare.com/files/1042248031/igyaan_a85_bundle.rar”]Download Here[/button]
    • Extract the RAR on your desktop.


    Step Two 

    • Extract vcredist_x86.rar and install the software within ( its Visual C++ redistributable)


    Step Three

    • Power off your A85/ Cherry Magnum 2x / KTouch K700
    • Once OFF : Hold the Power + Volume Up button till you see a Green Display 
    • Let go immediately after you see the green screen on the device

    Step Four

    • Plug in the USB cable into the PC and attach it to the A85/ Cherry Magnum 2x / KTouch K700
    • Windows will try and install the drivers but will not be able to.
    • Manually select the drivers ( included in the igyaan bundle in a folder called usbpcdriver)
    • Once the drivers are successfully installed Reboot you pc

    Step Five

    • Once rebooted Navigate to the iGyaan bundle and then folder NvMultiDown
    • Now run the NvMultiDOwn.exe


    Step Six

    • Once the program is running On the right side select the “iGyaan 2.3.4” update folder 
    • Uncheck the 2 boxes below the file location. (if they are checked.)
    • Remove the battery and usb cable from you A85/ Cherry Magnum 2x / KTouch K700
    • Repeat Step 3 from above and connect the Device to the USB cable
    • Once you connect the device will show up in the NvMultiDown program
    • Your device will start to update.

    Step Seven

    • Once Update finishes your device will boot with Android 2.3.4
    • Enjoy!


    Now a lot of you may face problems with the update, so those who figure out answers to the problems please help each other out in iGyaanForum.com in the discussion thread : [button link=”http://igyaanforum.com/showthread.php?t=541″ bg_color=”#bcc483″ border=”#7a097a” text=”dark”]Discussion Thread[/button]


    Please don’t mirror the downloads and keep the original link intact.

    If you create instructions don’t forget to link back to this page and don’t copy our links.


    Micromax Android 2.2 Stock Rom

    Incase you are facing problems with the 2.3 build that you cannot find a fix for, we have instructions to revert to the original rom. in our update bundle we have also included the stock rom.

    The stock Rom also includes the gestures app and all stock applications , incase you have warranty issues you can revert to the stock ROM aswell.

    Tutorial to revert to Stock 2.2

    Follow Step 1 – Step 5 Above

    Step Six

    • Once the program is running On the right side select the “Stock mmx 2.2” folder 
    • Uncheck the 2 boxes below the file location
    • Remove the battery and usb cable from you A85/ Cherry Magnum 2x / KTouch K700
    • Repeat Step 3 from above and connect the Device to the USB cable
    • Your device will start to downgrade to 2.2

    Step Seven

    • Once Update finishes your device will boot with Stock Micromax Rom.
    • Enjoy!


    Video Coming Shortly!

  • DIY : How to Jailbreak your iPhone 4s / iPad 2 Using Absinthe

    DIY : How to Jailbreak your iPhone 4s / iPad 2 Using Absinthe

    So ready to break your device free from the evil clutches of Apple? The highly awaited untethered jailbreak for iPhone 4s and iPad 2 is finally out. 

    Lets begin

    Here is what you need

    1. iPhone 4s / iPad 2 on iOS 5.o or iOS 5.0.1
    2. Download Absinthe from the links below
      [greenpois0n 1][ greenpoison 2]
    3. Apple computer/Hackintosh running MAC OS X / Snow Leopard
    4. Windows users will need to wait for the windows app

    Lets begin with Jailbreak

    Step 1

    • Make sure you backup your device with iTunes or have all you data synced with iCloud
    • For this jailbreak to work you have to disable backup passwords from iTunes.


    Step 2

    • Download and Open Absinthe on your Mac

    Step 3 

    • Plugin your iPhone 4s / iPad 2 on your mac using the USB cable
    • Click the Jailbreak button on Absinthe and wait for the process to finish.


    Step 4

    • Once the process is complete you will see a new app on your iPhone/iPads screen – Absinthe


    • Tap the app to start it ( make your you have internet connectivity)
      Note: you might get error connecting to database – due to high usage currently) 
    • Once you do get a connection it will download the Jailbreak data and reboot your device.
    • Once the device reboots you will see the Absinthe icon replace with CYDIA!
     

    Enjoy your Jailbroken iPhone 4s / iPad 2 ! 

    Video Coming Shortly!


  • DIY: Have a Crashed Ferrari, Make a Crashed Ferrari Coffee Table

    DIY: Have a Crashed Ferrari, Make a Crashed Ferrari Coffee Table

    Ever wondered what a Ferrari coffee table would look like? We have the right answers, and the wrong ones too. Folks over at Molinelli Designs found an ingenious way to turn a Rich mans sadness into happiness, depending on what you claim happiness is.

    So taking their cue we tell you how to make this wonderful coffee table

    Step 1

    Be rich Enough to Afford a Ferrari.

    Step 2

    Be dumb enough to crash your expensive Ferrari.

    Step 3 

    Make a coffee table with a shallow centre.

    Step 4

    Stuff it with your crashed Ferrari.

    Step 5

    Paint and cover with Glass

    Enjoy!

    [MAKE]

  • The complete guide for upgrading to iOS 5 on a Mac and PC

    The complete guide for upgrading to iOS 5 on a Mac and PC

    If you own an iOS device and are skeptical about the new iOS 5 update. Here is our quick guide for upgrading your precious iOS device to the latest from Cupertino.

    The first step is updating your Computer.

    Computer

    You will need to update you computer to the last builds of the following softwares, if you are on a PC only download the iCloud control panel and update iTunes.

    Lion 10.7.2
    iPhoto 9.2
    iTunes 10.5
    iCloud control panel for Windows


    iTunes

    Before you begin updating your device, the first step is always to take a backup

    Follow the guide Step by Step

    1. Backup your iOS device to your pc/mac using iTunes
      (Right-click on your device in the left-hand column in iTunes. Select Backup.)
    2.  Download the iOS 5 update. You can manually download the update here
    3.  Plug your iOS device into iTunes and Check for Update.
    4. iTunes will give you two options (Update or Restore), choose the one required and start updating.
    iCloud
    While your device is updating head over to iCloud in System>Preferences on a Mac (control panel in PC)
    • Use your existing iTunes ID to sign in 
    • If you don’t have an ID create one
    • Once you sign in you settings panel will show
    • Now set all the preferences according to your requirement.
    • Okay iCloud is set

    Set up Device

    • Once your iPhone finishes the update, you’ll be presented with the setup-assistant.
    • During the setup you’ll first be asked if you want to set up Location Services.
    • Next you will be asked whether to set as new device or restore (new feature in iOS)
    • Choose the relevant option and proceed.
    • Next you’ll be asked to add your Apple ID information. This information is used to set up iTunes, the App Store, and iCloud.
    • Next is iCloud, if you followed our Guide : just enter the same account details as you entered for iCloud on mac/pc.
    • The setup will now ask whether you want to backup to cloud of Mac, We suggest mac/pc (since the cloud will be busy for the time being)
    • Next the assistant will ask you a certain number of questions, which you can answer according to your choice, whether you want “Find my iPhone”
      or want to send information to Apple.

    You are all Done Enjoy your new iOS 5 Device 

    So did you upgrade to iOS 5 ?
    How was it?
    [polldaddy poll=5579753]
  • Update : How to Install Android 2.3.4 Gingerbread on the Samsung Galaxy 5  (i5500 / i5503) + Cyanogen Mod 7.1

    Update : How to Install Android 2.3.4 Gingerbread on the Samsung Galaxy 5 (i5500 / i5503) + Cyanogen Mod 7.1

    Update : Oct 9th 2011

    The Guide has been updated to include the latest rom update. For those who have already used this guide and are on the Madteam rom v1.0 (those who used the guide from Aug 15th) use the steps at the bottom of the page to upgrade.

    New iGyaan Guide 

    Did you think it was possible?, we didn’t either!. But following various guides and tweaks we were able to get Cyanogen mod 7.1 running on the Samsung Galaxy 5, Yes the 1.5 year old device from Samsung.

    The big differences we saw:

    • Tremendous improvement in battery life, almost fixes any battery leaks.
    • Fast and responsive OS Android 2.3, no lag and no jitters.
    • Clean looking UI + Cyanogen mod tweaks
    • Best Part : Nexus S style : CRT TV lock animation

    This Guide was put together using our own experience, and its here to help you out.

    Note: Like any other unofficial guide, there is a high chance that you might brick your phone.  iGyaan is in no way responsible for that and you are following this at your own risk.
     
    Okay so lets begin!
    Here is what you need 
    1. The iGyaan Galaxy 5 Pack : Download Here
    2. A Galaxy 5 : Duh!
    3. Widows PC
    4. USB – Micro USB data cable
    5. Patience and Humility.
    6. A MicroSD card with over 1GB free space.

    Step 1 (Important)

    • Backup all your contacts and files.
    • Sync your device to your Gmail Accounts

    Step 2 (Device Prep)

    • Time to put your Galaxy 5 in download mode
    • Power off your Galaxy 5
    • Hold Volume Down + Home + Power Button 
    • You should see the Download Screen
     

    Step 3 (Install Recovery)

    • Fire up ODIN (found in the iGyaan Galaxy 5 pack)
    • Select the EUROPA_v1.0.ops  in the OPS field ( also in the iGyaan Pack)
    • Select One Package and ClockworkMod-Galaxy5-v0.4.tar in the one package Field
      (Also in the iGyaan Package downloaded earlier.)
    • Connect your phone to your pc via usb cable, wait for it to show up in ODIN
    • Once it shows up click START ( follow the images below)


    IMPORTANT 


    Your Device Should now boot up in Clockwork Recovery like the image below.

    WARNING : DONT UNPLUG OR REBOOT your PHONE HERE.


    Step 4 (Copy files)

    • Using the D pad or Volume +/- buttons browse to Mounts and storage
    • Once in mounts and storage select “Mount USB Storage”
    • Your memory card will show up on your PC
    • Copy the “update-cm-7.1.0-RC1-MADTEAM-v1.6-signed.zip” to the memory card ( found in the iGyaan package)
    • Once copied, Safely remove /eject the memory card mount from your PC
      (Do not remove it from the phone and do not reboot the phone
    • Press the  back button several times, till you reach the main screen as the image above.

    Step 5 (Backups)

    • Browse to Backup and Restore
    • and select backup ( let the device backup your existing rom on the memory card)
    • Once done press the back button to come back to the main recovery screen.

    Step 6  (Install Prep)

    • Browse to Wipe date /factory reset and initiate it by selecting “yes”
    • Browse to wipe cache / initiate it by selecting “yes.”
    • Browse to advanced : Wipe dalvik cache.

    Step 7 (Install the Rom)

    • Browse to “Install zip from SD card”
    • Choose “Select zip from SD card”
    • Select the “update-cm-7.1.0-RC1-MADTEAM-v1.6-signed.zip” we copied to the memory card earlier.
    • Initiate it by selecting “yes”

    Step 8 (One more thing!)

    • Once its done Reboot by selecting reboot system now from the main menu
    • At this moment your device will boot in Cyanogen Mod 7.1 for Galaxy 5. on Android 2.3.4
    • Its not over yet!
    You will still need the Google Apps package to get the Market , Gmail, etc

    Step 9 (Install Google Apps)

    • Once your phone is booted press the power button
    • Select “reboot”
    • Select “recovery” 
    • You will boot back into Clockwork Recovery
    • Go to Mounts and Storage and select “Mount USB storage”
    • Connect your device to a PC
    • Download and copy the following file to the memory card of your phone : Google Apps iGyaan.zip
    • Once copied  : come back to main recovery screen and select “Install zip from SD car”
    • Select the “select zip from sd card” and choose “google apps iGyaan.zip” : install by selecting “Yes”

    Step 10 ( Final Steps)

    • Once all the above is done : reboot your phone
    • You will be boot into Cyanogen Mod 7.1 , but this time you will get the “Tap Android to Start” screen.
    • Follow the directions on the screen.

    Enjoy your newly revamped Galaxy 5.!

    This rom comes highly recommended, we installed it on our Galaxy 5 and its almost like a new phone, its much faster cleaner and much more stable than the Samsung Official Rom. this rom also improves the battery life by more than three times.

    Leave your feedback below, and if you were able to do it properly.

    If you have any problems post all your questions in the iGyaanforum.com thread over HERE 


    Steps to Upgrade if you have used the Old Guide


    Step One

    • Download the new iGyaan Package : Here 

    Step Two

    • Use a usb cable / sd card reader to copy the file “update-cm-7.1.0-RC1-MADTEAM-v1.6-signed.zip” to the SD Card root folder (the file is in the iGyaan Package) 

    Step Three

    • Reboot into recovery using the Rom Manager And choose “backup and restore”

        Next Create a new Backup.

    Step Four

    • From the Recovery main screen select “install zip from SD Card”
      and choose the file you copied above

    Step 5

    • Once the install is complete reboot the device and wait for it to load : first boot can take upto 15 minutes


    Enjoy the update with tons of bug fixes !


    As always the guide here is for informational purposes, iGyaan is not responsible for any softwares being used here and are courtesy their original developers. We therefore take no responsibility for any damages that may occur to your device.

  • Micromax A70 will Run Gingerbread + Easy Fix for Video Calling on Fring

    Micromax A70 will Run Gingerbread + Easy Fix for Video Calling on Fring

    We mentioned in our review that the Micromax A70 was not upgradeable to 2.3, after we published that today, we got a call. According to our source Micromax the A70 will run Android 2.3 and there seems to be an easy way to do it. We are trying to get the process and will give a quick tutorial, possibly a video tutorial on how to go about it soon after we have tried it ourselves. 

    Also to make Fring Video calls, an easy fix was recommended by one of our readers. All you need to do it fire up Fring,  then quit it , open the camera and switch to the front facing camera, and then reopen Fring, Voila Video calls will now work

    Note : if Video calls don’t work : jump into bring settings and make sure video calls is ticked. Thats all , we tested it and it works fine.

    This however will not work on Skype, even the hacked version of Skype. 

  • How To : Import Your Facebook Contacts to Google Plus (+) : Step by Step

    How To : Import Your Facebook Contacts to Google Plus (+) : Step by Step

    After getting you an Invite,

    And Telling you

    How to Setup your Account on Google Plus.


    We are now helping you shift your Facebook contacts to Google + .

    It is a tedious, process but it works


    Step 1. Yahoo Mail

    • Create a Yahoo mail account if you don’t already have one.
    • Login and click the contacts tab.
    • Once in the contacts tab you will be able to import contacts from Facebook.
    • Go ahead and do that.
    • After you enter your Facebook details all your contacts will appear in the contacts tab.
    • Next its time to export the contacts.
    • Click  the Actions button in the contacts screen.
     
    • Now click Export all and choose the Microsoft Outlook option.
    • Save the file
    • Move on to Step 2
     

    Step 2 : Windows Live Mail

    At this point you would want to say to yourself, Why would i need a windows mail account?

    Answer : Currently Google + supports contact import from Yahoo and Hotmail. But once you import your contacts from Facebook to yahoo mail, Google plus can’t import them. Same is the case with Hotmail/Windows Live Mail. But with our work around Google Plus will import your contacts, So go on ahead:

    • Make sure you have a Windows Live Mail or Hotmail account (if not get one) 
    • Next go into the Contacts Menu
    • Click Manage and then Click Import


    • Next, Choose  Outlook and import the file you previously exported from Yahoo mail.
    • Now that your contacts are imported in yahoo mail the next step is to add them to Google Plus

    Step 3 : Google Plus

    • Log onto your Google Plus account
    • Visit the Circles tab
    • Click find and Invite
    • Click on hotmail
    • Enter your details


    You are Done!

    You have successfully imported your Facebook Contacts into Google Plus. 
    Now go ahead and add people to the circles of your choice and invite them.


  • How to : Set up your Google Plus Account Step by Step

    How to : Set up your Google Plus Account Step by Step

    Today we are going to help you set up a Google Plus Account – Step By Step


    Step 1 : Invitations

    If you don’t already have an invitation to Google plus, then you should consider making friends with better people, like us.

    Hit this link to get an Invite 

    Note:

    • You will need a gmail email address or a fully qualified google profile to get this to work.
    • Google apps and associated email addresses  are currently not supported

    When you get an invite it should look something like the image below


    After you get an invite  you will need to click the button :  


    Step 2 : Register 

    Once you click on the button you will be redirected to the registration page:


    Add your details, upload and crop your profile Photo.

    And you are all set to CLICK JOIN


    Step 3 : Profile

    Now that you are in, you would want to set up your profile.

    You will be greeted with a similar welcome page : 

    welcome page
    • Click the sprocket settings button on the top right of you browser to get into Google Plus settings.


    • Next, Set up your privacy and sharing settings in the page.

    HIT – SAVE, and you are done!


    Step 4 : Setting up Circles

    Hit the circles button on your profile page to set up Circles.


    Once on the circles page you will be able to , find people by email addresses or by searching for them over other networks and email services like yahoo mail or hotmail.

    Simple create circles of your choice, Like Friends, Family, Colleagues, Game Buddies, College, etc.

    You can also add the same person to multiple circles.

    Once you are done finding and adding your friends, its time to start posting!.


    Step 5 : First Post!

    • Simple click on the share bar in your Google Plus homepage and start writing.
    • You can add media like videos or photos or even links and location from where you are posting.
    • Also select what all circles you would like to share this post with.
    • You can also leave it blank to share with everyone
    Once you are done typing click the green Share button.

    Congratulations you have successfully started using Google Plus (+)


    You can now start inviting your friends too!
    Stay tuned for an update to this post where we share details about Sparks, Hangouts and Streams


    We also have a tutorial on how to transfer your Facebook friends to Google + here.
  • Swype Comes to iPhone, IPod and iPad Courtesy Jailbreak : How To

    Swype Comes to iPhone, IPod and iPad Courtesy Jailbreak : How To


    The most popular keyboard from the Android OS has finally been ported to iOS via Jailbreak. So , if you have already Jailbroken your device, follow the step by step below to add swype to your device


    Step 1:

    •  Open Cydia and move to Manage tab

    Step 2:

    •  Tap on Sources > Edit > Add

    Step 3: 

    • When you tap on add, a window will pop up asking for a URL, type following URL:
    • http://wynd.x10.mx
    • Then tap on Add.

    Step 4: 

    • Once repo is added and packages are downloaded.
    • Go to the “Changes” Screen and Tap on “Swype”
    • Tap Install

    Step 5

    • Once Installed Respring Your Device
    • Swype is enabled on your standard keyboard
    A quick Video Demo is coming up shortly


iGyaan Network
Privacy Overview

This website uses cookies so that we can provide you with the best user experience possible. Cookie information is stored in your browser and performs functions such as recognising you when you return to our website and helping our team to understand which sections of the website you find most interesting and useful.