How to Install Android M on Your Nexus Device

At the I/O 2015 conference, Google announced the next version of Android. The company detailed some interesting features that will be available on Android devices later this year. With Android M, they have focused on improving the system’s overall quality and fixing the bugs found on Lollipop. While Google SVP Sundar Pichai’s speech seemed impressive, we wanted to see for ourselves what the fuss was all about.
We installed Google’s Android M developer preview on our Nexus 6 and decided to share the step-by-step procedure.
Disclaimer:
- Before you decide to install Android M on your device, consider the fact that it will wipe the smartphone’s memory entirely.
- The developer preview also contains several bugs and may be unstable.
- We wouldn’t recommend installing the OS on the Nexus device you use on an everyday basis. Some of the major applications are having trouble loading on Android M.
- The Developer Preview is only out for Nexus 5, Nexus 6, Nexus 9 and Nexus Player.
Preparation
- Back-up your Nexus Device.
- To make this quick and easy, before you begin, make sure you have ADB and fastboot installed on your computer. The easiest way to install ADB on your machine is by inserting the following command on your Command Line/Terminal:
bash <(curl -s https://raw.githubusercontent.com/corbindavenport/nexus-tools/master/install.sh)
- Download the factory images for your device here. Unzip and save them on a file on your desktop.
Method
- Now to begin, enable your device’s debugging mode and connect it to your computer via a USB cable.
- Open an ADB command line and enter ‘adb reboot boot loader’

- Open the folder containing your factory images.
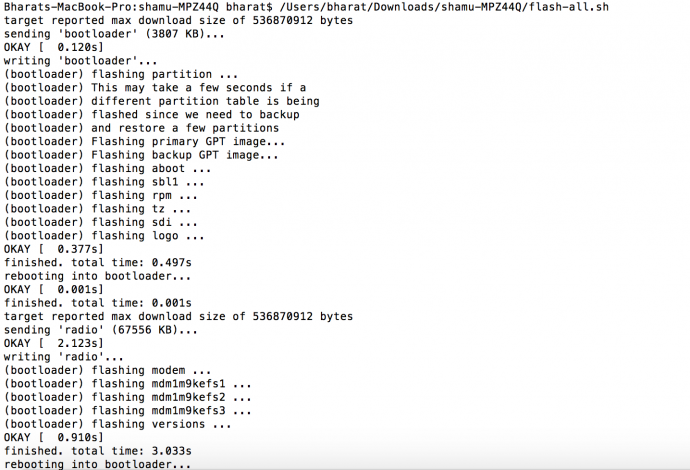
- Now on the ADB command line, enter ‘flash-all’ to run the installation. This is the final step and it will initiate the process, as seen below:

You will now have to wait till it gets installed. It took us approximately 5 minutes.
Now you can enjoy fiddling around. To read more about Android M, click here.


