


 Unboxed")
")


The iGyaan Beast PC Build: Components Used, Step By Step Guide

Step 1: Prepare the Cabinet
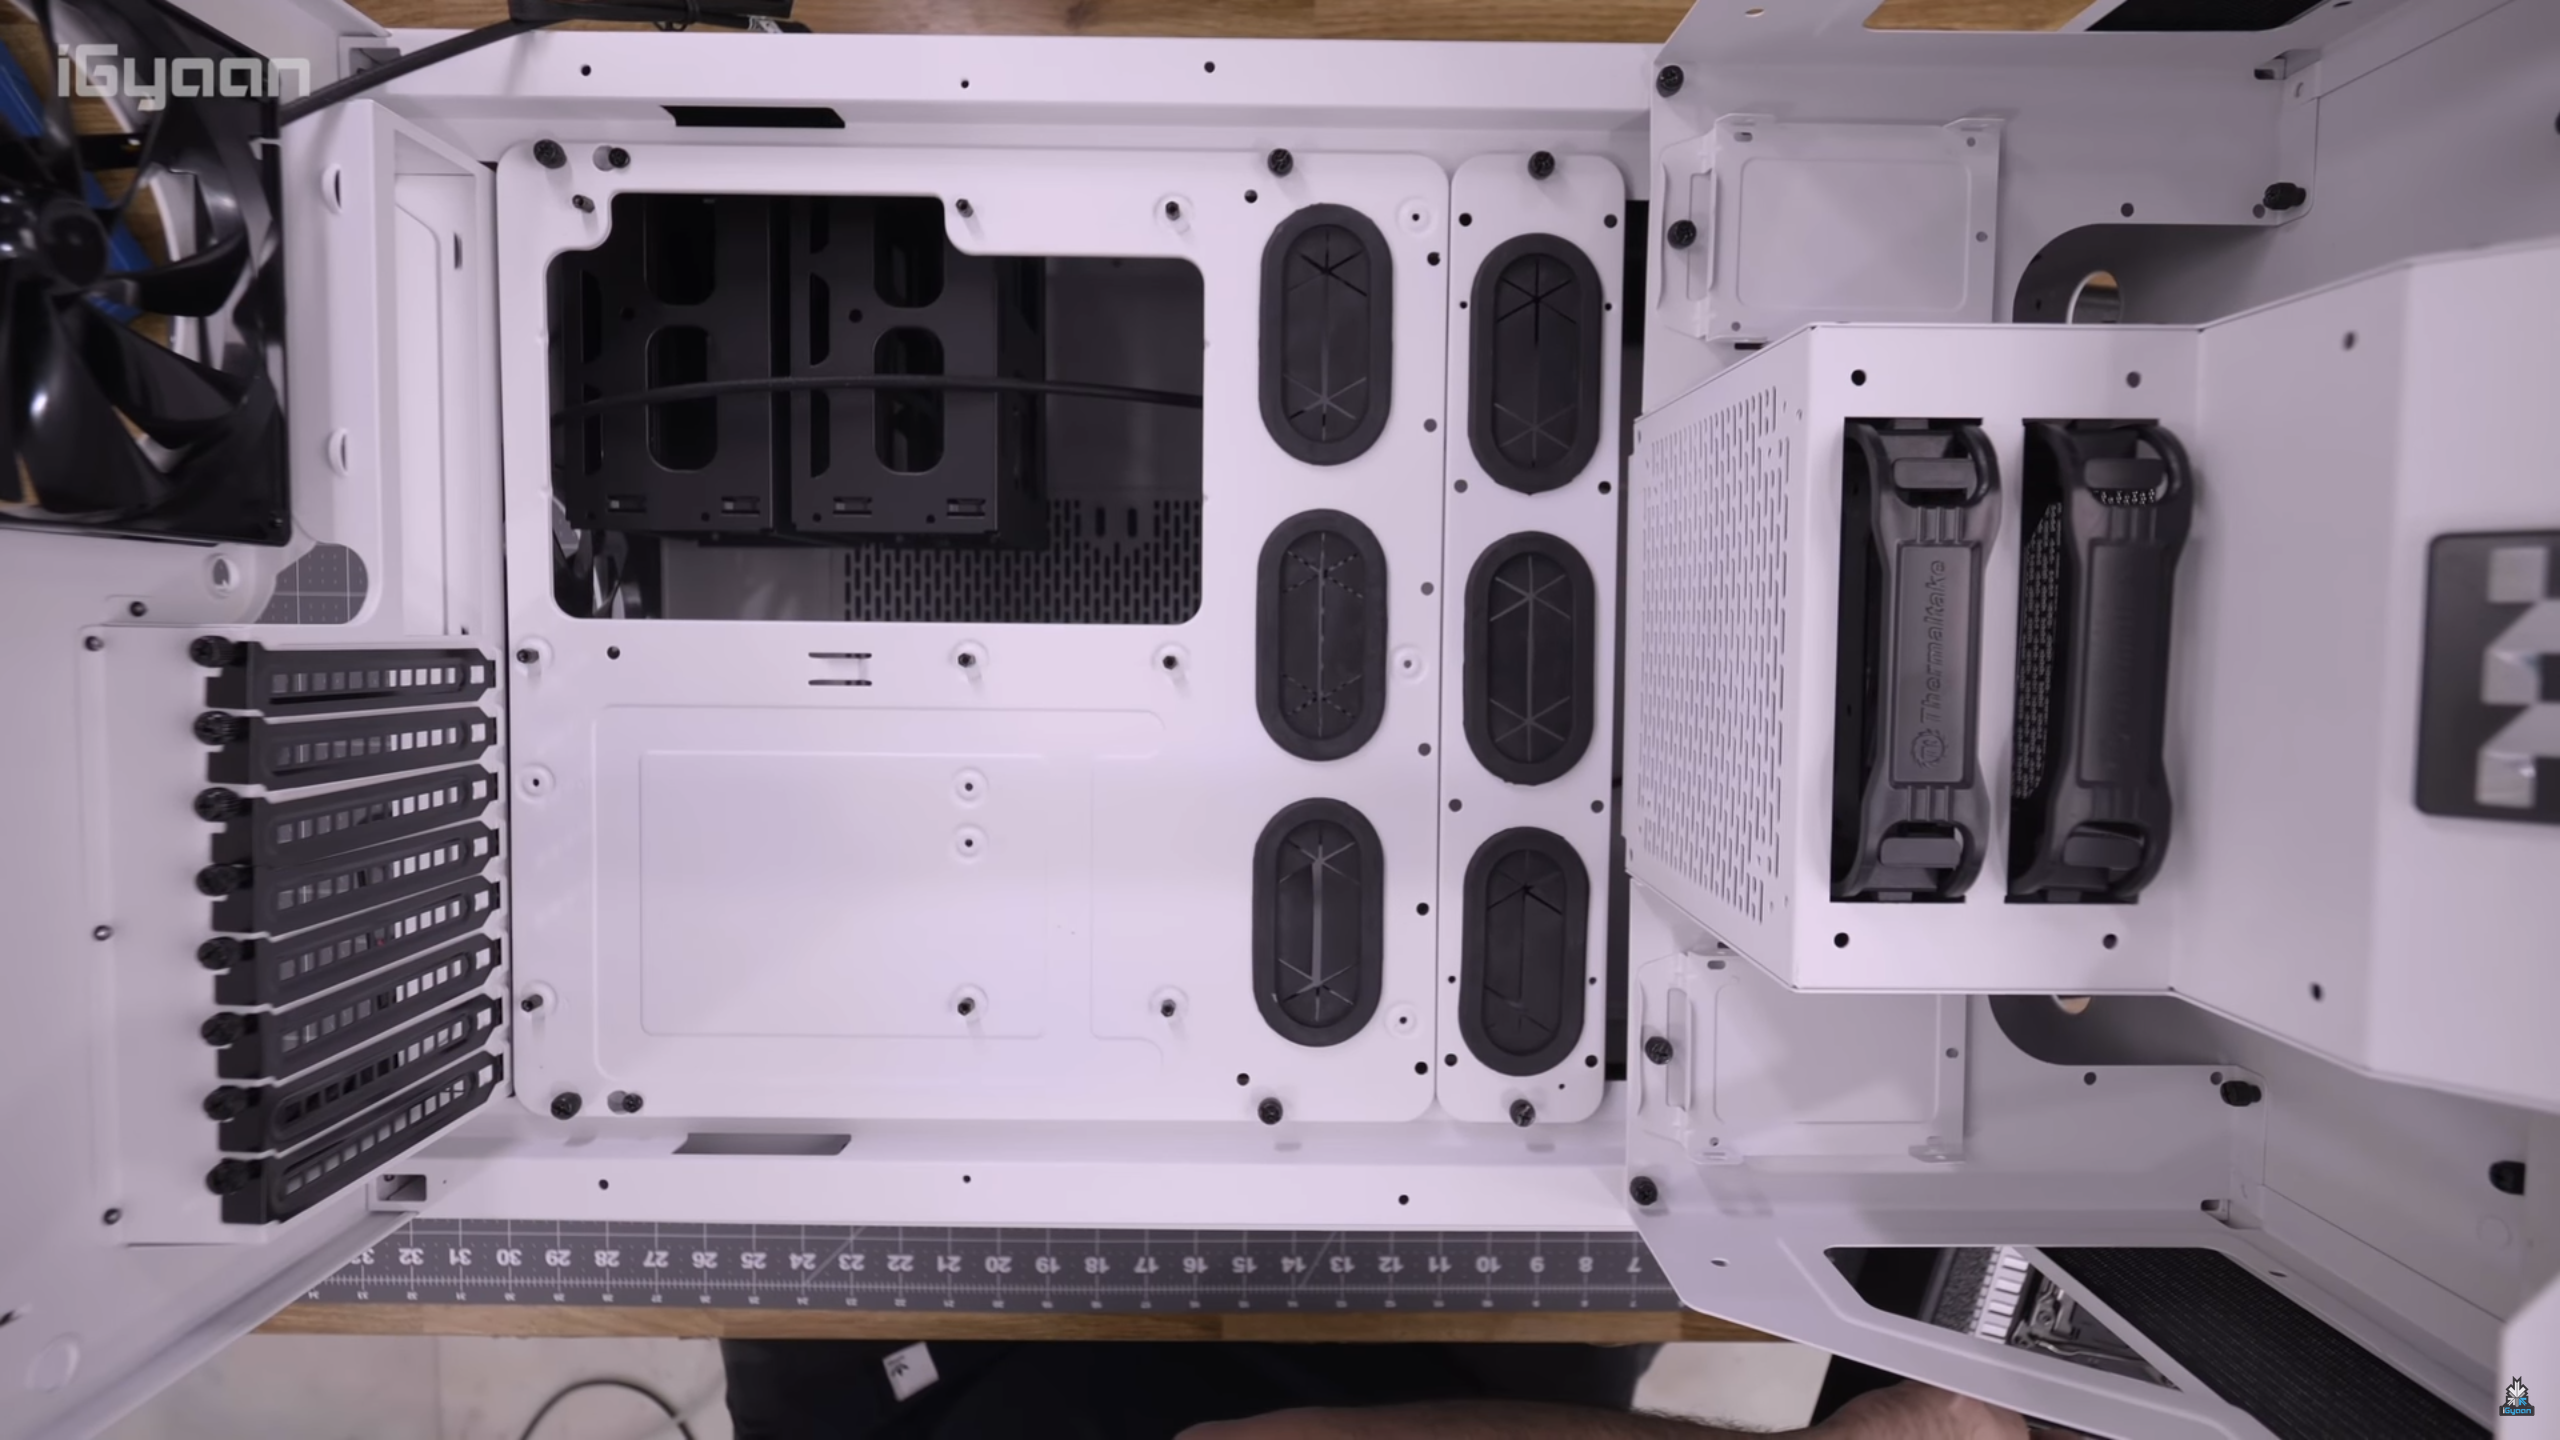 The first step was to strip down the cabinet, detach all the external covers and remove the tempered glass from the sides so that we could see where each component was going to be placed. Remember to keep track of all the screws and bolts you remove along the way so that you don’t face any hassles while putting the cabinet back together.
Step 2: Screwing The Motherboard Into Place
 The motherboard can be installed with or without installing the processor first, but we preferred getting the motherboard into place first and then working on it later. Since the standoffs were already present on the chassis, all we needed to do was screw the motherboard in. All the necessary screws were available with the Cabinet as well as the motherboard itself. Note that tightening each screw, in the beginning, is not a good idea as you may have difficulty in tightening the others. It’s better to lightly place the screws in the beginning and then tightening them together later.
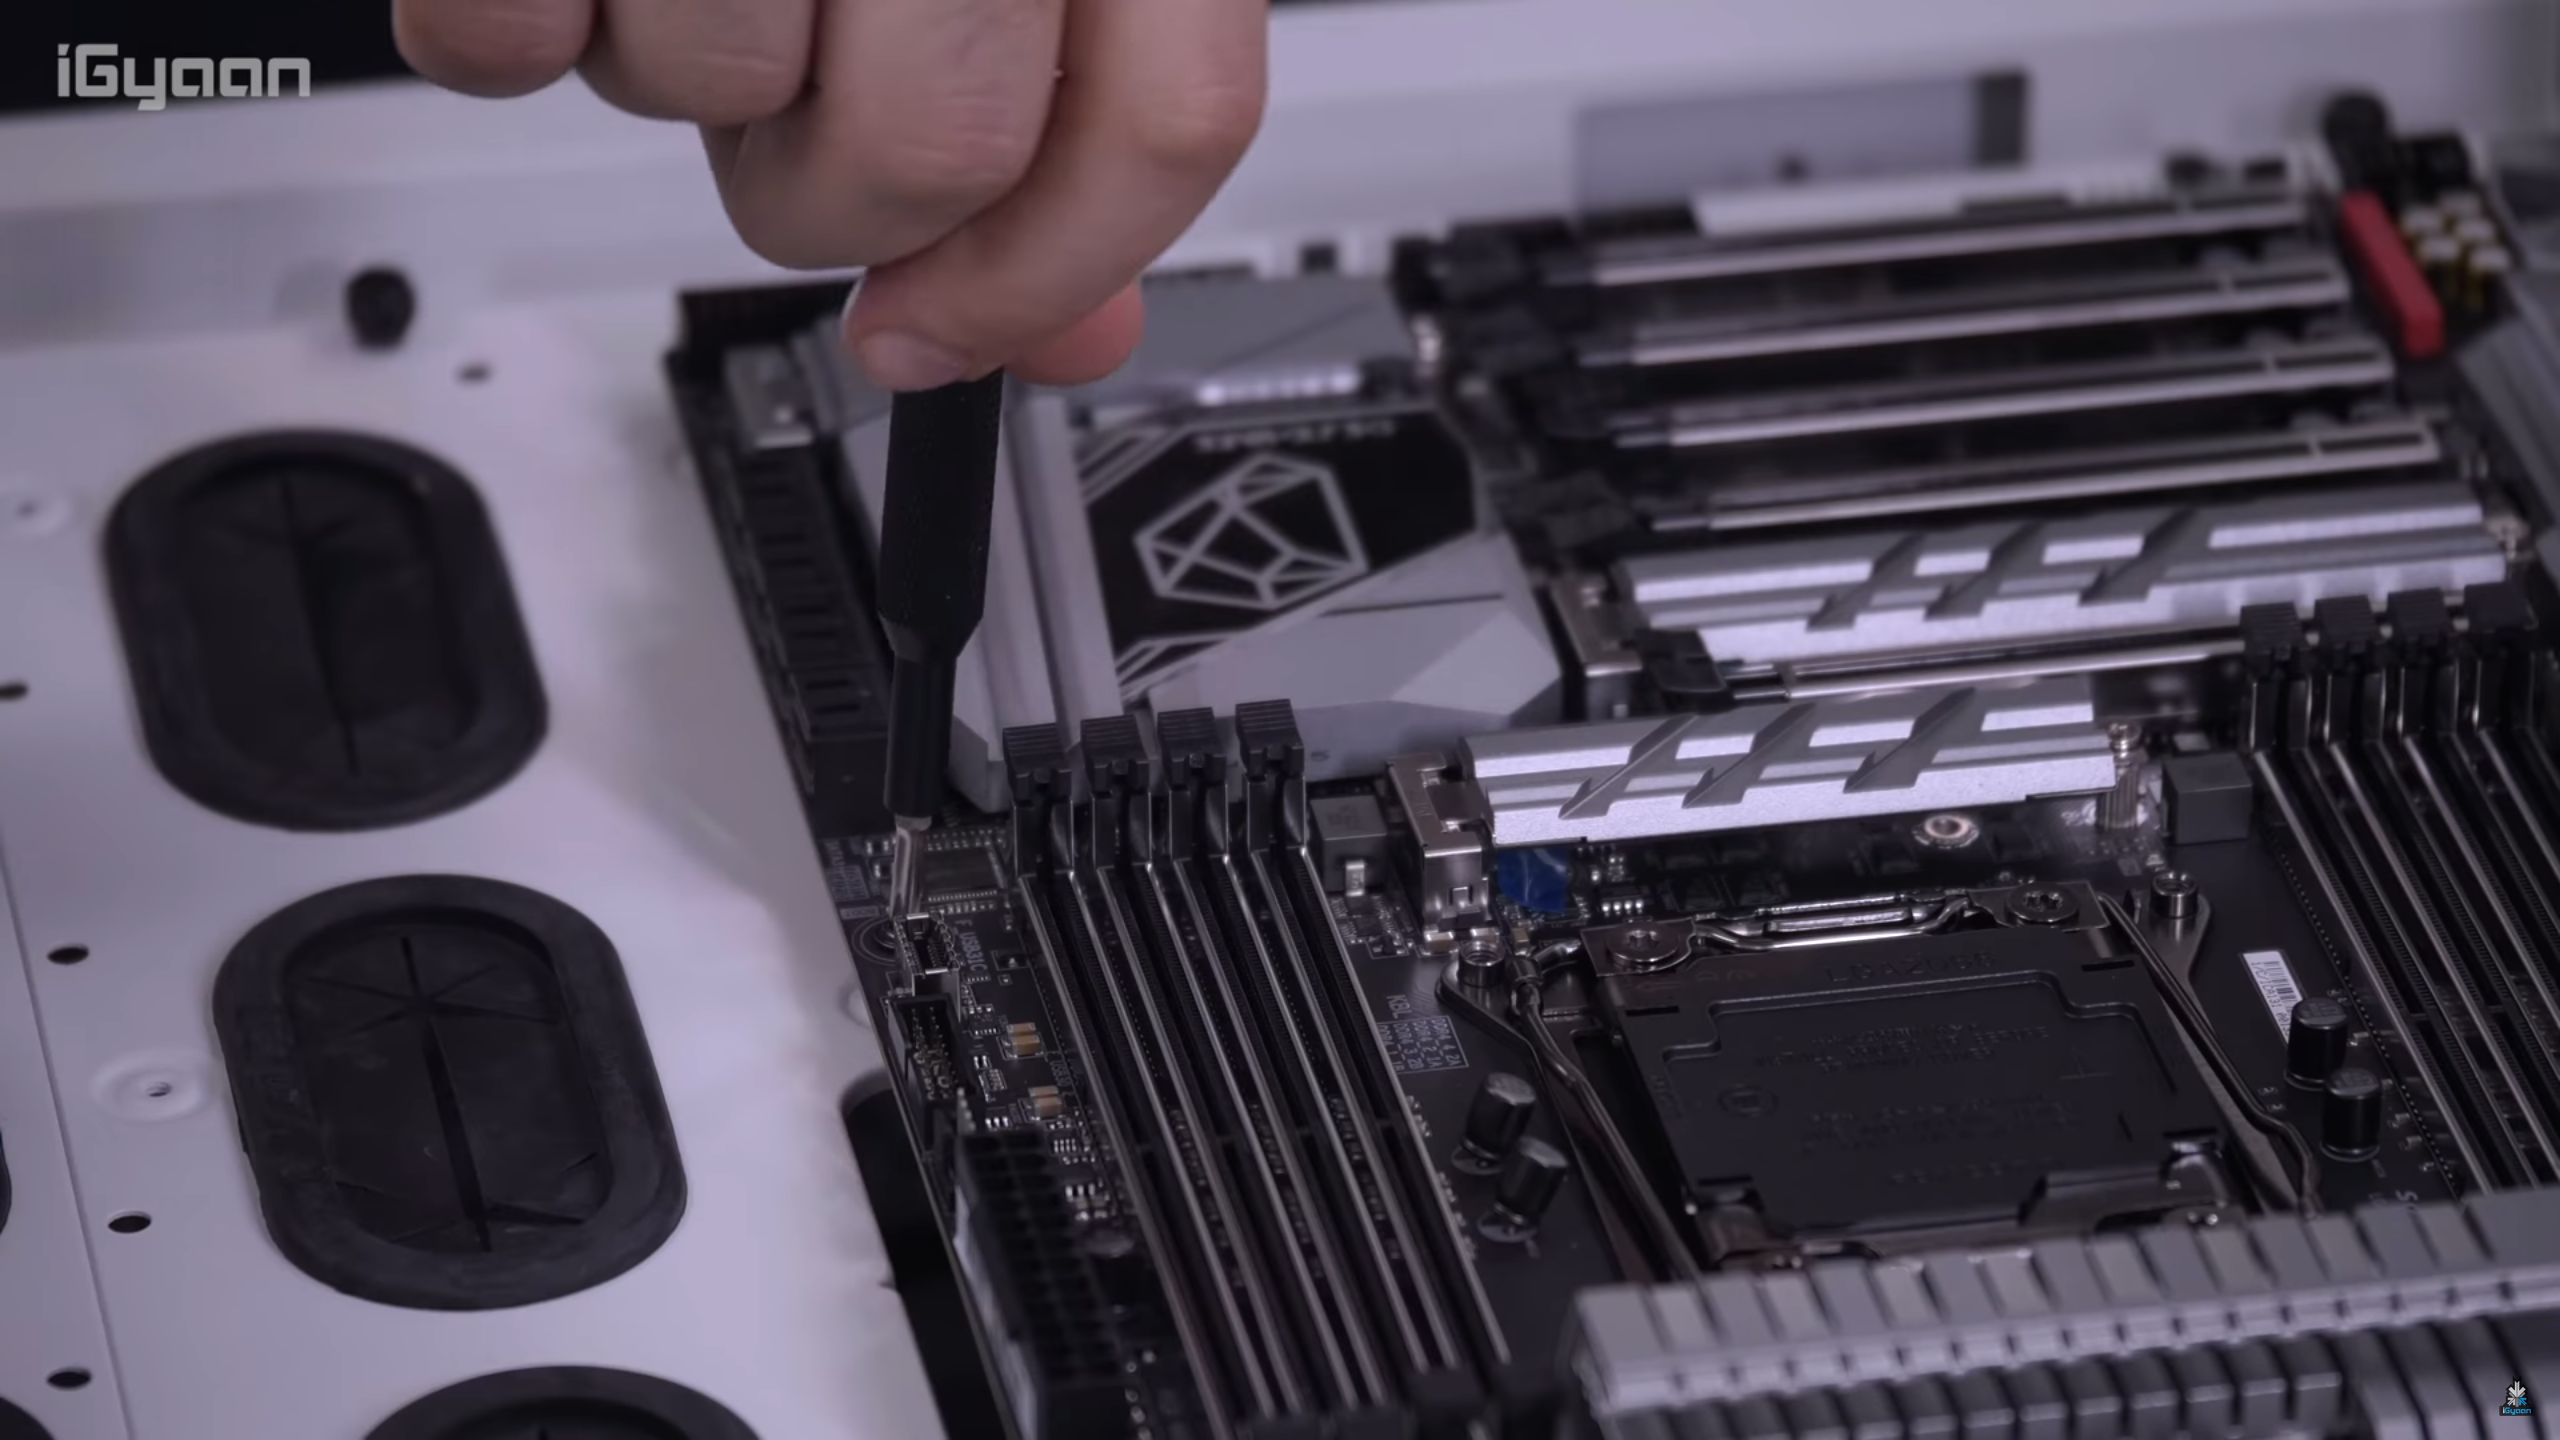
Step 3: Installing the Processor
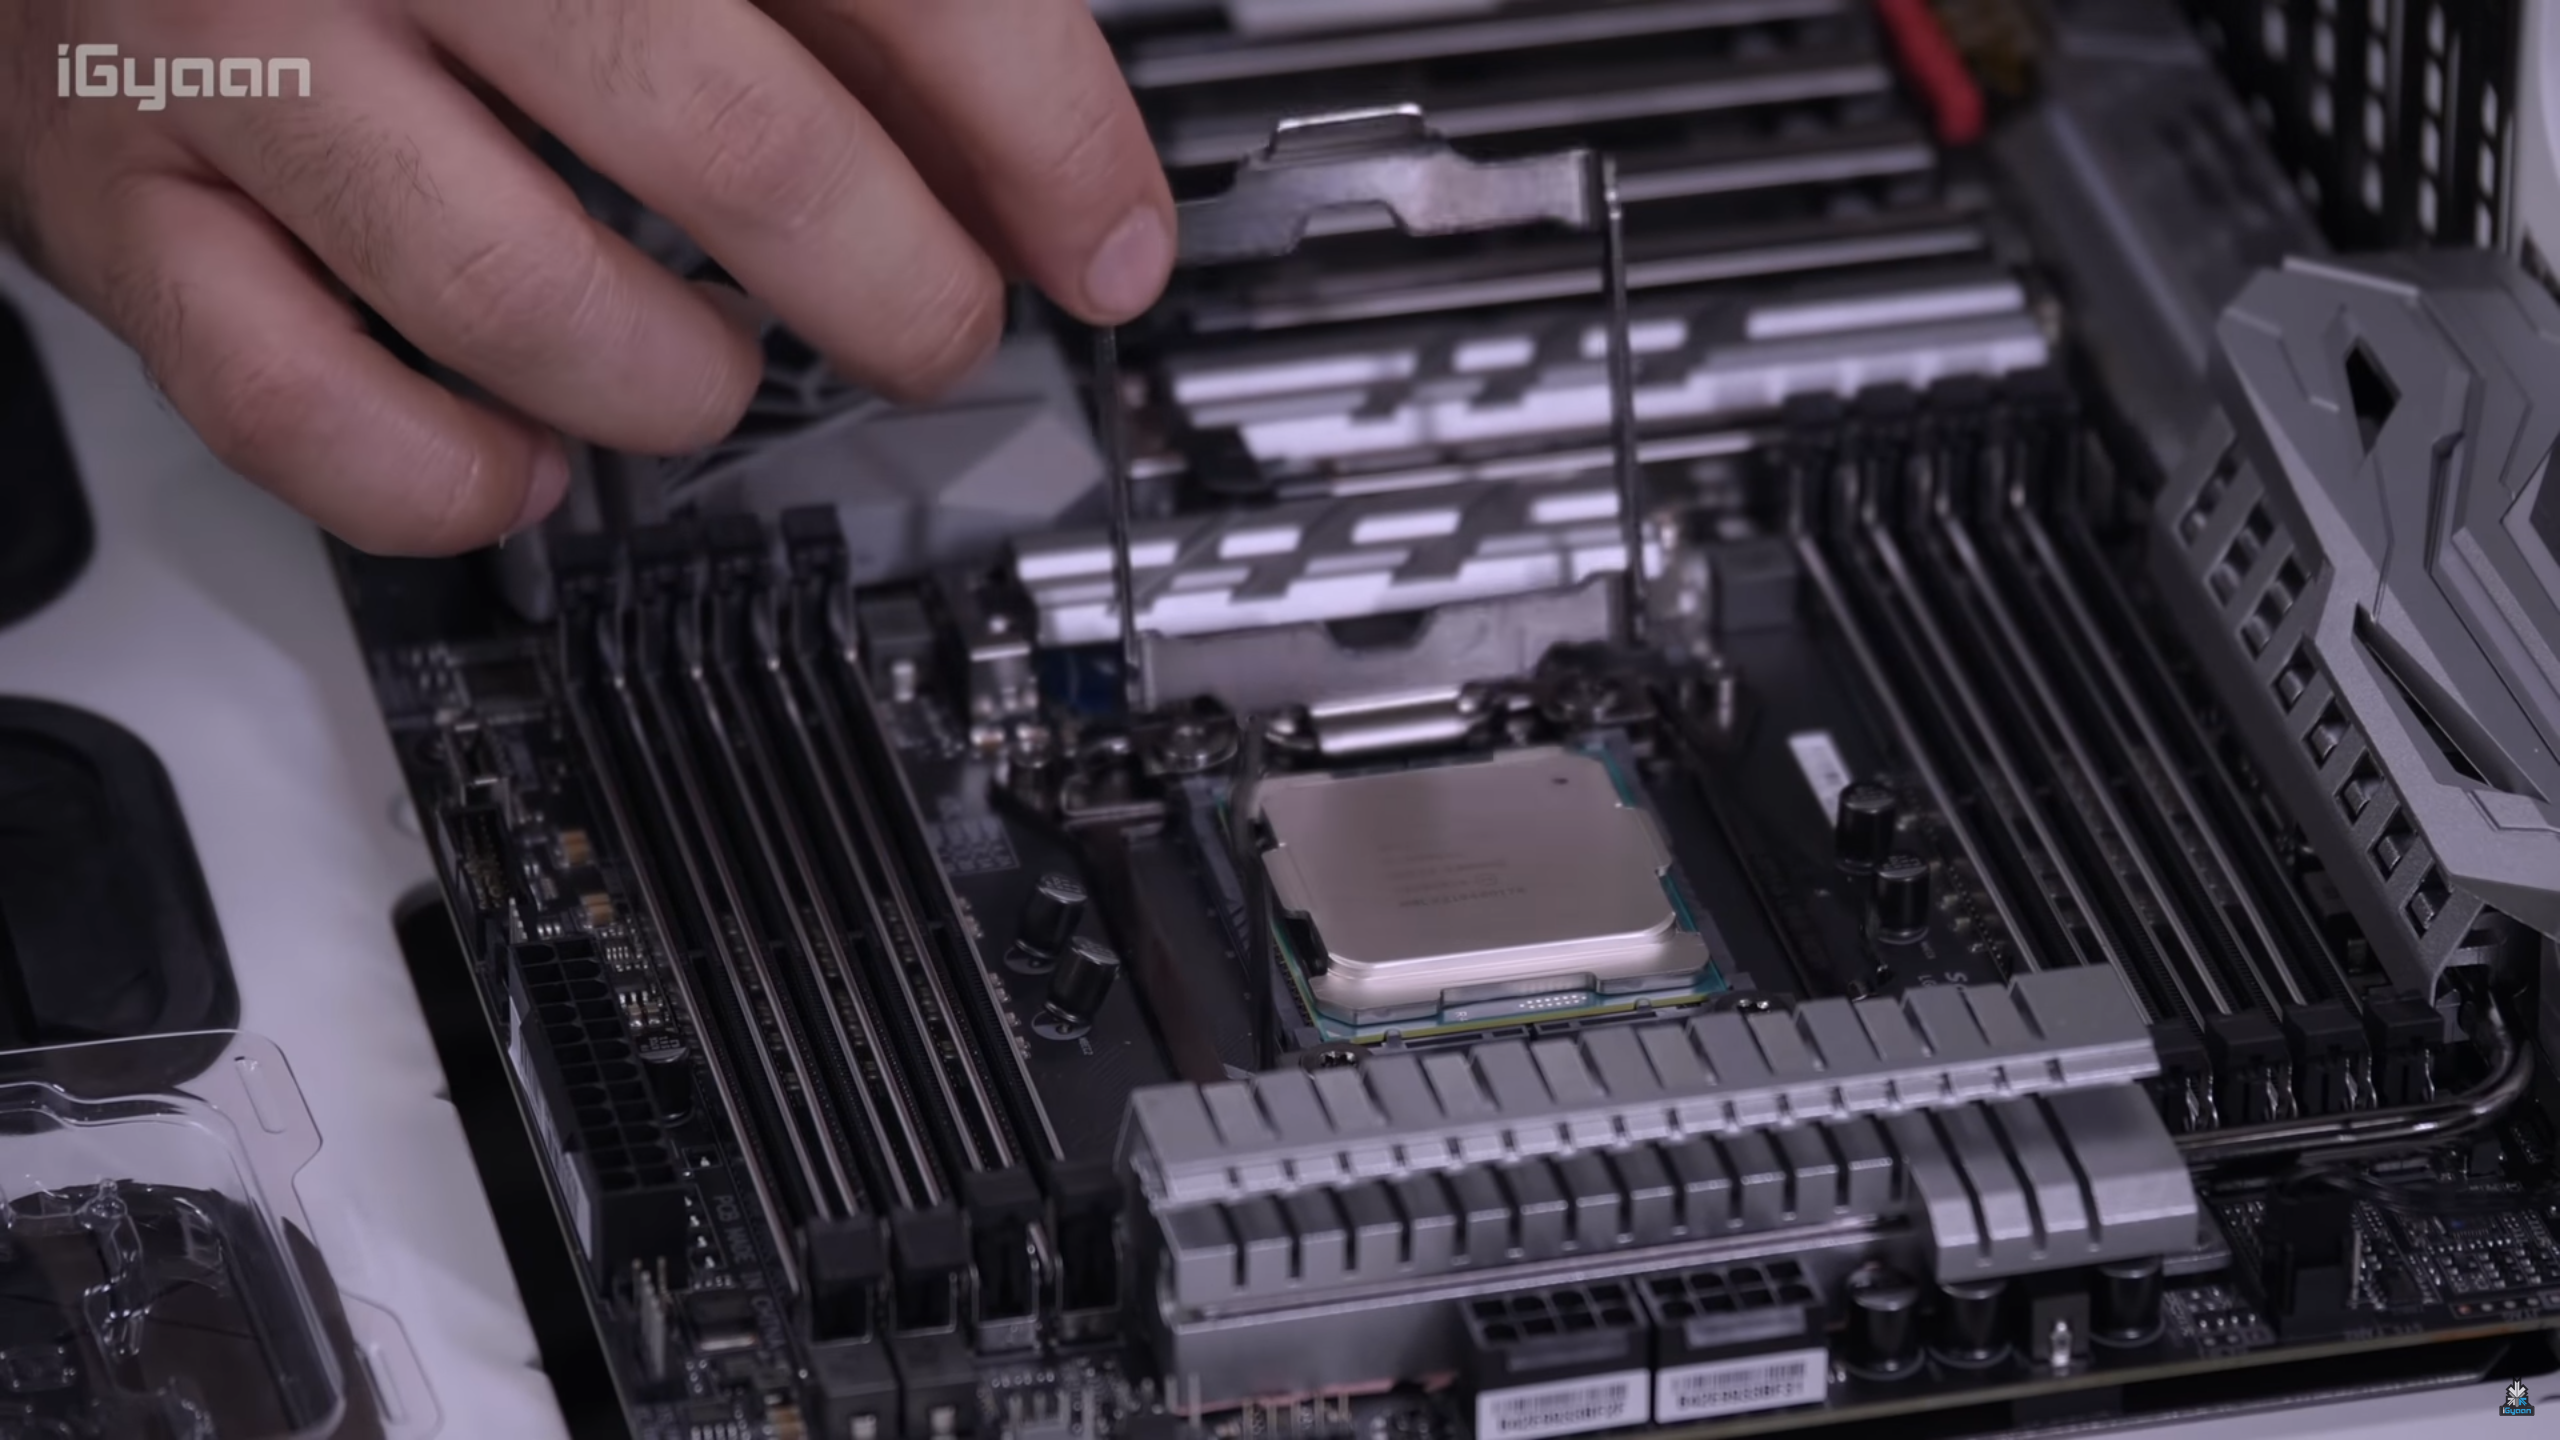 While plugging in the processor, be sure that your environment is static-free, since A static charge that’s too small for a human being to even feel can completely ruin a processor. Release the clamps surrounding the CPU tray on the motherboard, lift them and line up the tiny arrow on one corner of the processor with the tiny arrow on the CPU socket. Once you have lined up the arrows, gently place the processor on the socket. As soon as it’s popped in, place the clamps back and you’re done with the processor.
Step 4: Installing The SSD
 For the initial boot-up, we decided to install just 1 SSD in a dedicated slot on the motherboard. Remove the heat shield and insert the SSD into the slot. After this, place the heat shield back on and screw it into place. We plan to set up the RAID array once we complete the initially required setups on the PC. For that, we will plug in 8 SSD modules in 2 ASUS M.2 X16 Expansion cards (4 SSDs each) and plug them into the PCI slots. This will be done in the next phase of the PC build.
Step 5: Installing The RAM
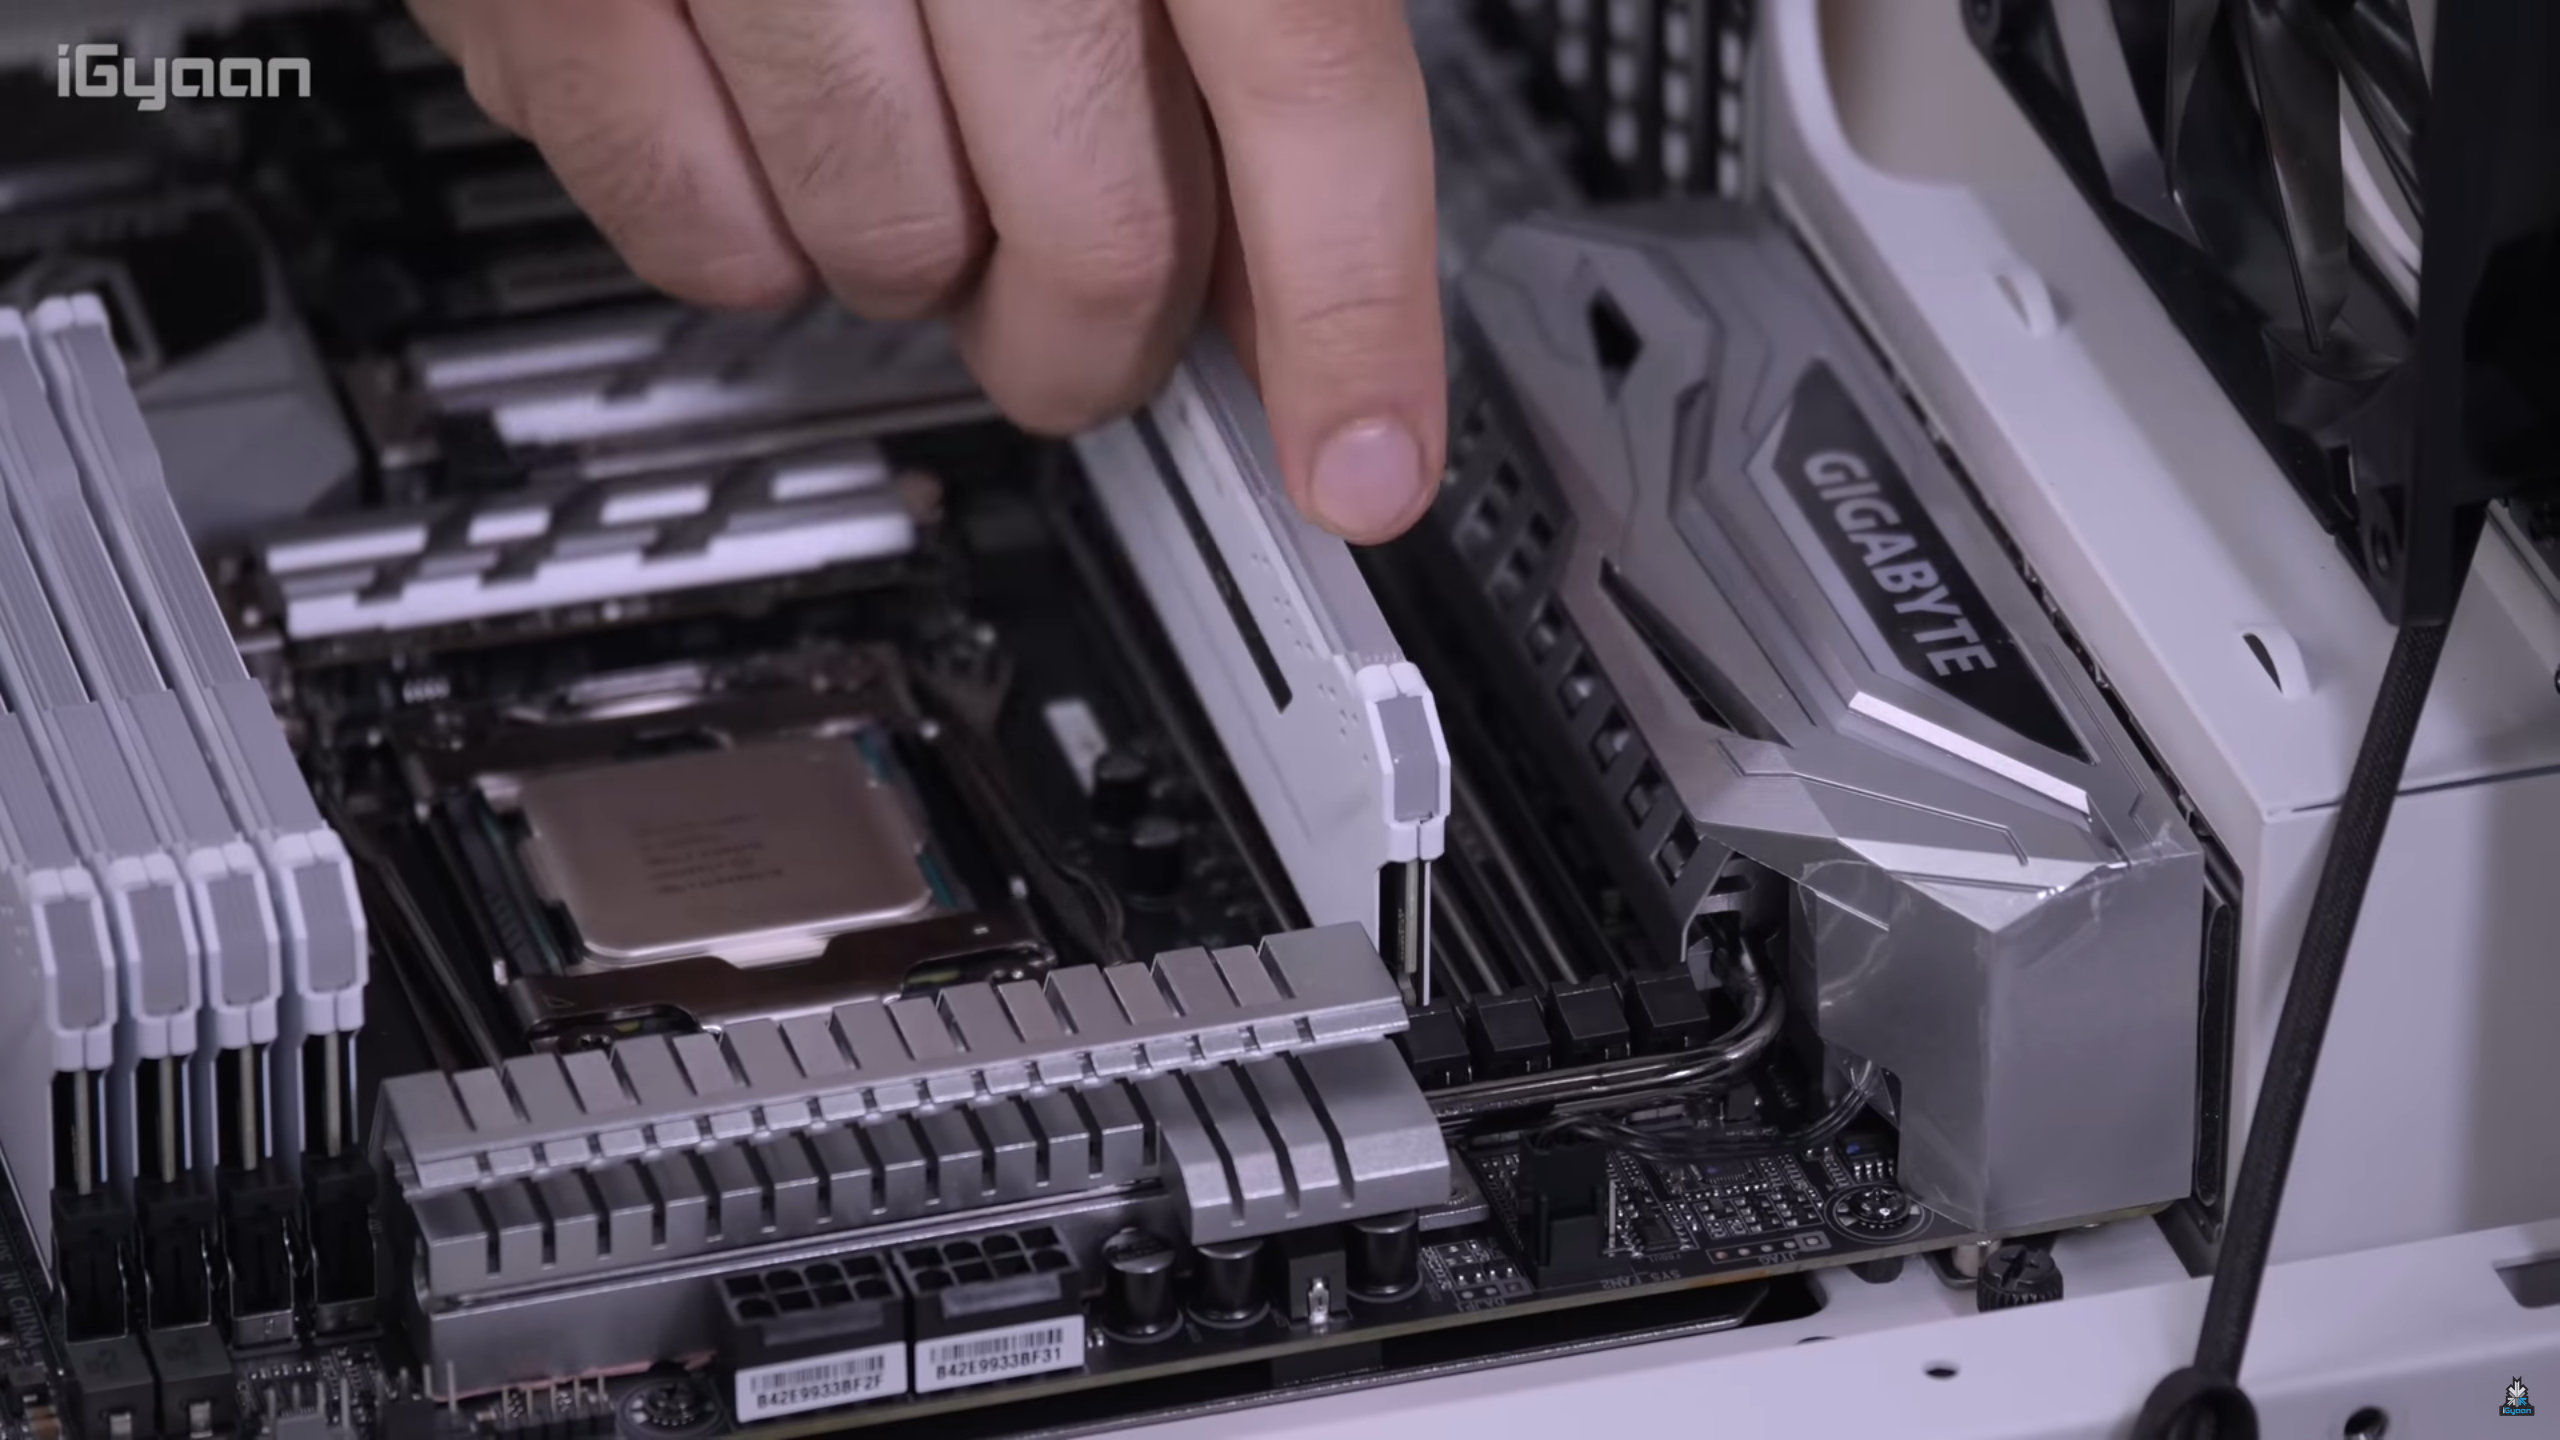 Usually, Dual-Channel RAM controllers utilize two 64-bit data channels, resulting in a total bandwidth of 128-bits, to move data from RAM to the CPU. So they should never be installed in the same PCIe channel which may lead to throttle in performance. We, however, were using quad-channel RAMs, and we had 8 RAM modules of 16GB each, totalling at 128GB.
To install the RAM, simply make sure that the pins and the RAM-port notch are aligned with each other. Make sure the clips on the RAM socket are free to move, then push the RAM stick into place until it clicks into place and the clips become immobile.
Step 6: Installing the Power Supply Unit
 The next step was to get the heart of build where it belonged. Locate the power supply bay and screw the Power supply unit into place carefully, since it can be fairly heavy. Noteworthy, be sure to align the PSU fans with the air vent to maintain adequate airflow, otherwise, you may face throttling issues.
Step 7: Installing The Graphics Card
 For the initial boot-up, we plugged in just one of our two RTX 2080 Ti graphics cards. To install the GFX card, remove the two back plates adjacent to the PCI slots (where you are installing the graphics card). Single slot cards are comparatively easier to install since they require only one PCI slot, unlike the 2080 Ti which requires twice the number of slots. Line up the card with the PCI slots and plug it in gently till you hear the crisp “click” sound.
Step 8: Installing The Cooler
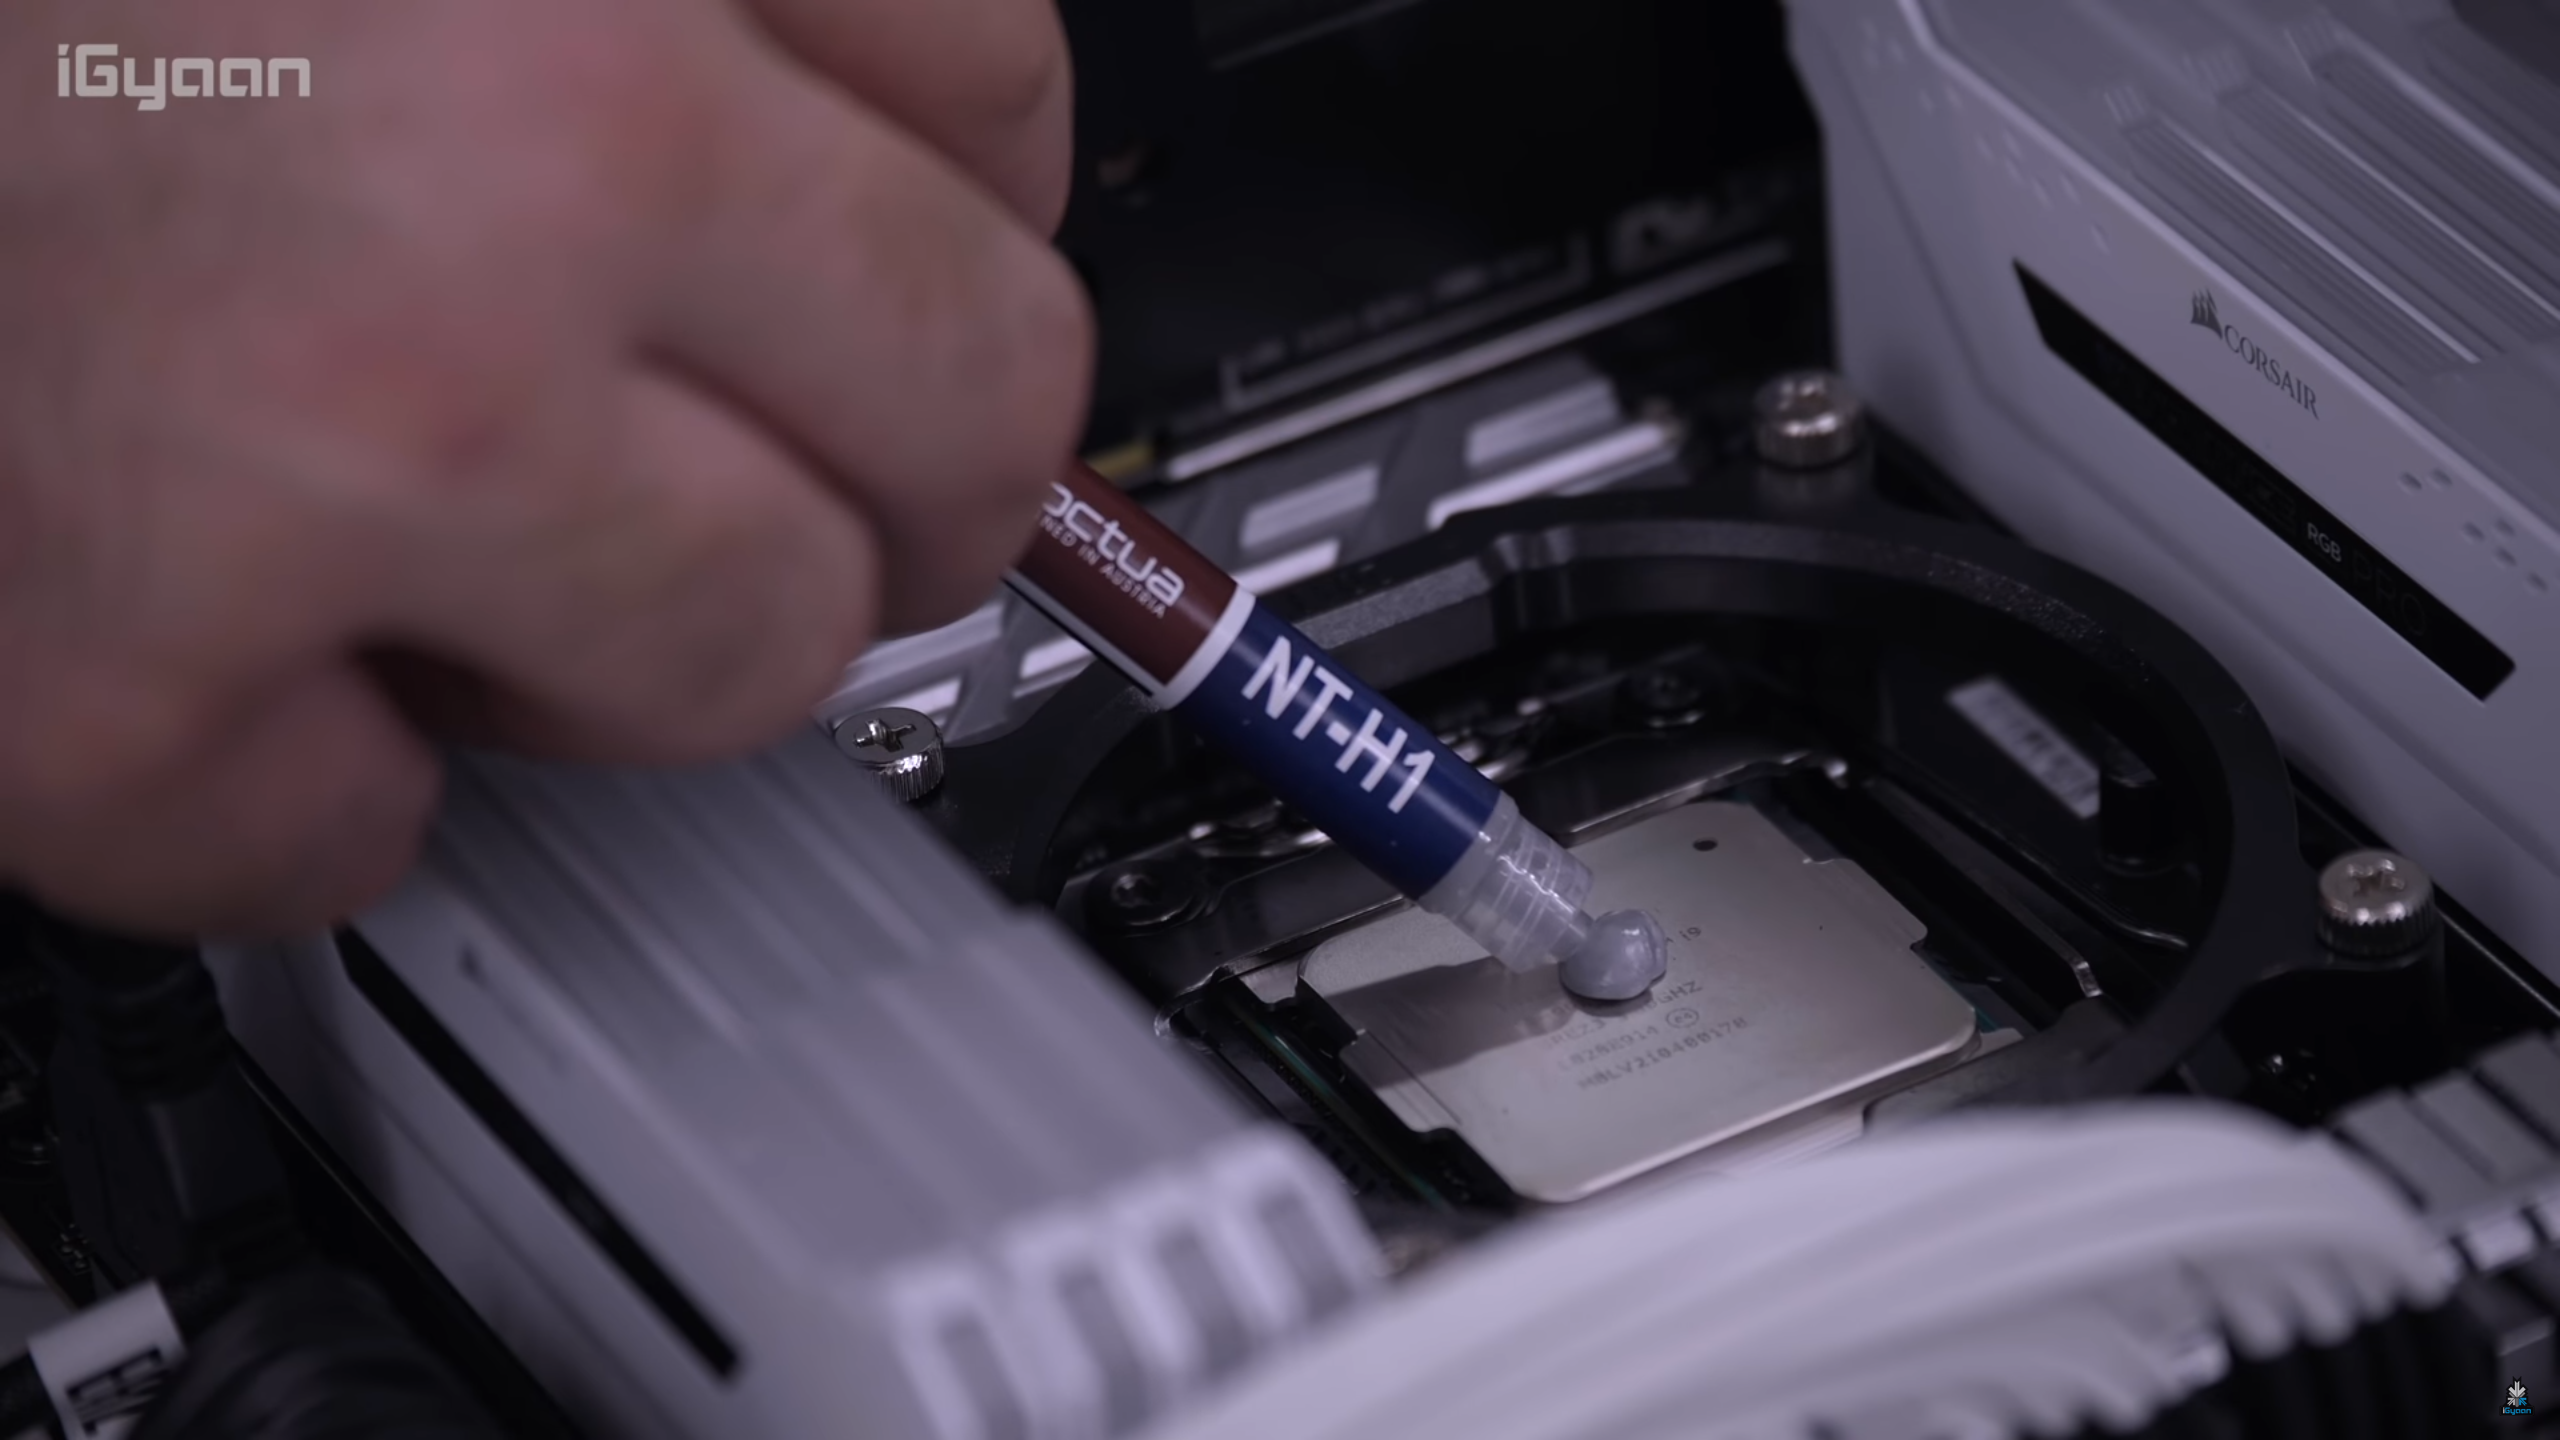 Like we mentioned previously, we skipped the hard-tubing part because we wanted to get all the PC components in place before we could start working on the hard-tubing cooling system. The Antec C400 Glacial CPU cooler was a breeze to install. Simply screw in the base of the cooler onto the motherboard (surrounding the processor). Apply a dollop of thermal paste on the processor and then install the fan on top of the processor.
Step 9: Routing The Cables
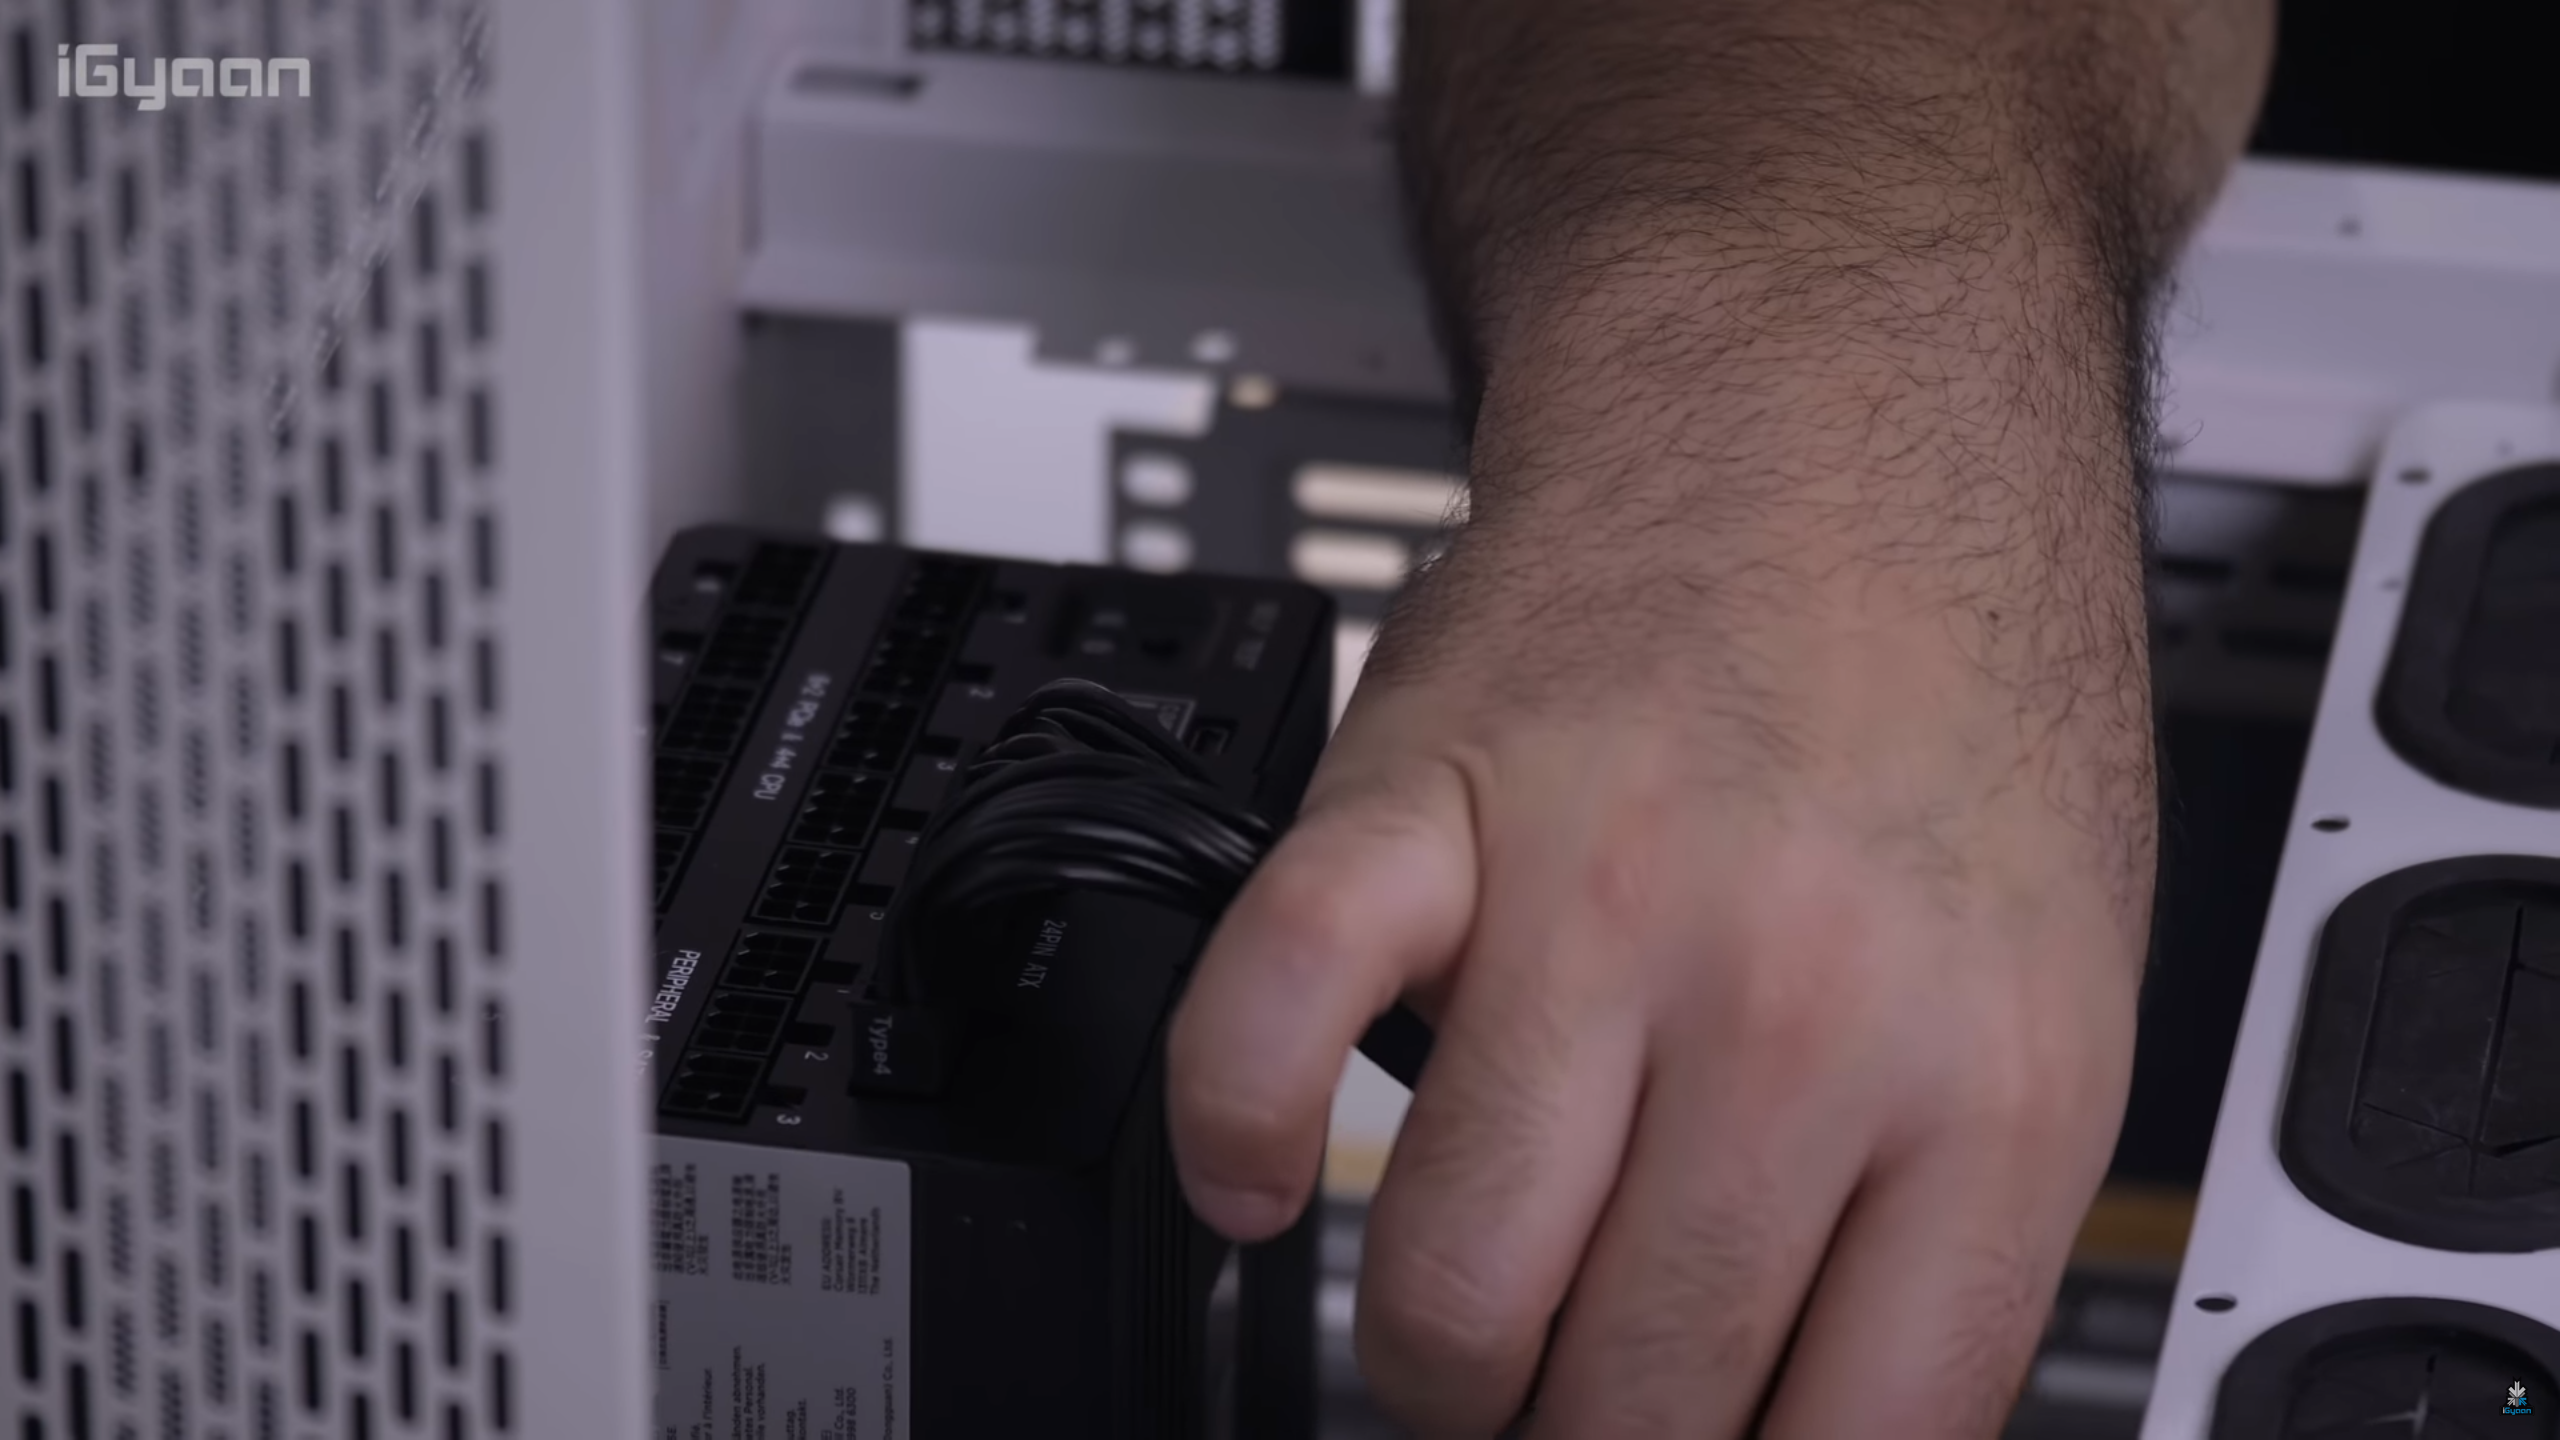 The last major step before powering on the machine is routing the cables from the motherboard, the CPU and the Graphics Cards to the Power Supply Unit. Route the cables via the cable-supply areas present in the lower section of chassis. A cleaner cable install will be performed in the next video of the PC build. Remember to cross check that all the necessary cables are plugged in where they should be because taking the whole motherboard apart after complete assembly can be a nightmare for most people.
Step 10: Setting Up The Machine
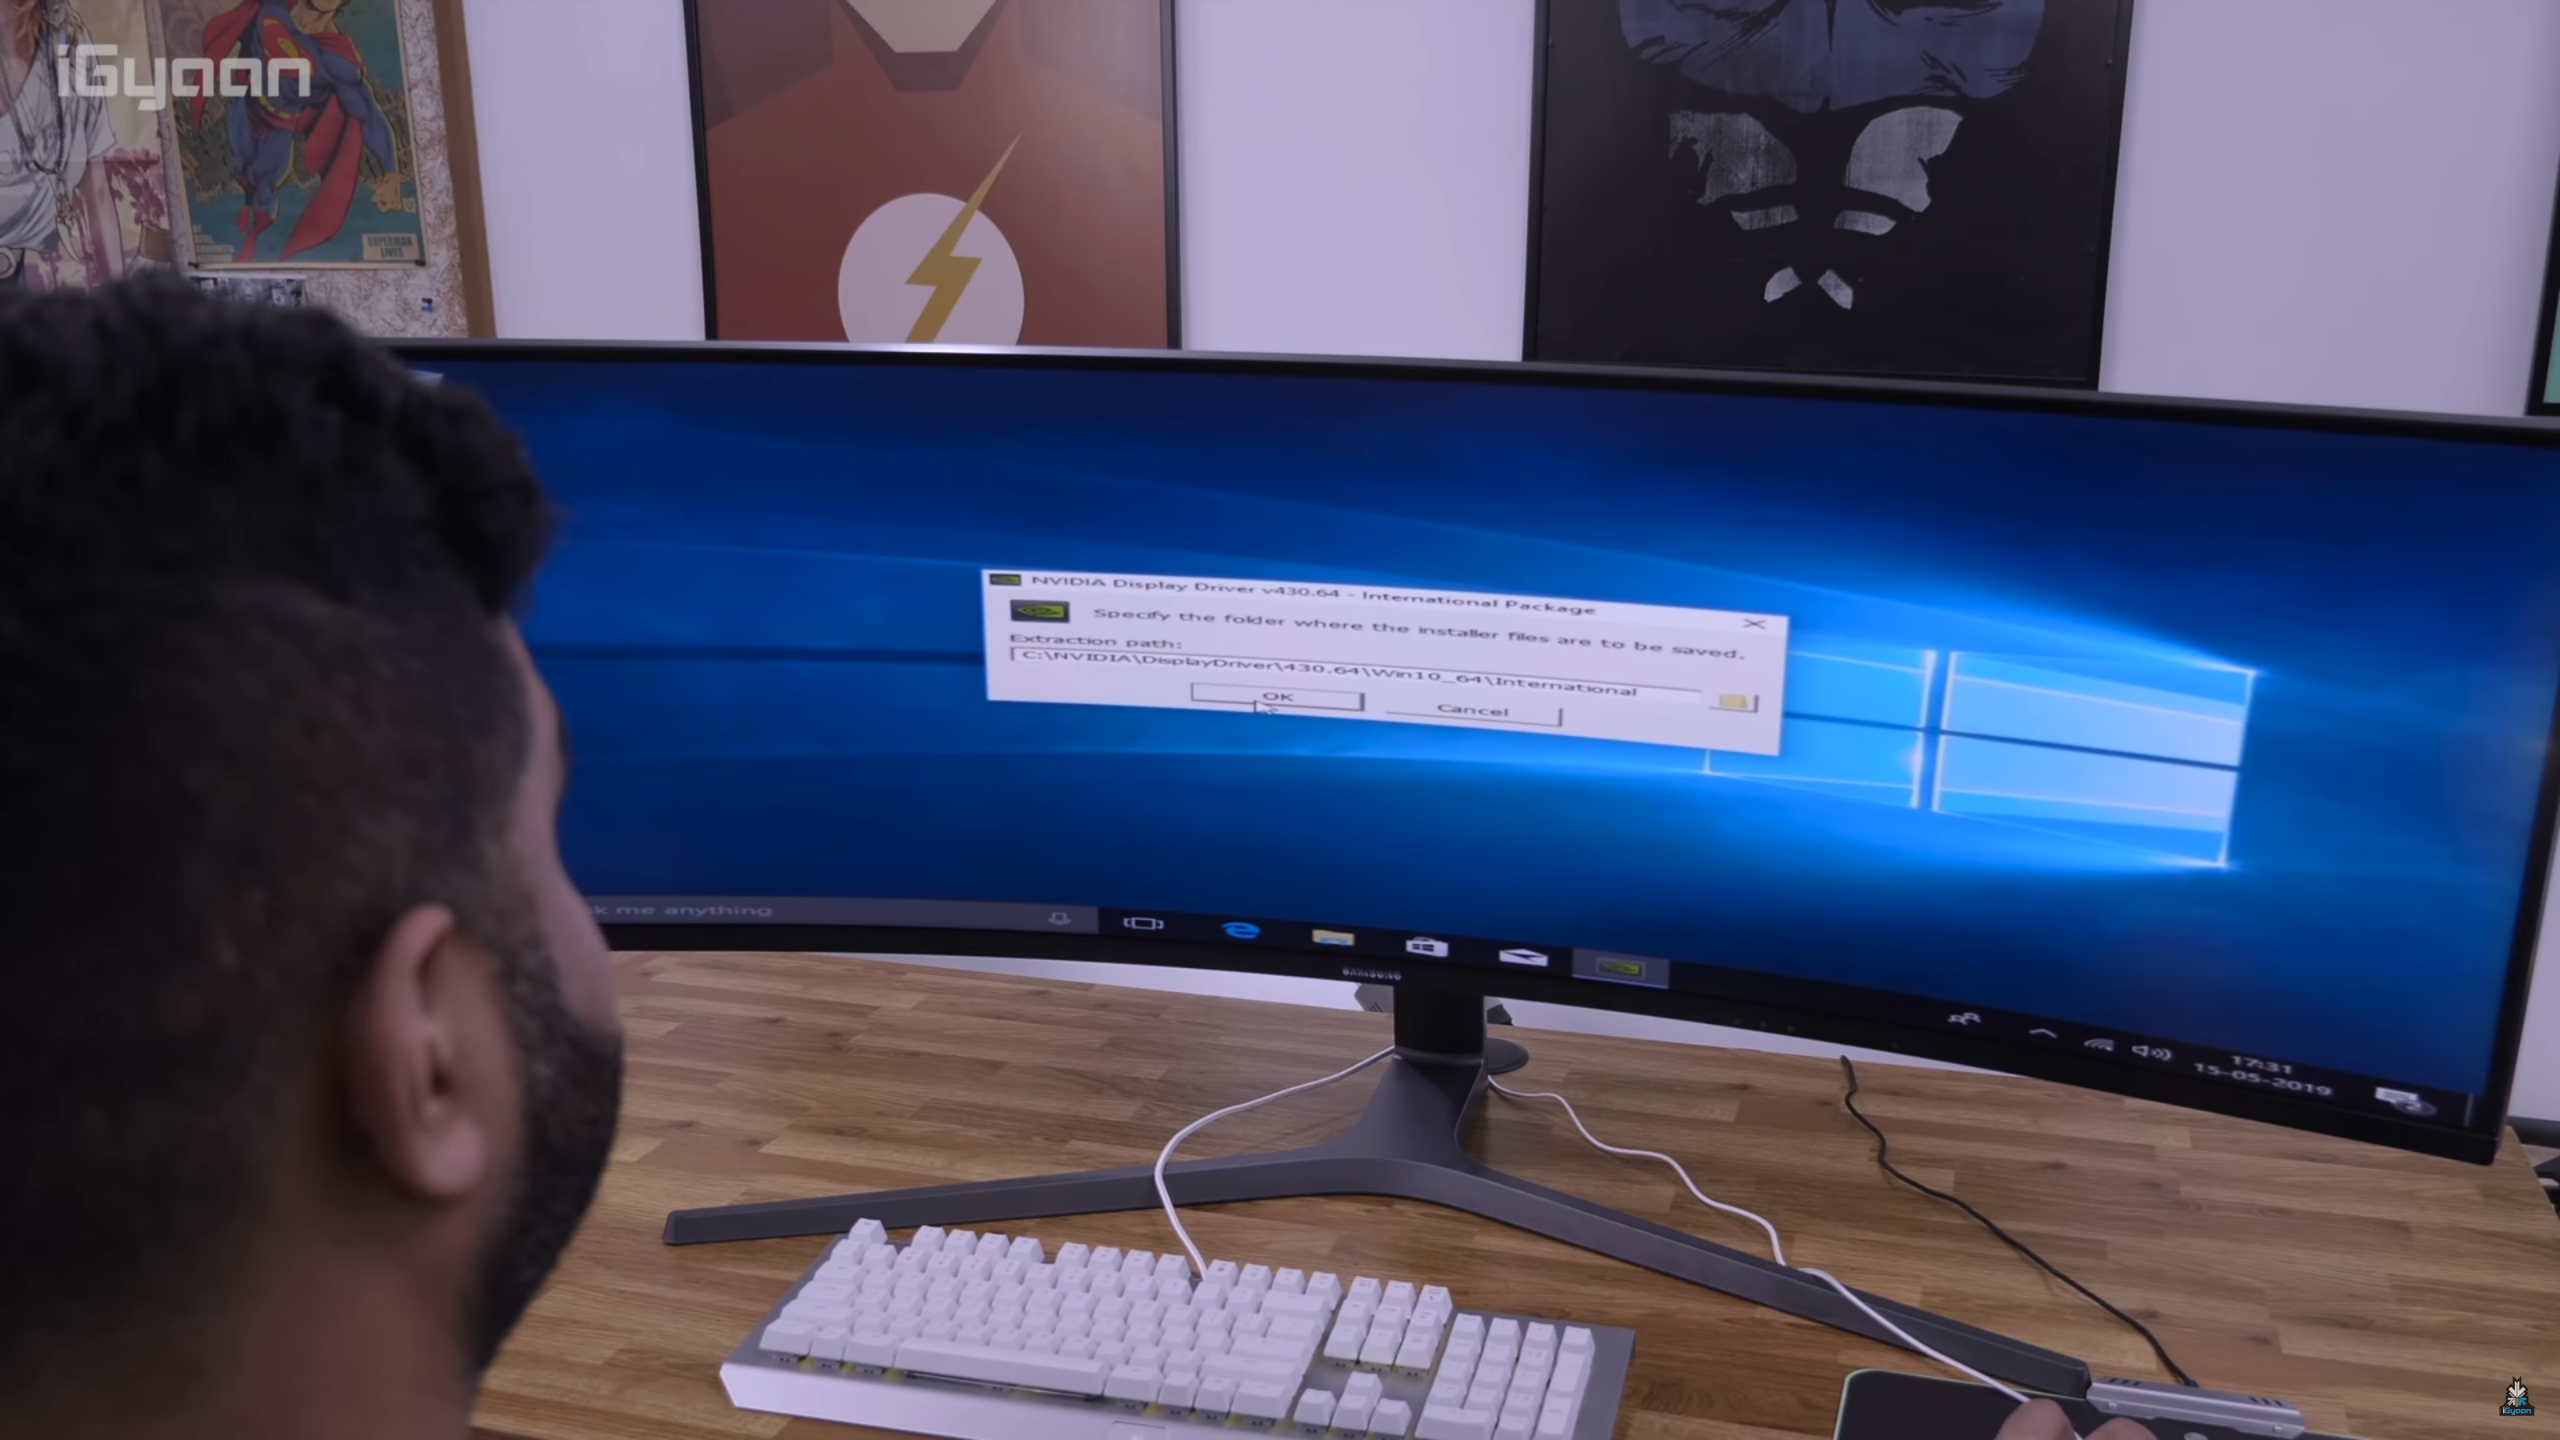 The last step involved in the setup is to plug in the peripherals and boot up the system. Once you enter the BIOS setup, plug in your Windows USB key/Windows Disc and boot from the same. After installing Windows, be sure to download and install the latest drivers for all the major components being used in the PC setup.
The Beast PC Build Video
Also Read: 5 Of The Weirdest Gadgets Ever Designed
With this, the major chunk of our PC build setup was complete. The next and the final phase of the build will include the completion of the RAID Setup, installing the hard tubing and overclocking the machine to unlock its maximum potential. Most importantly, we will add the second 2080 Ti Graphics card and link both the cards with the EVGA NVLink Bridge to double the graphics memory and performance. We will play around with the lighting to see what enhances the aesthetics of our Beast Gaming PC in the next video.